Installation of the PZA aluminum threshold + KZ end cap
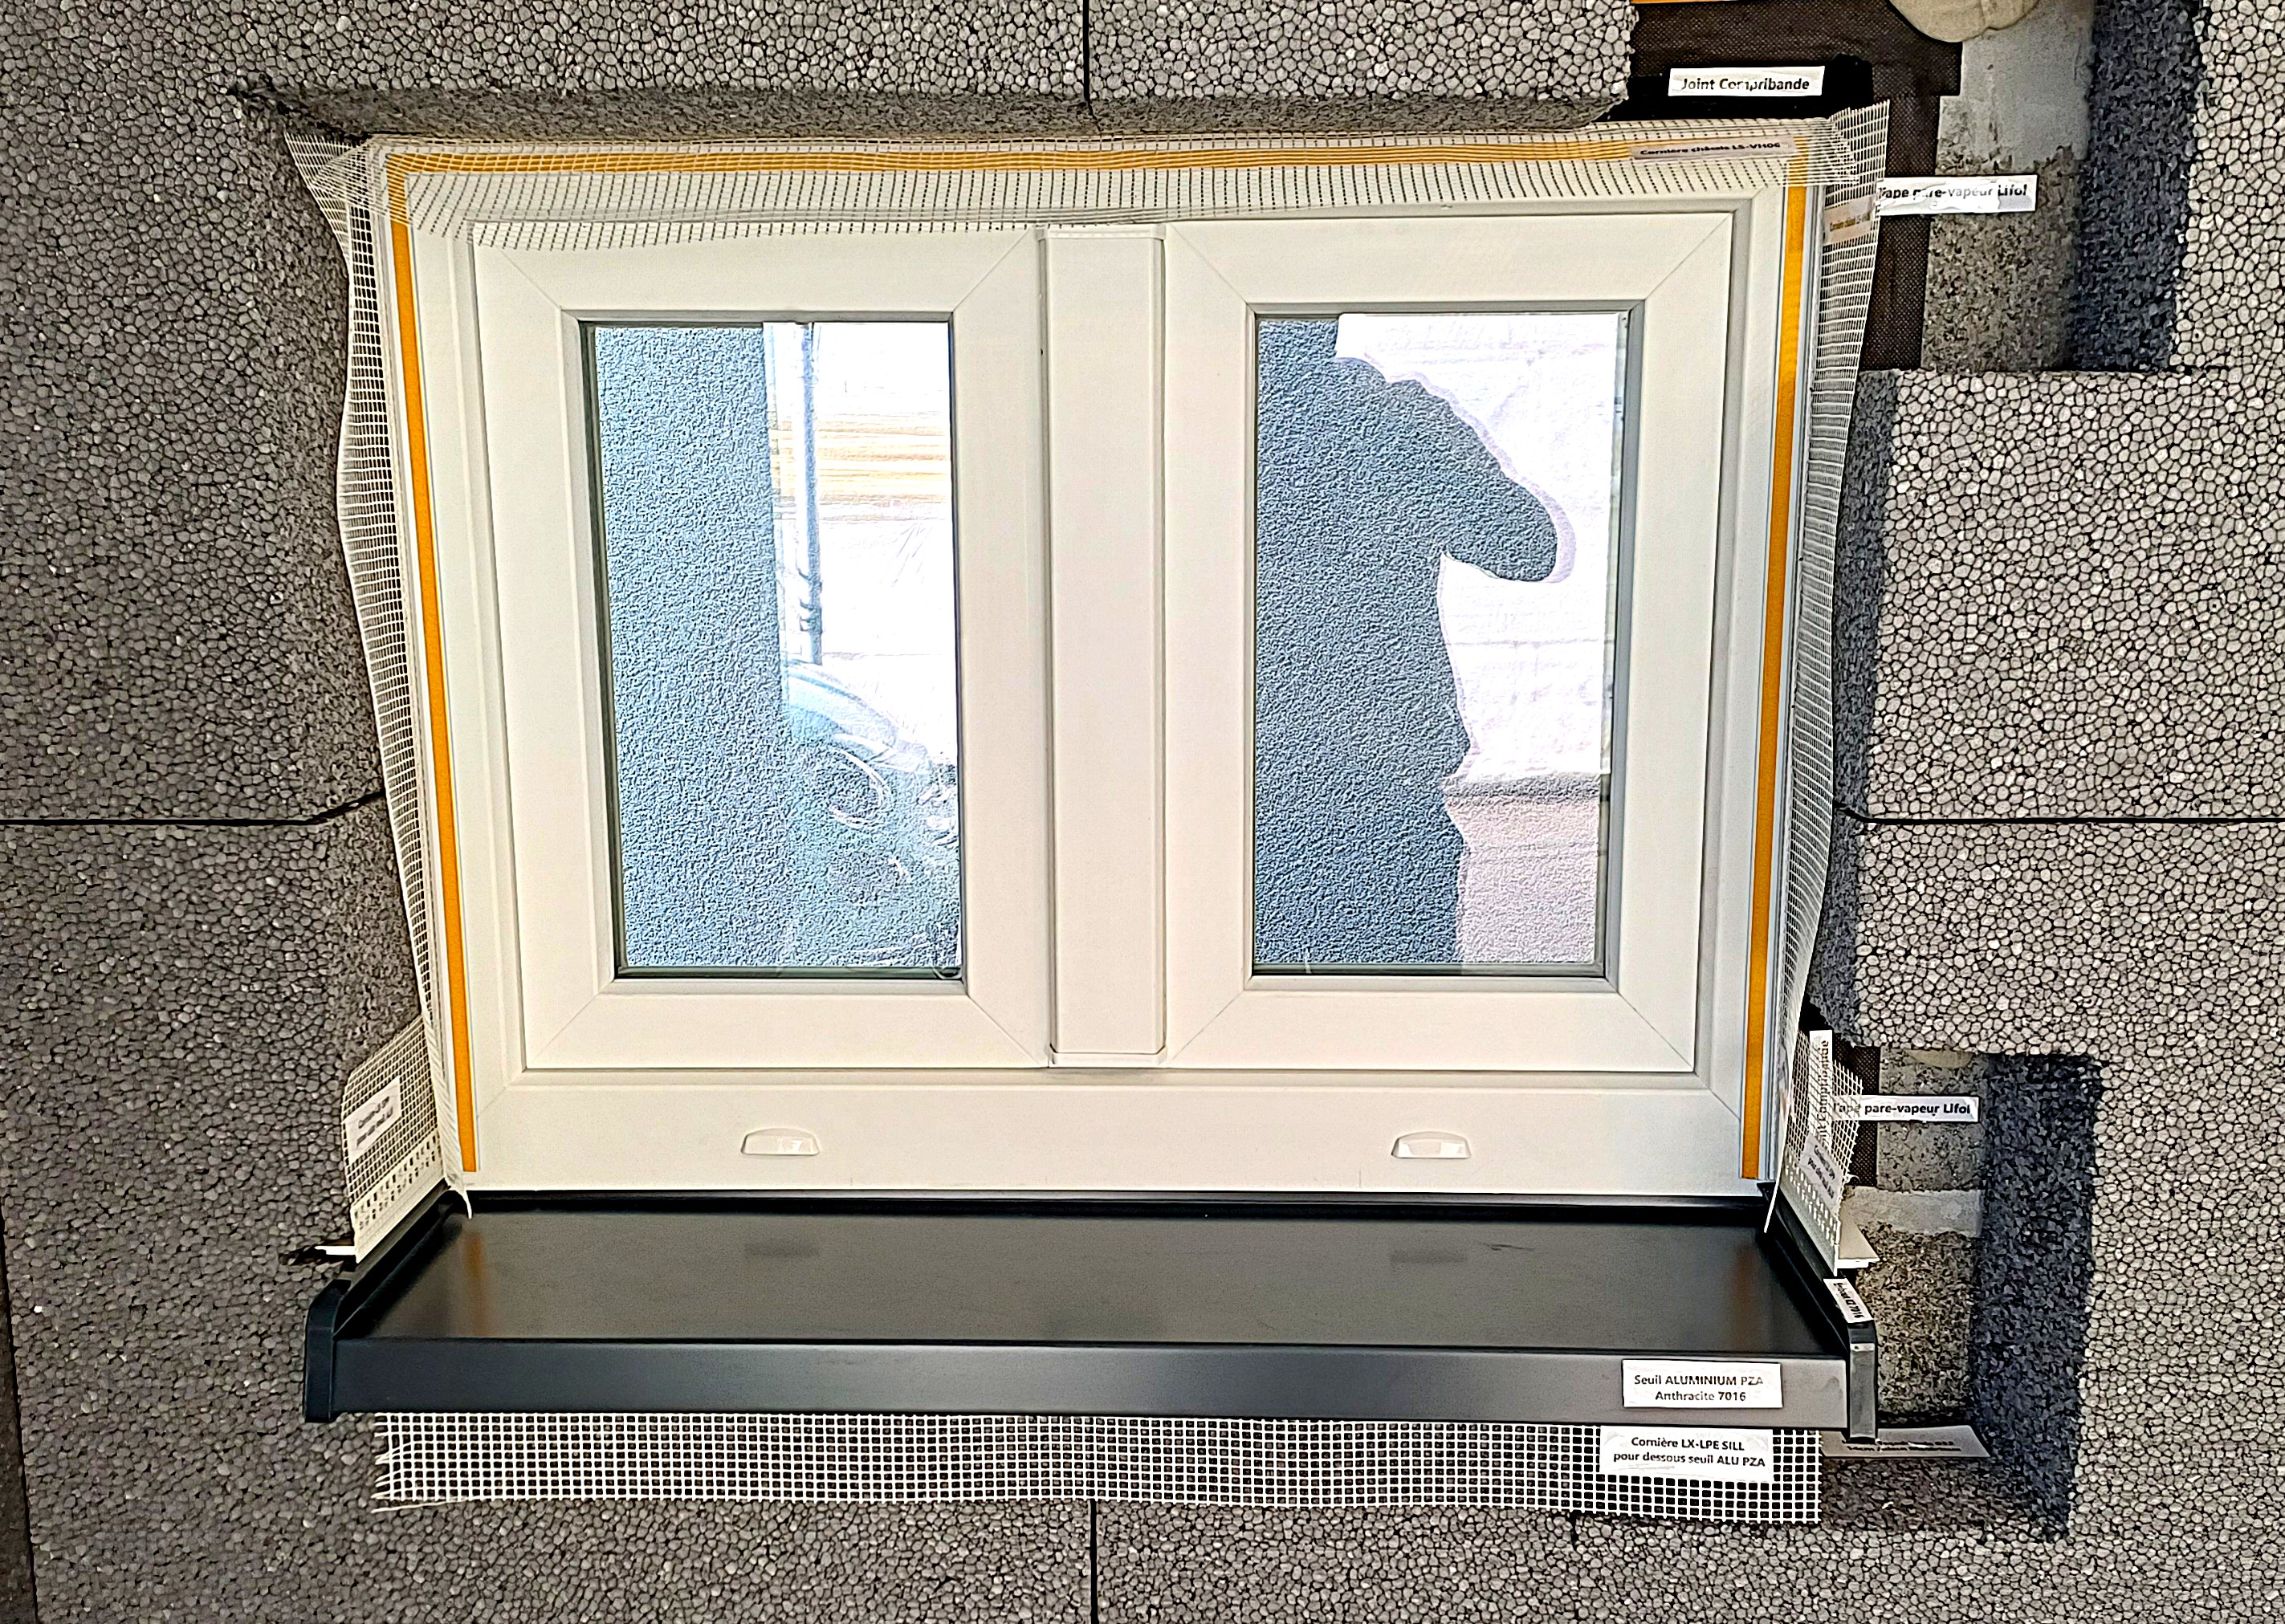
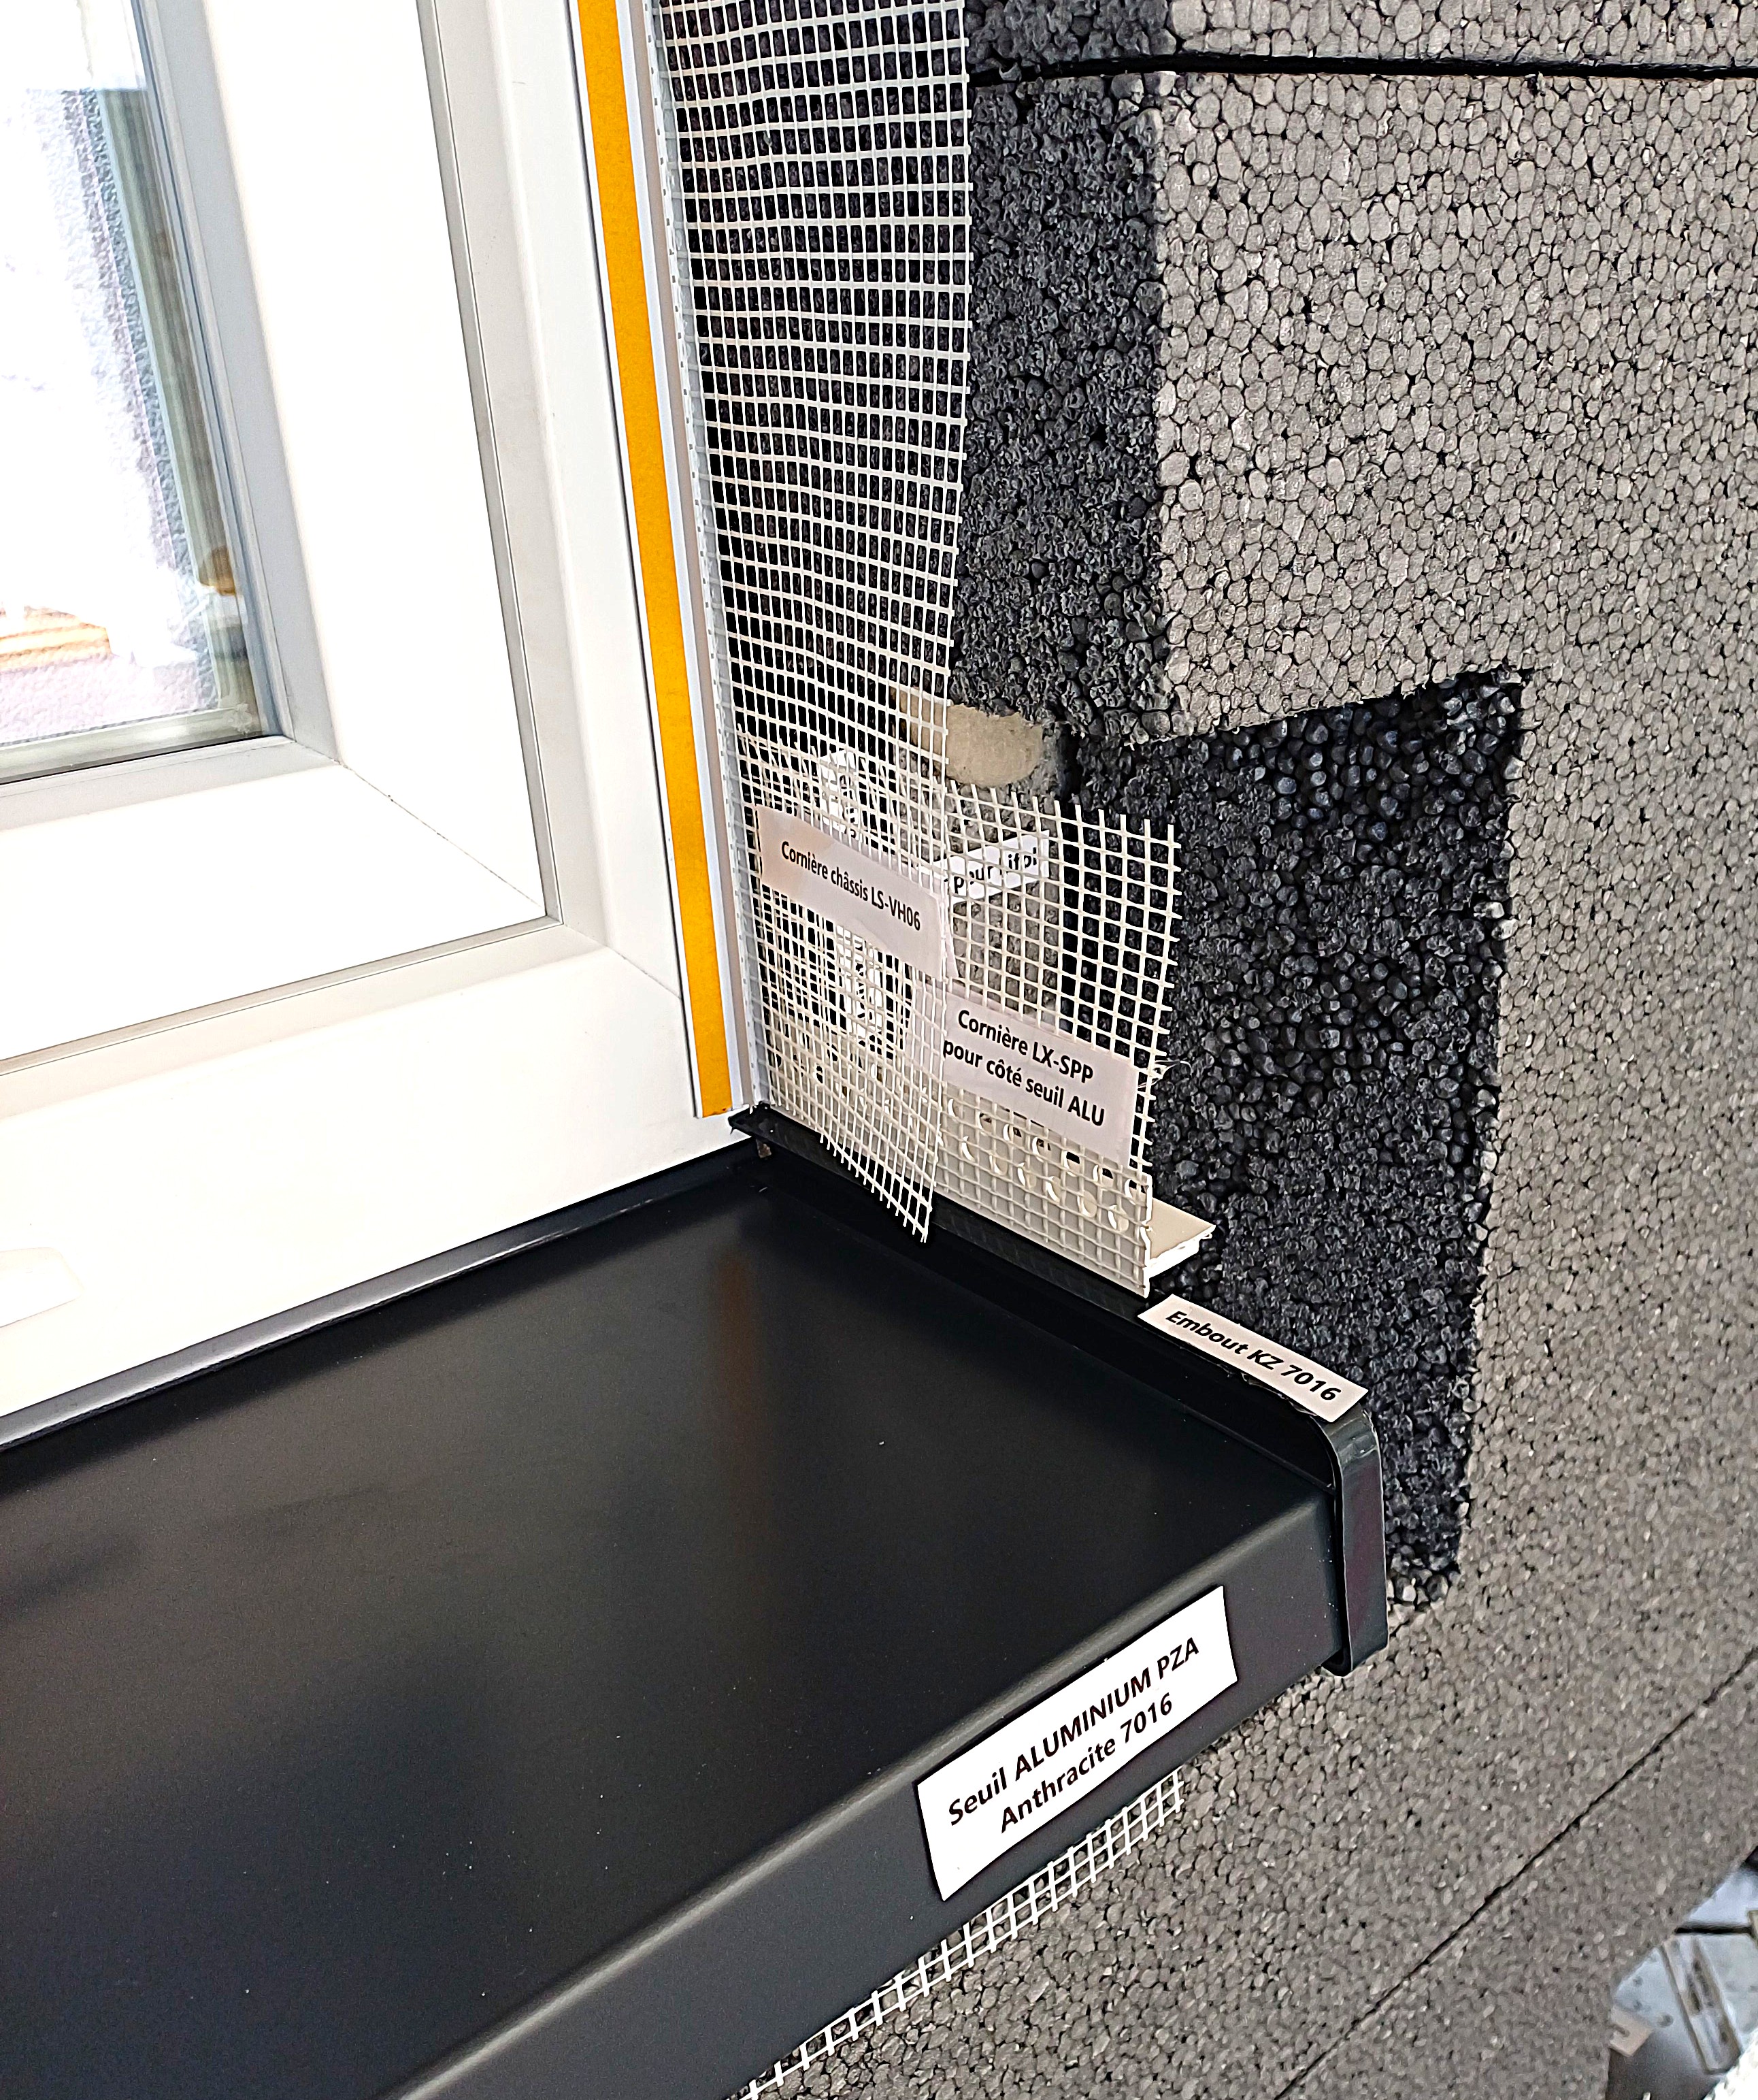
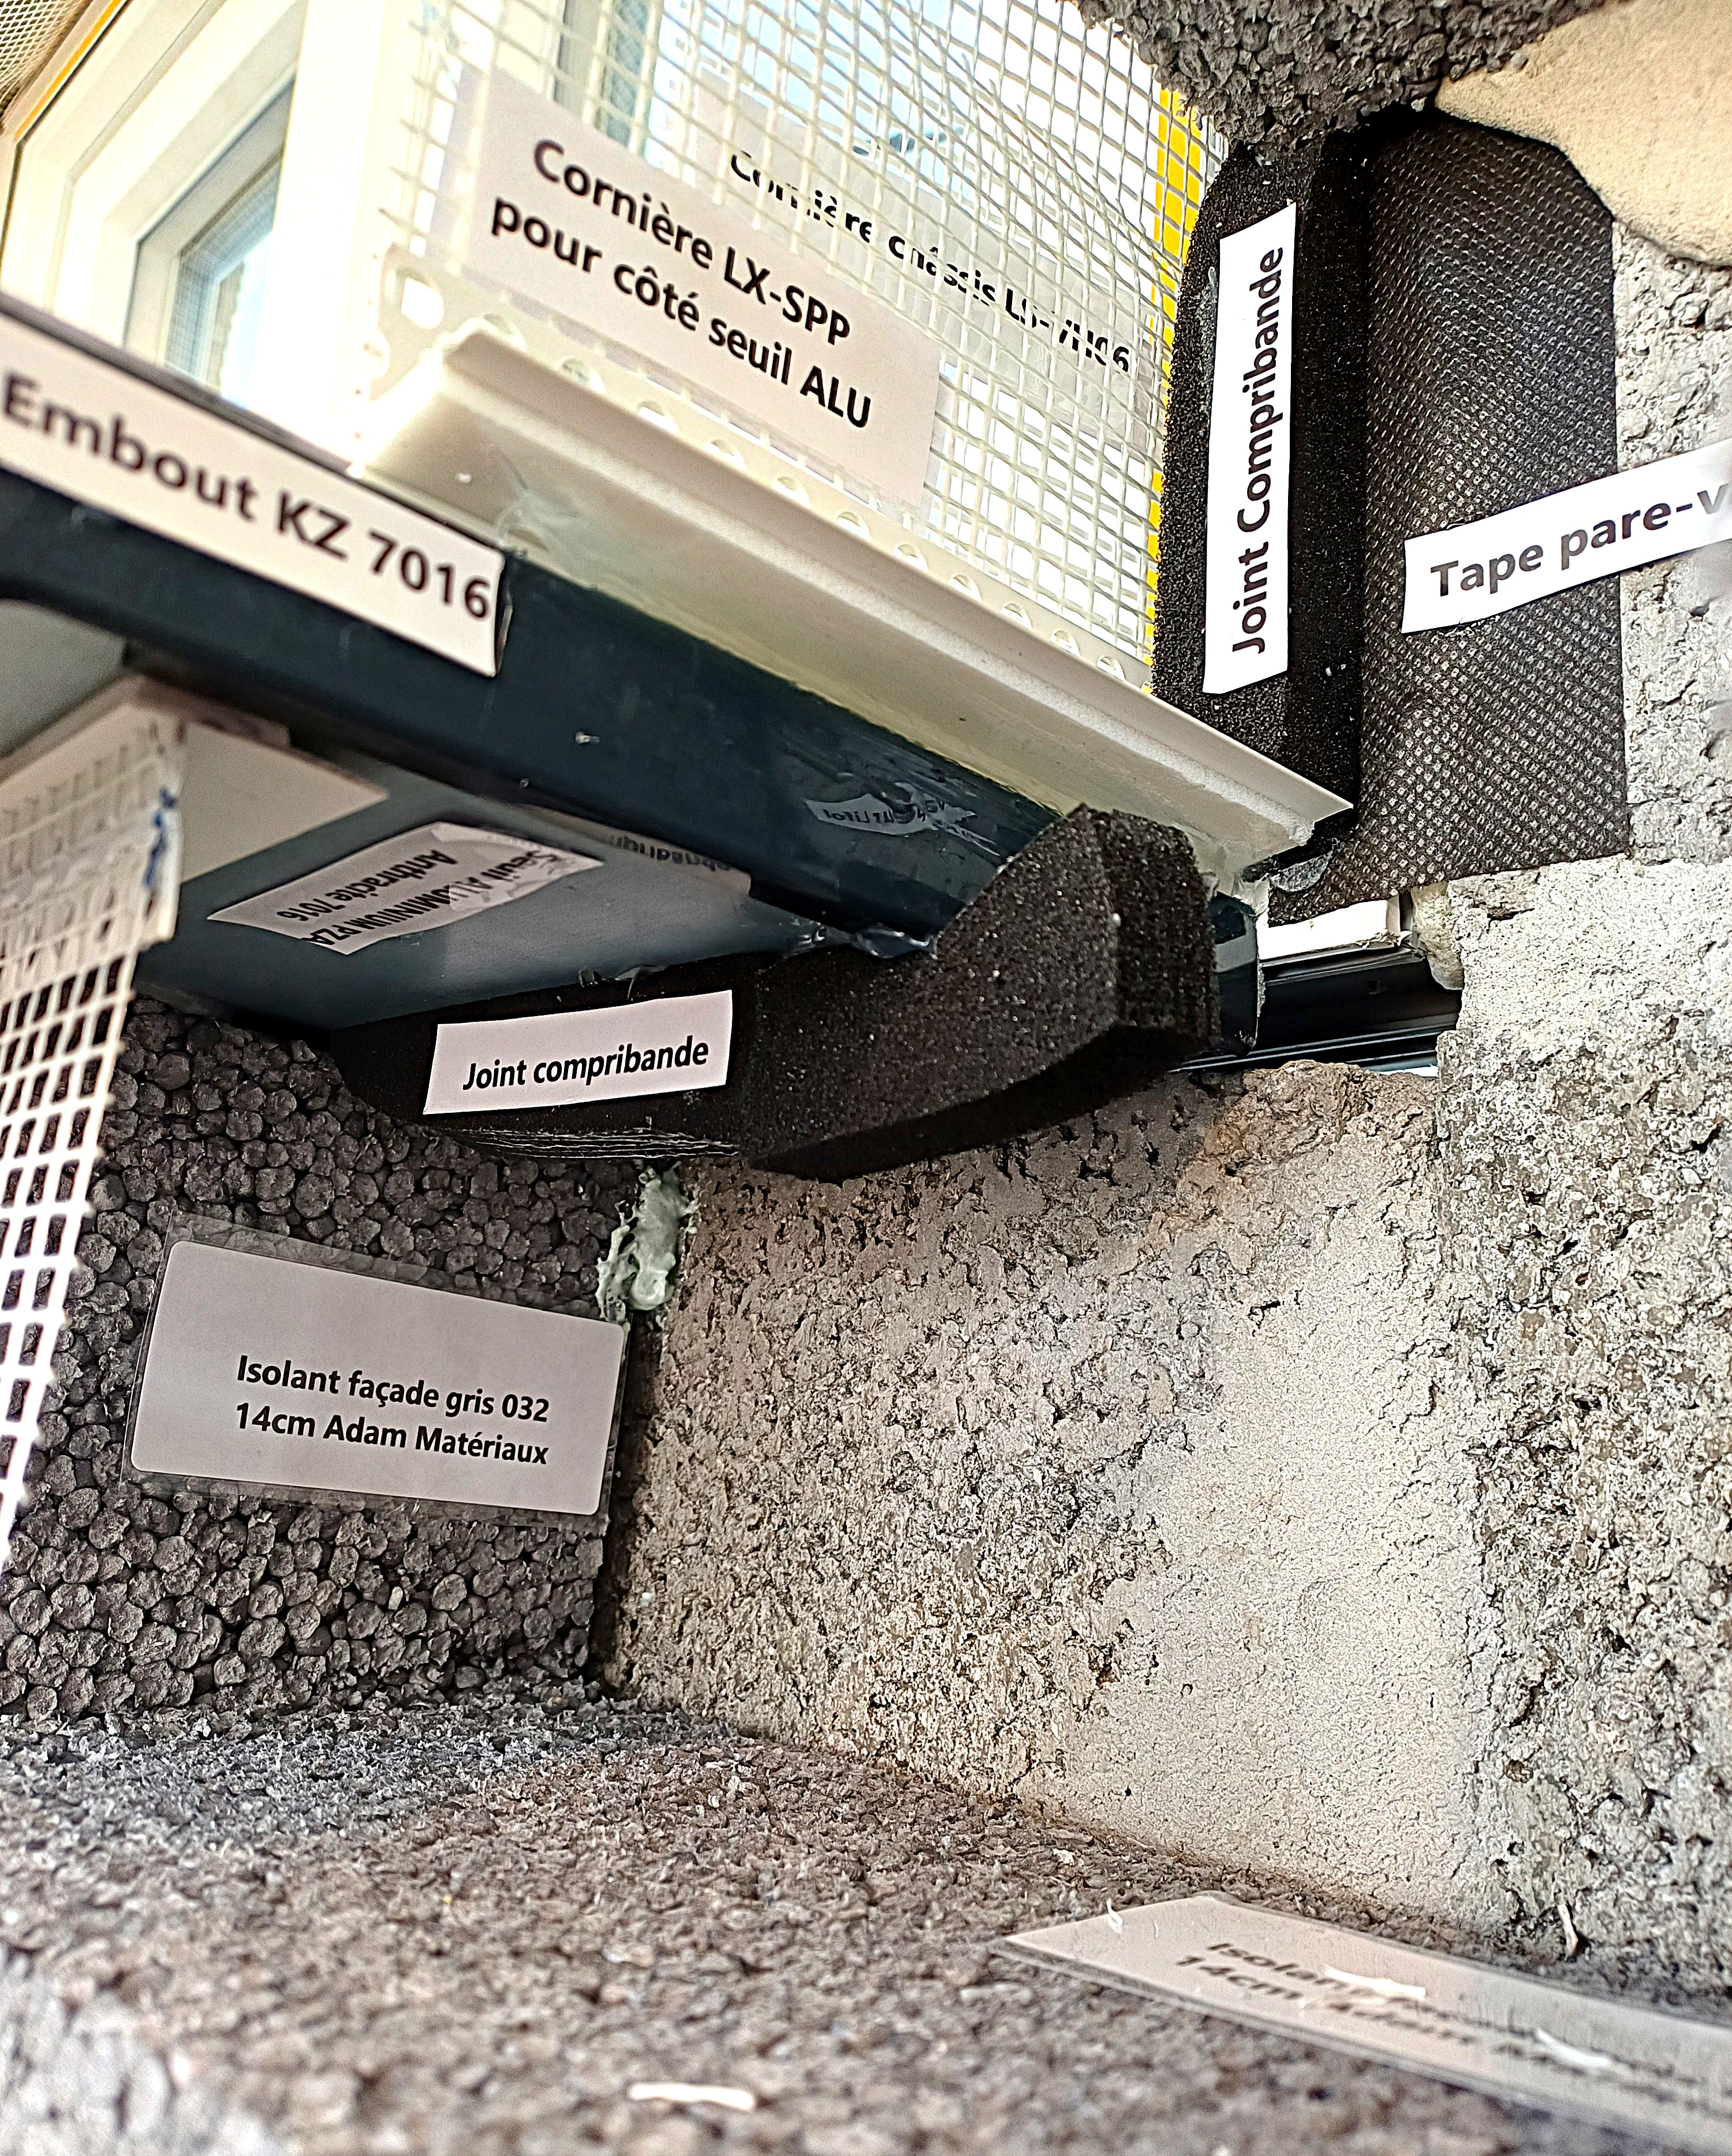
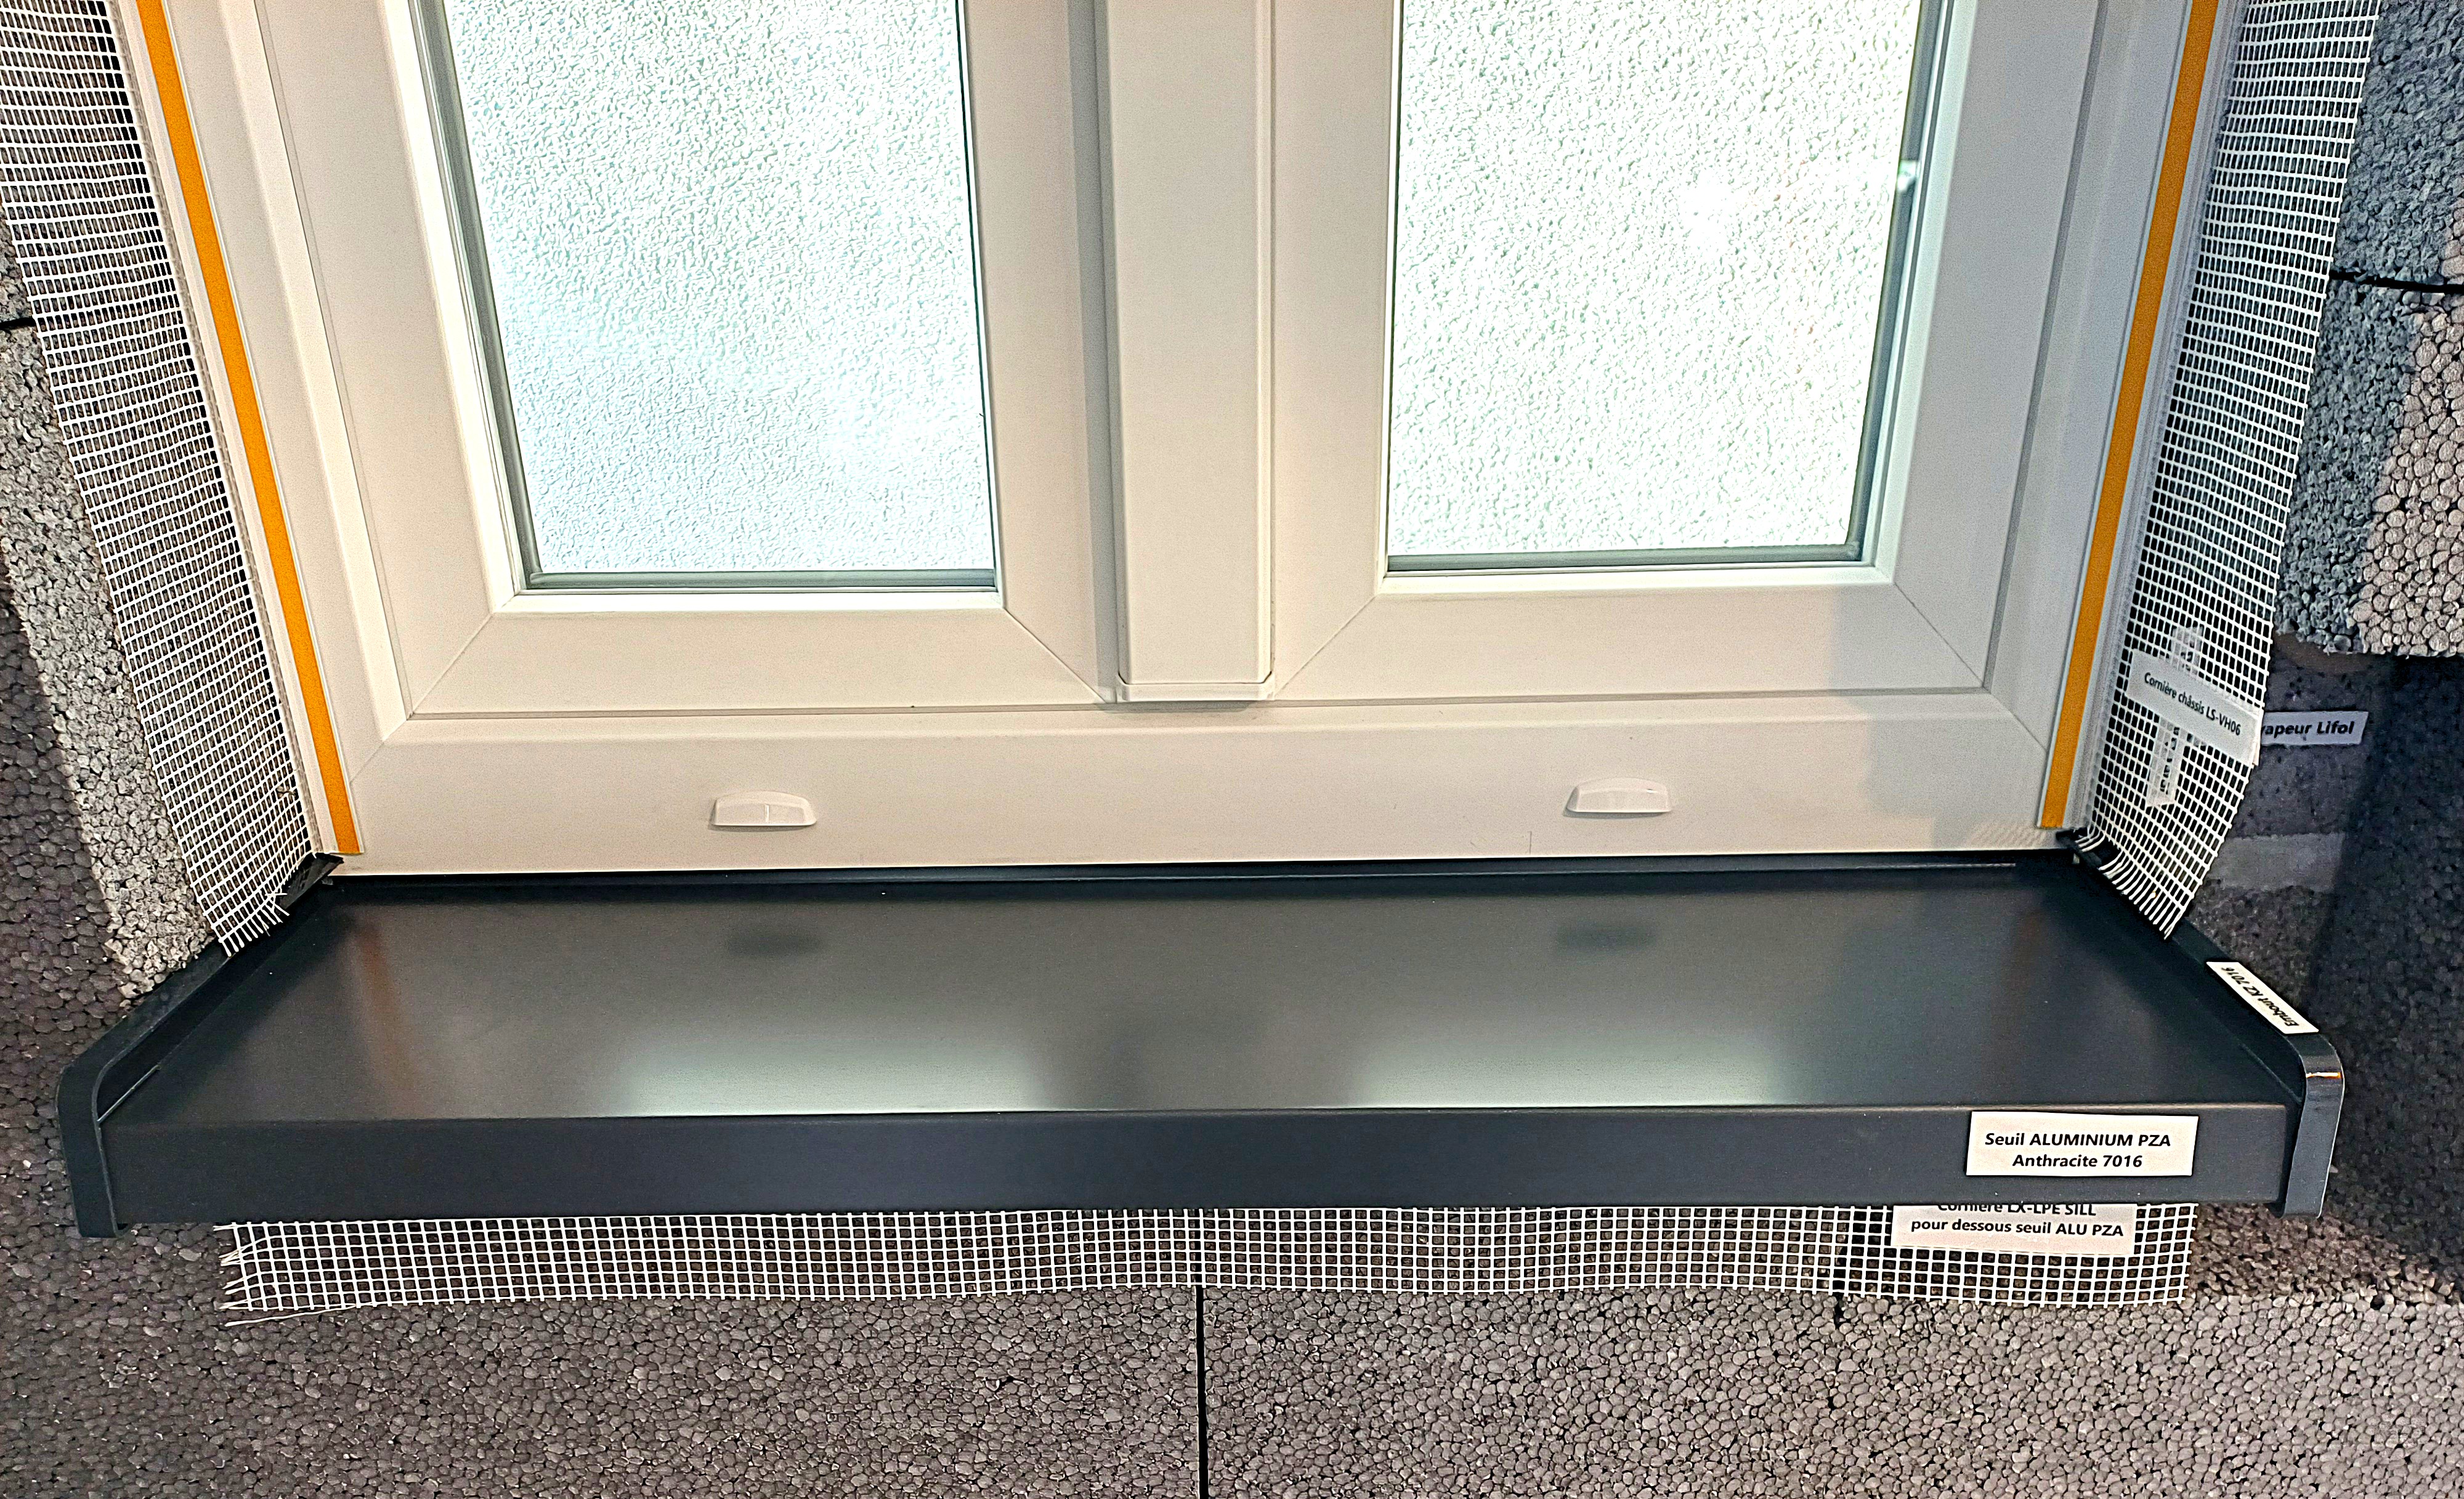
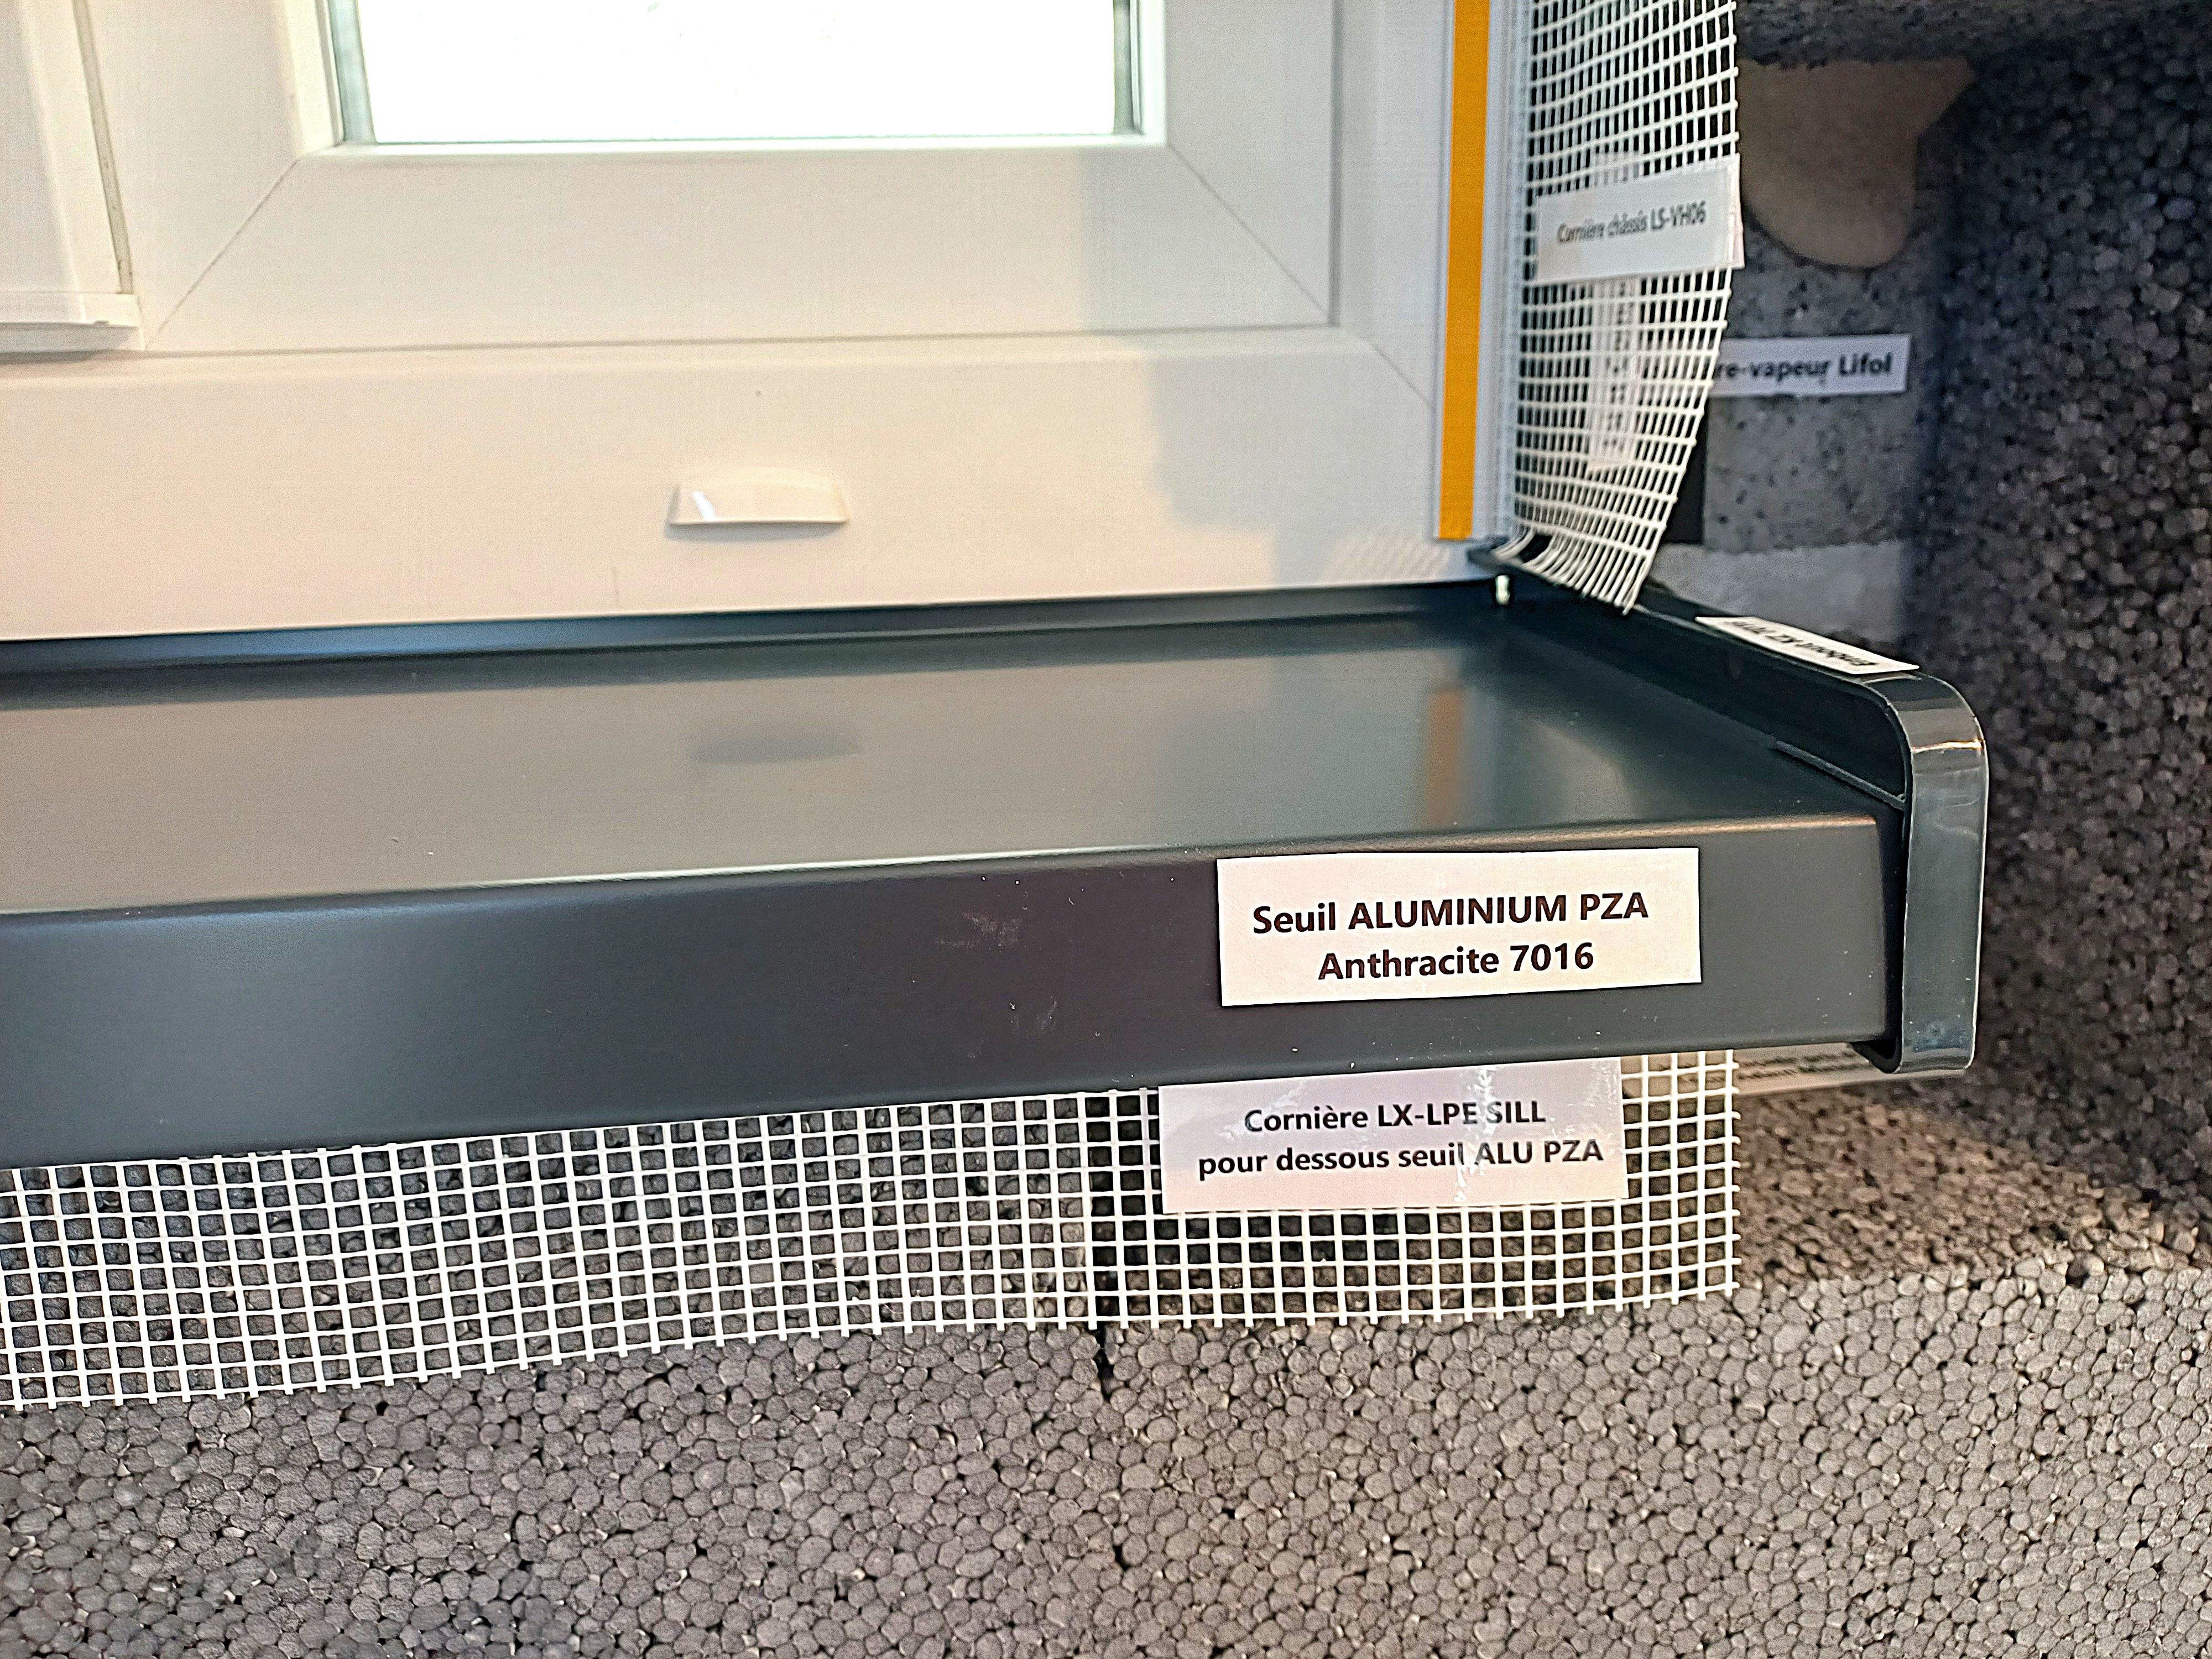
Installation of the PZA aluminum threshold with the 7016 end cap pair:
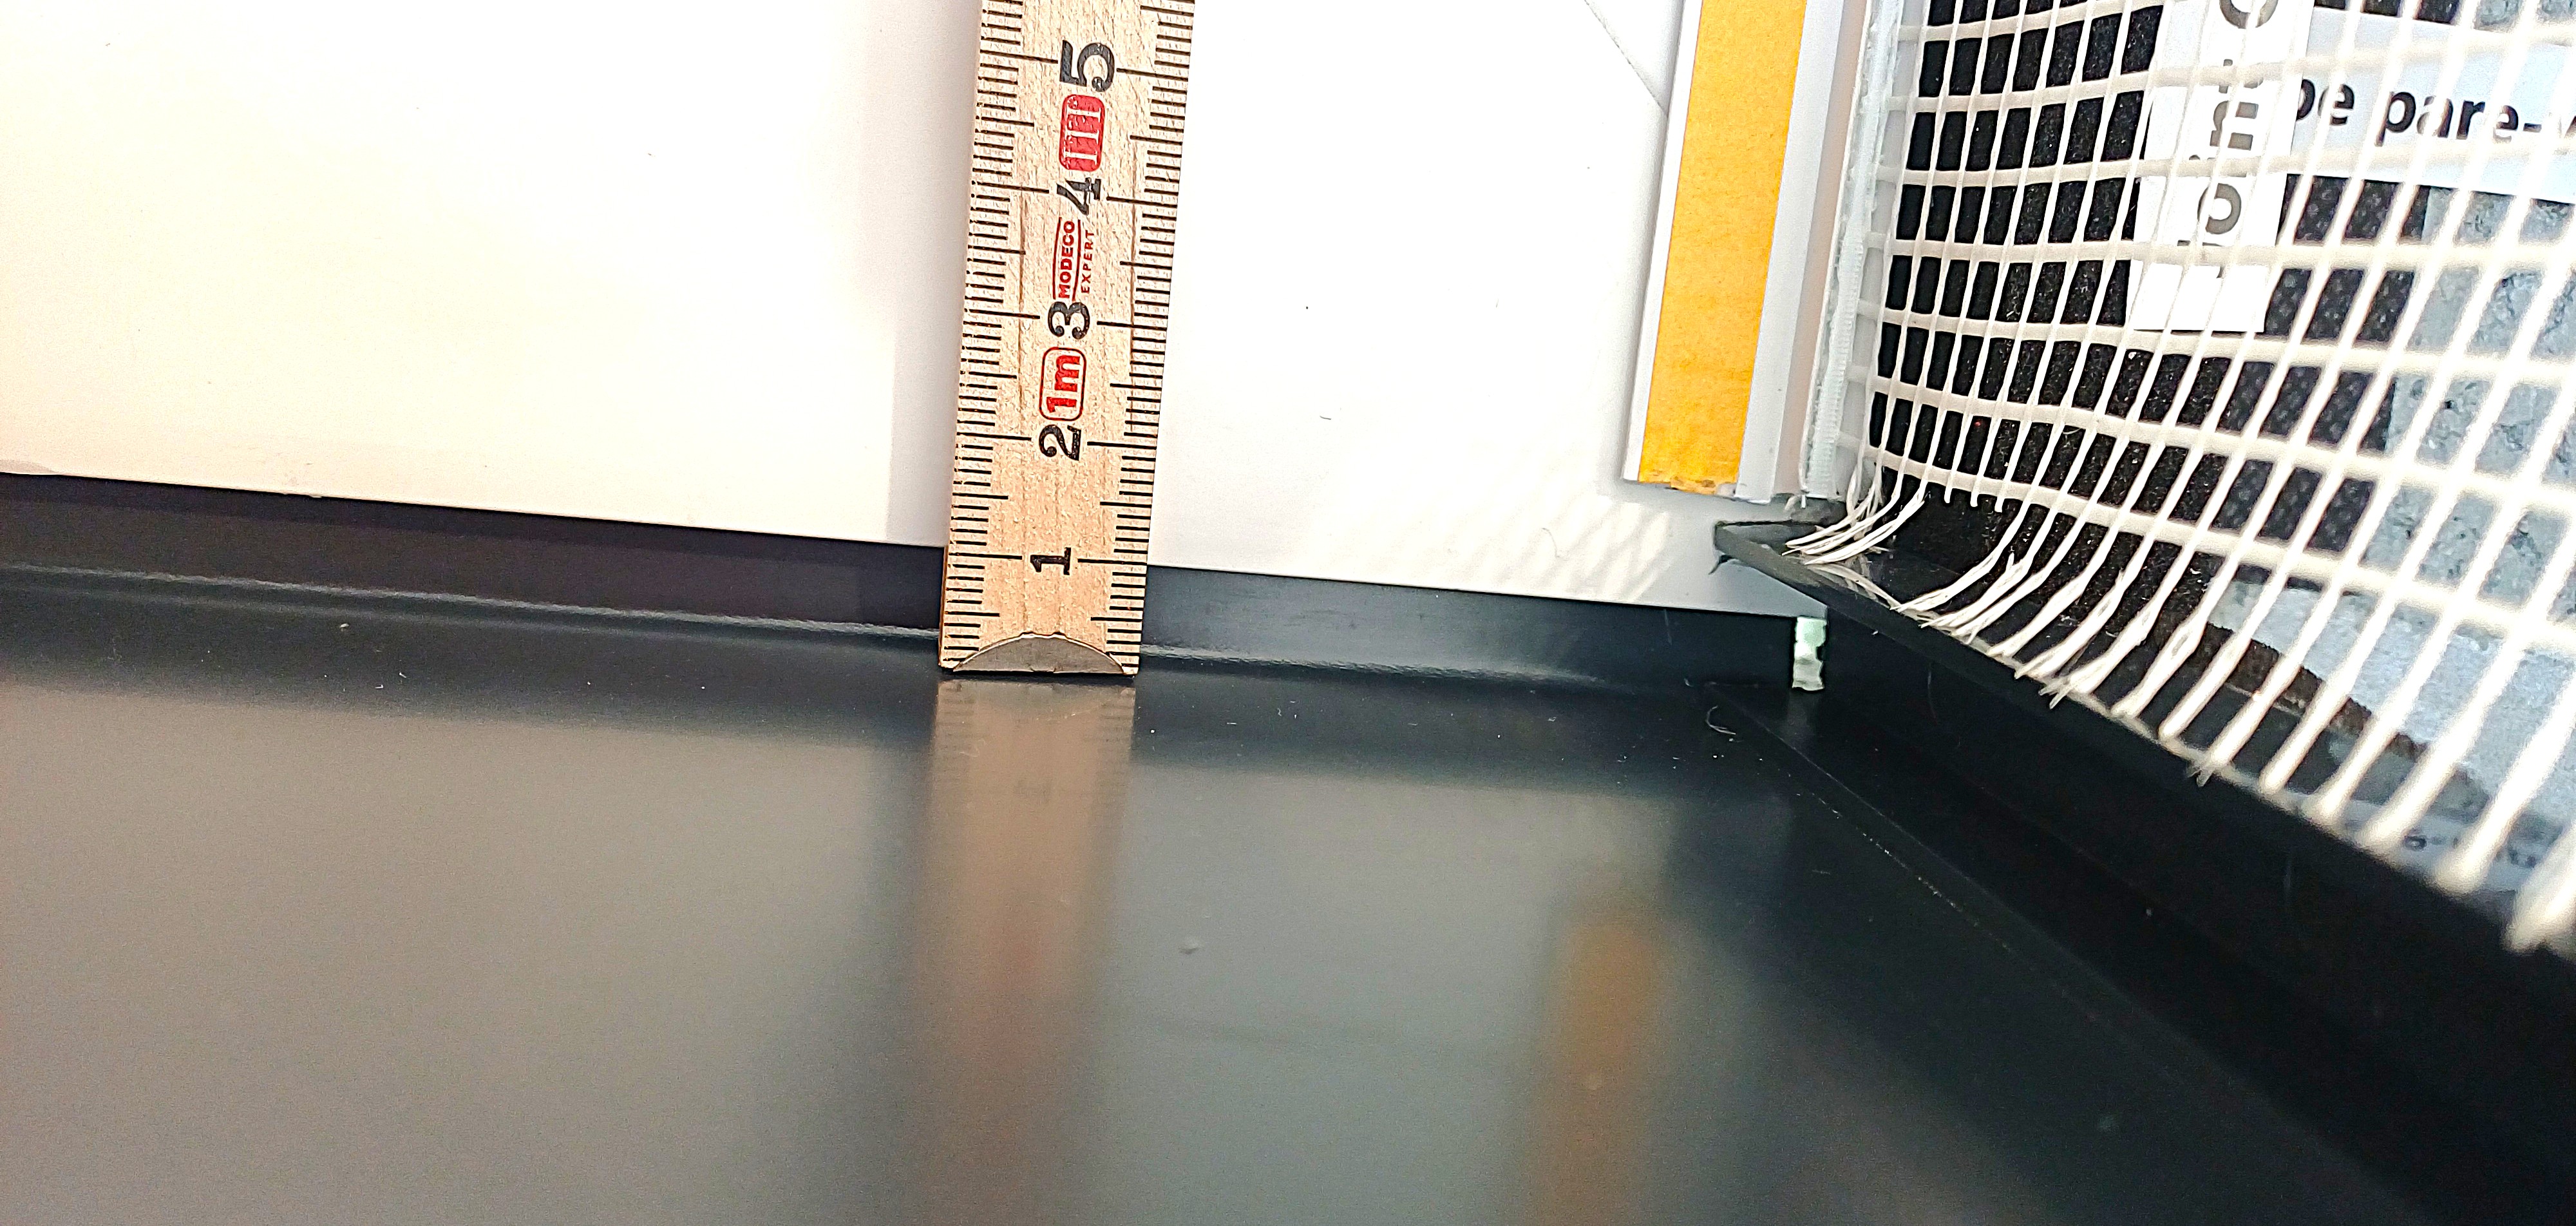
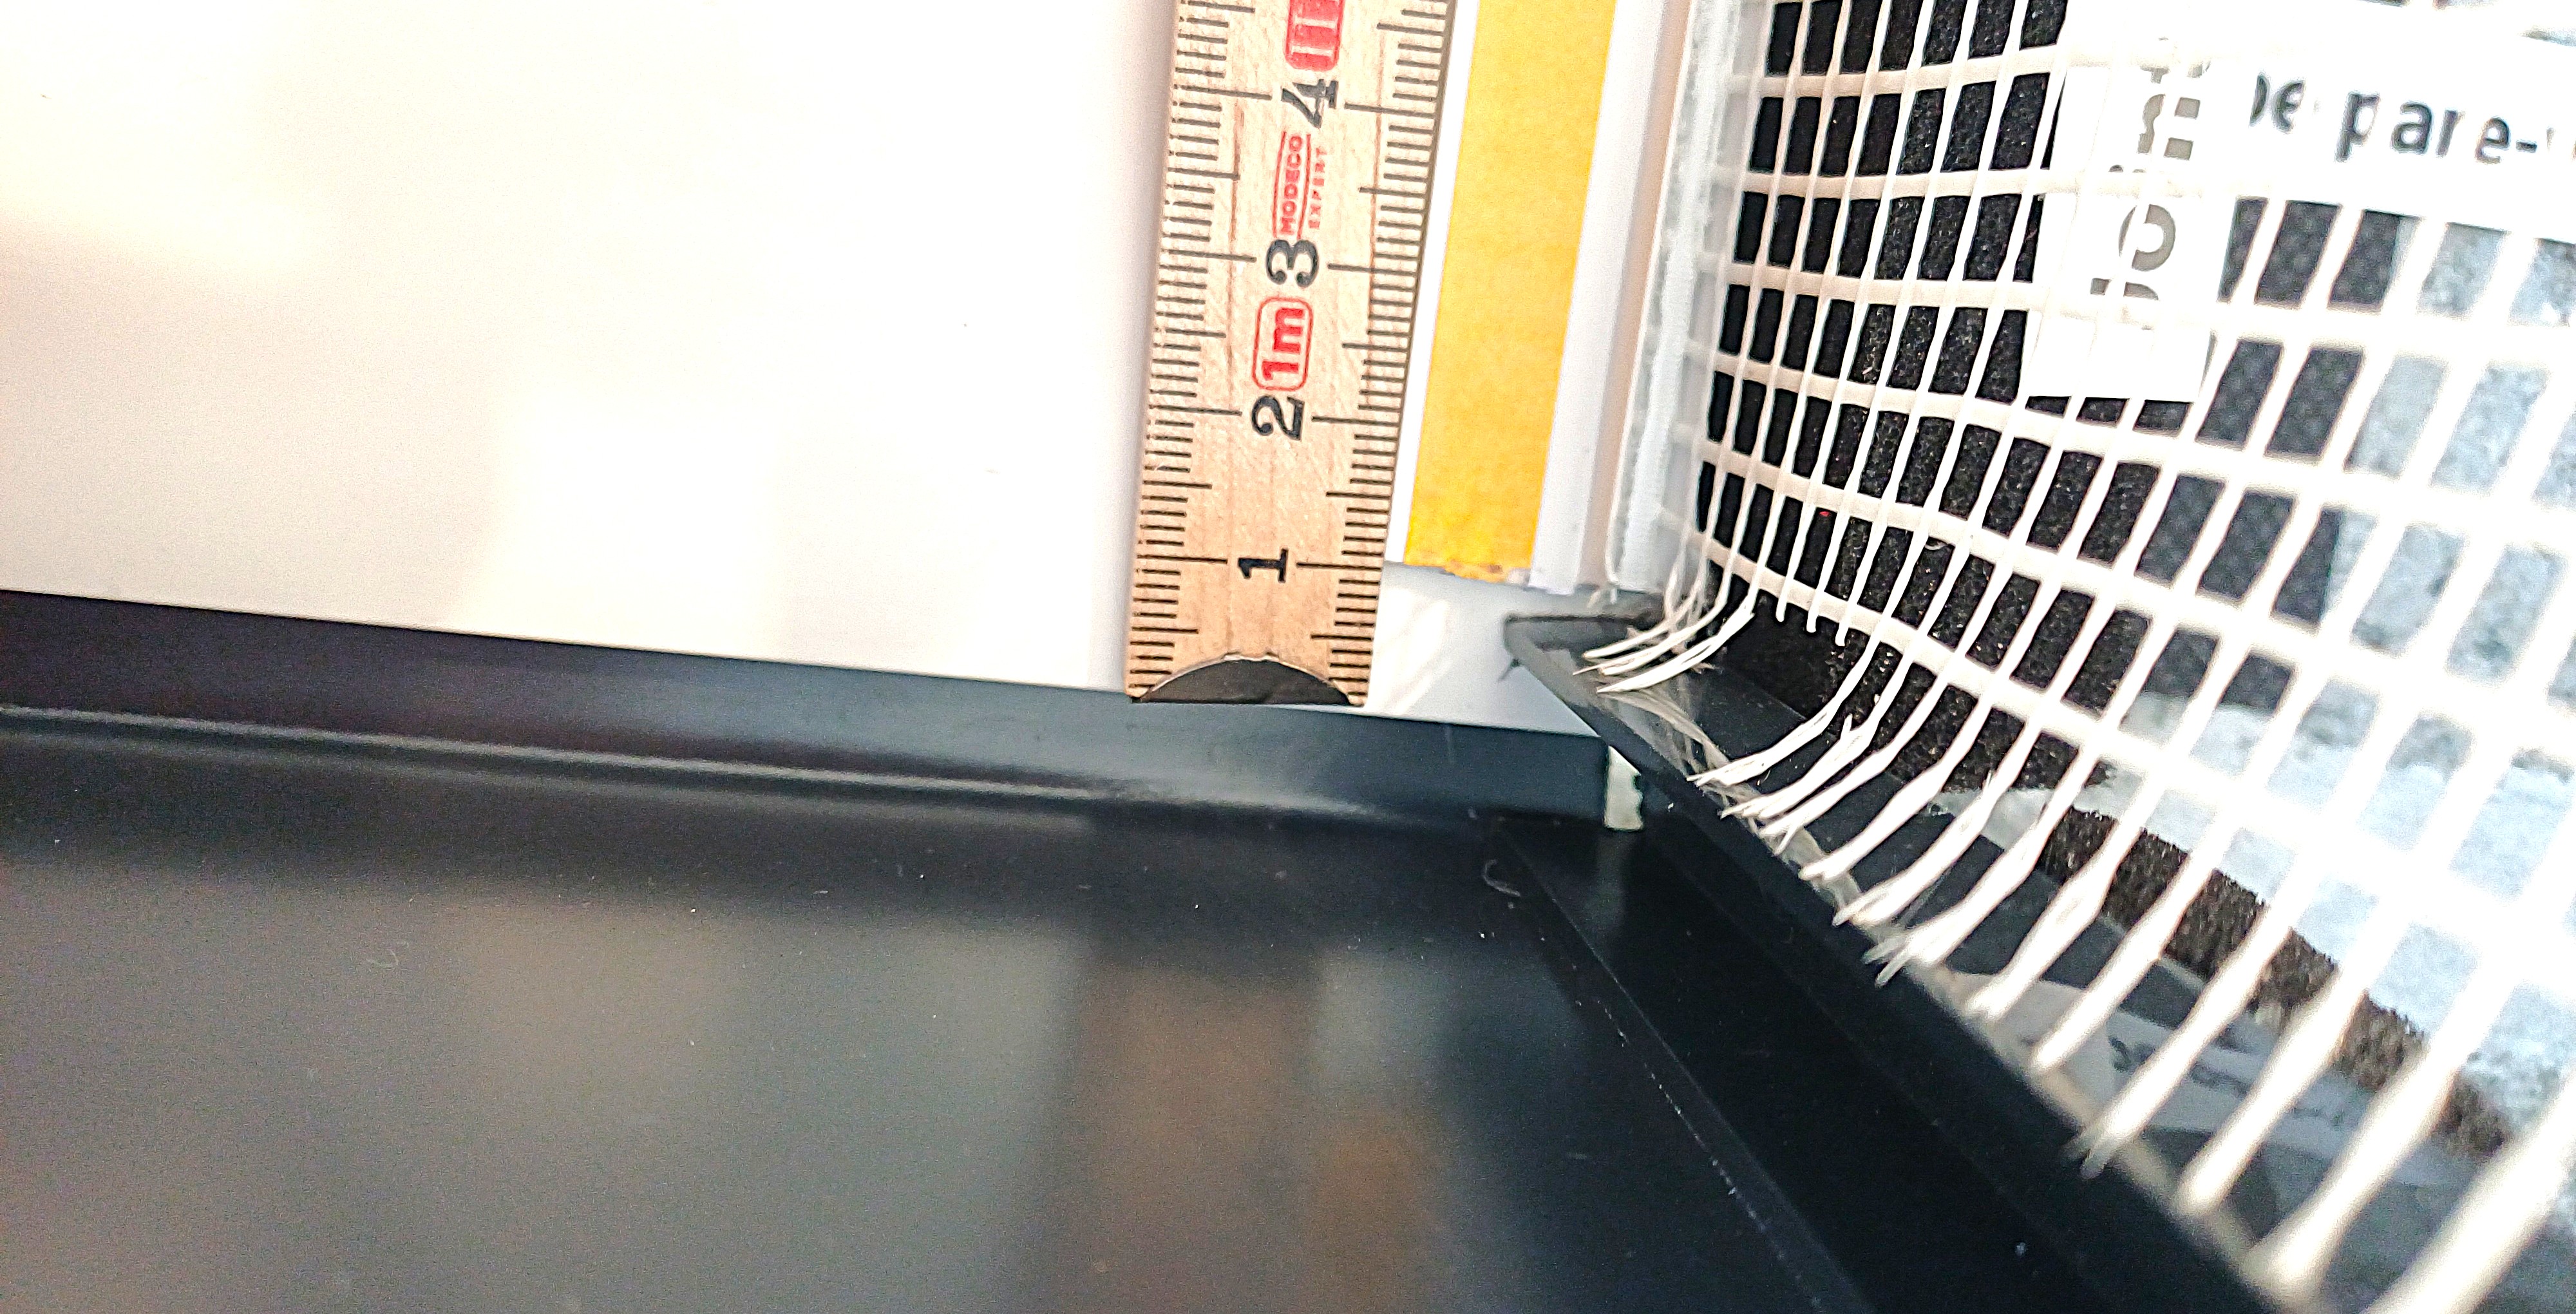
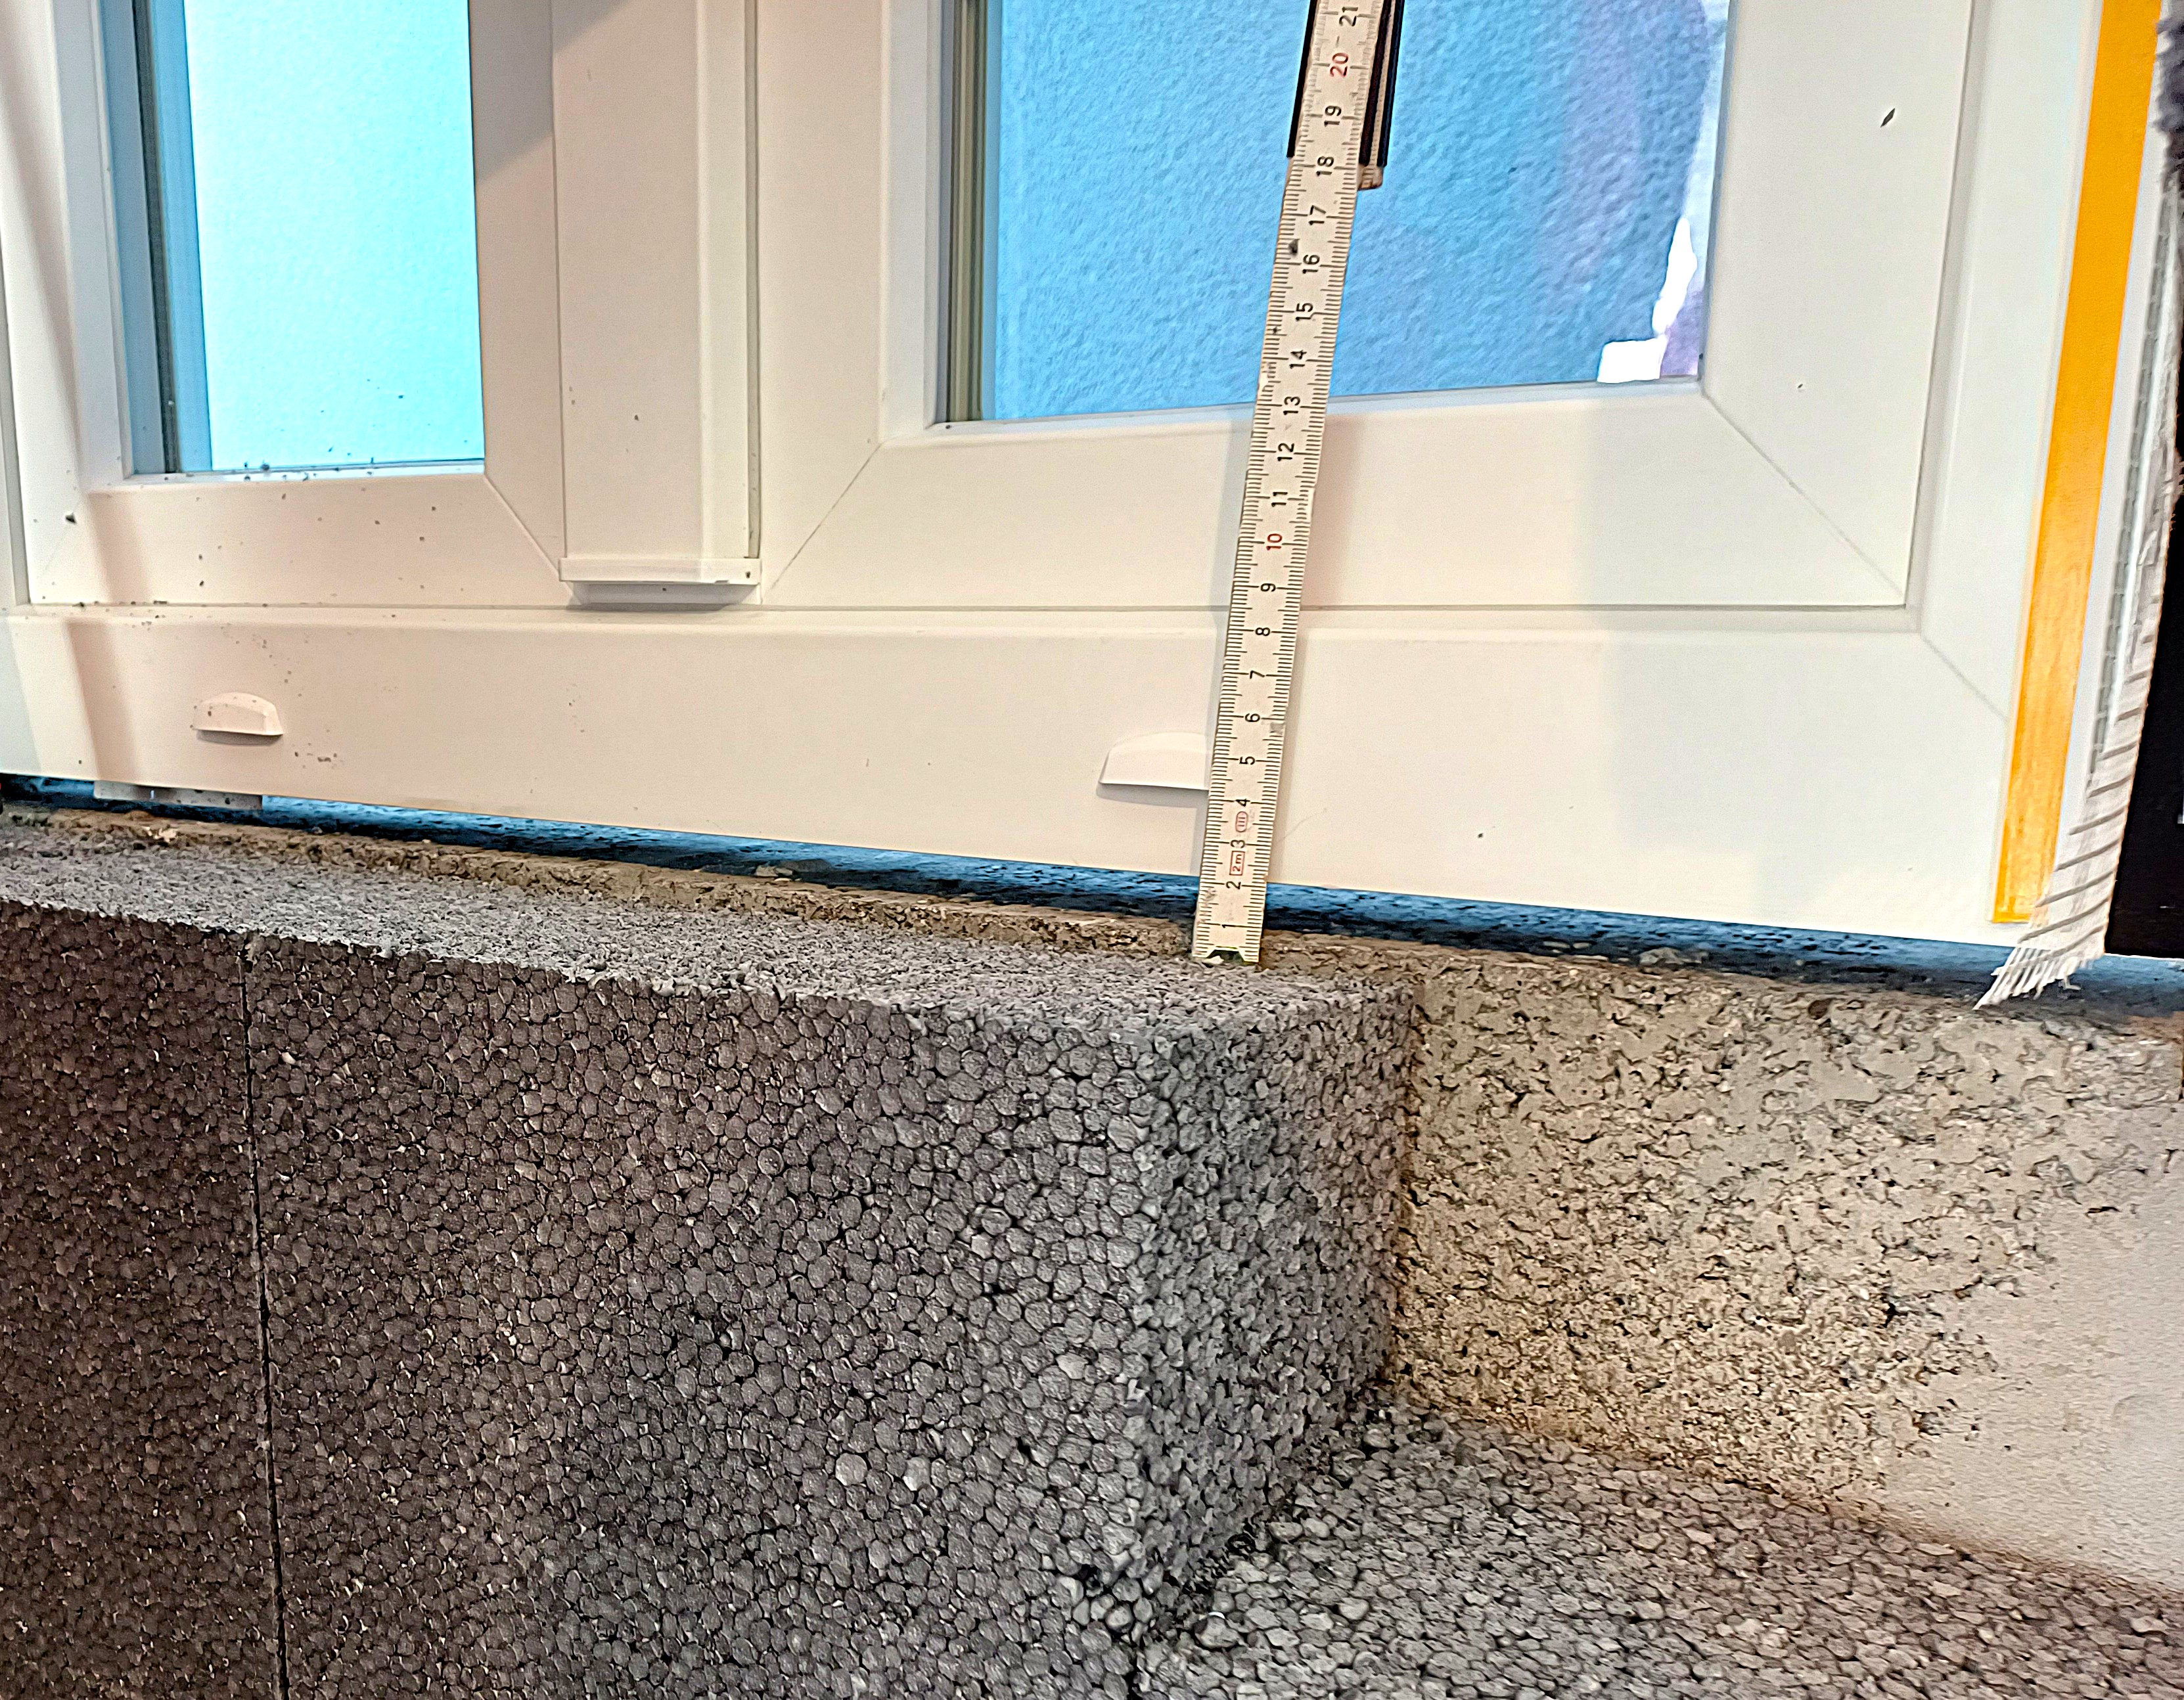
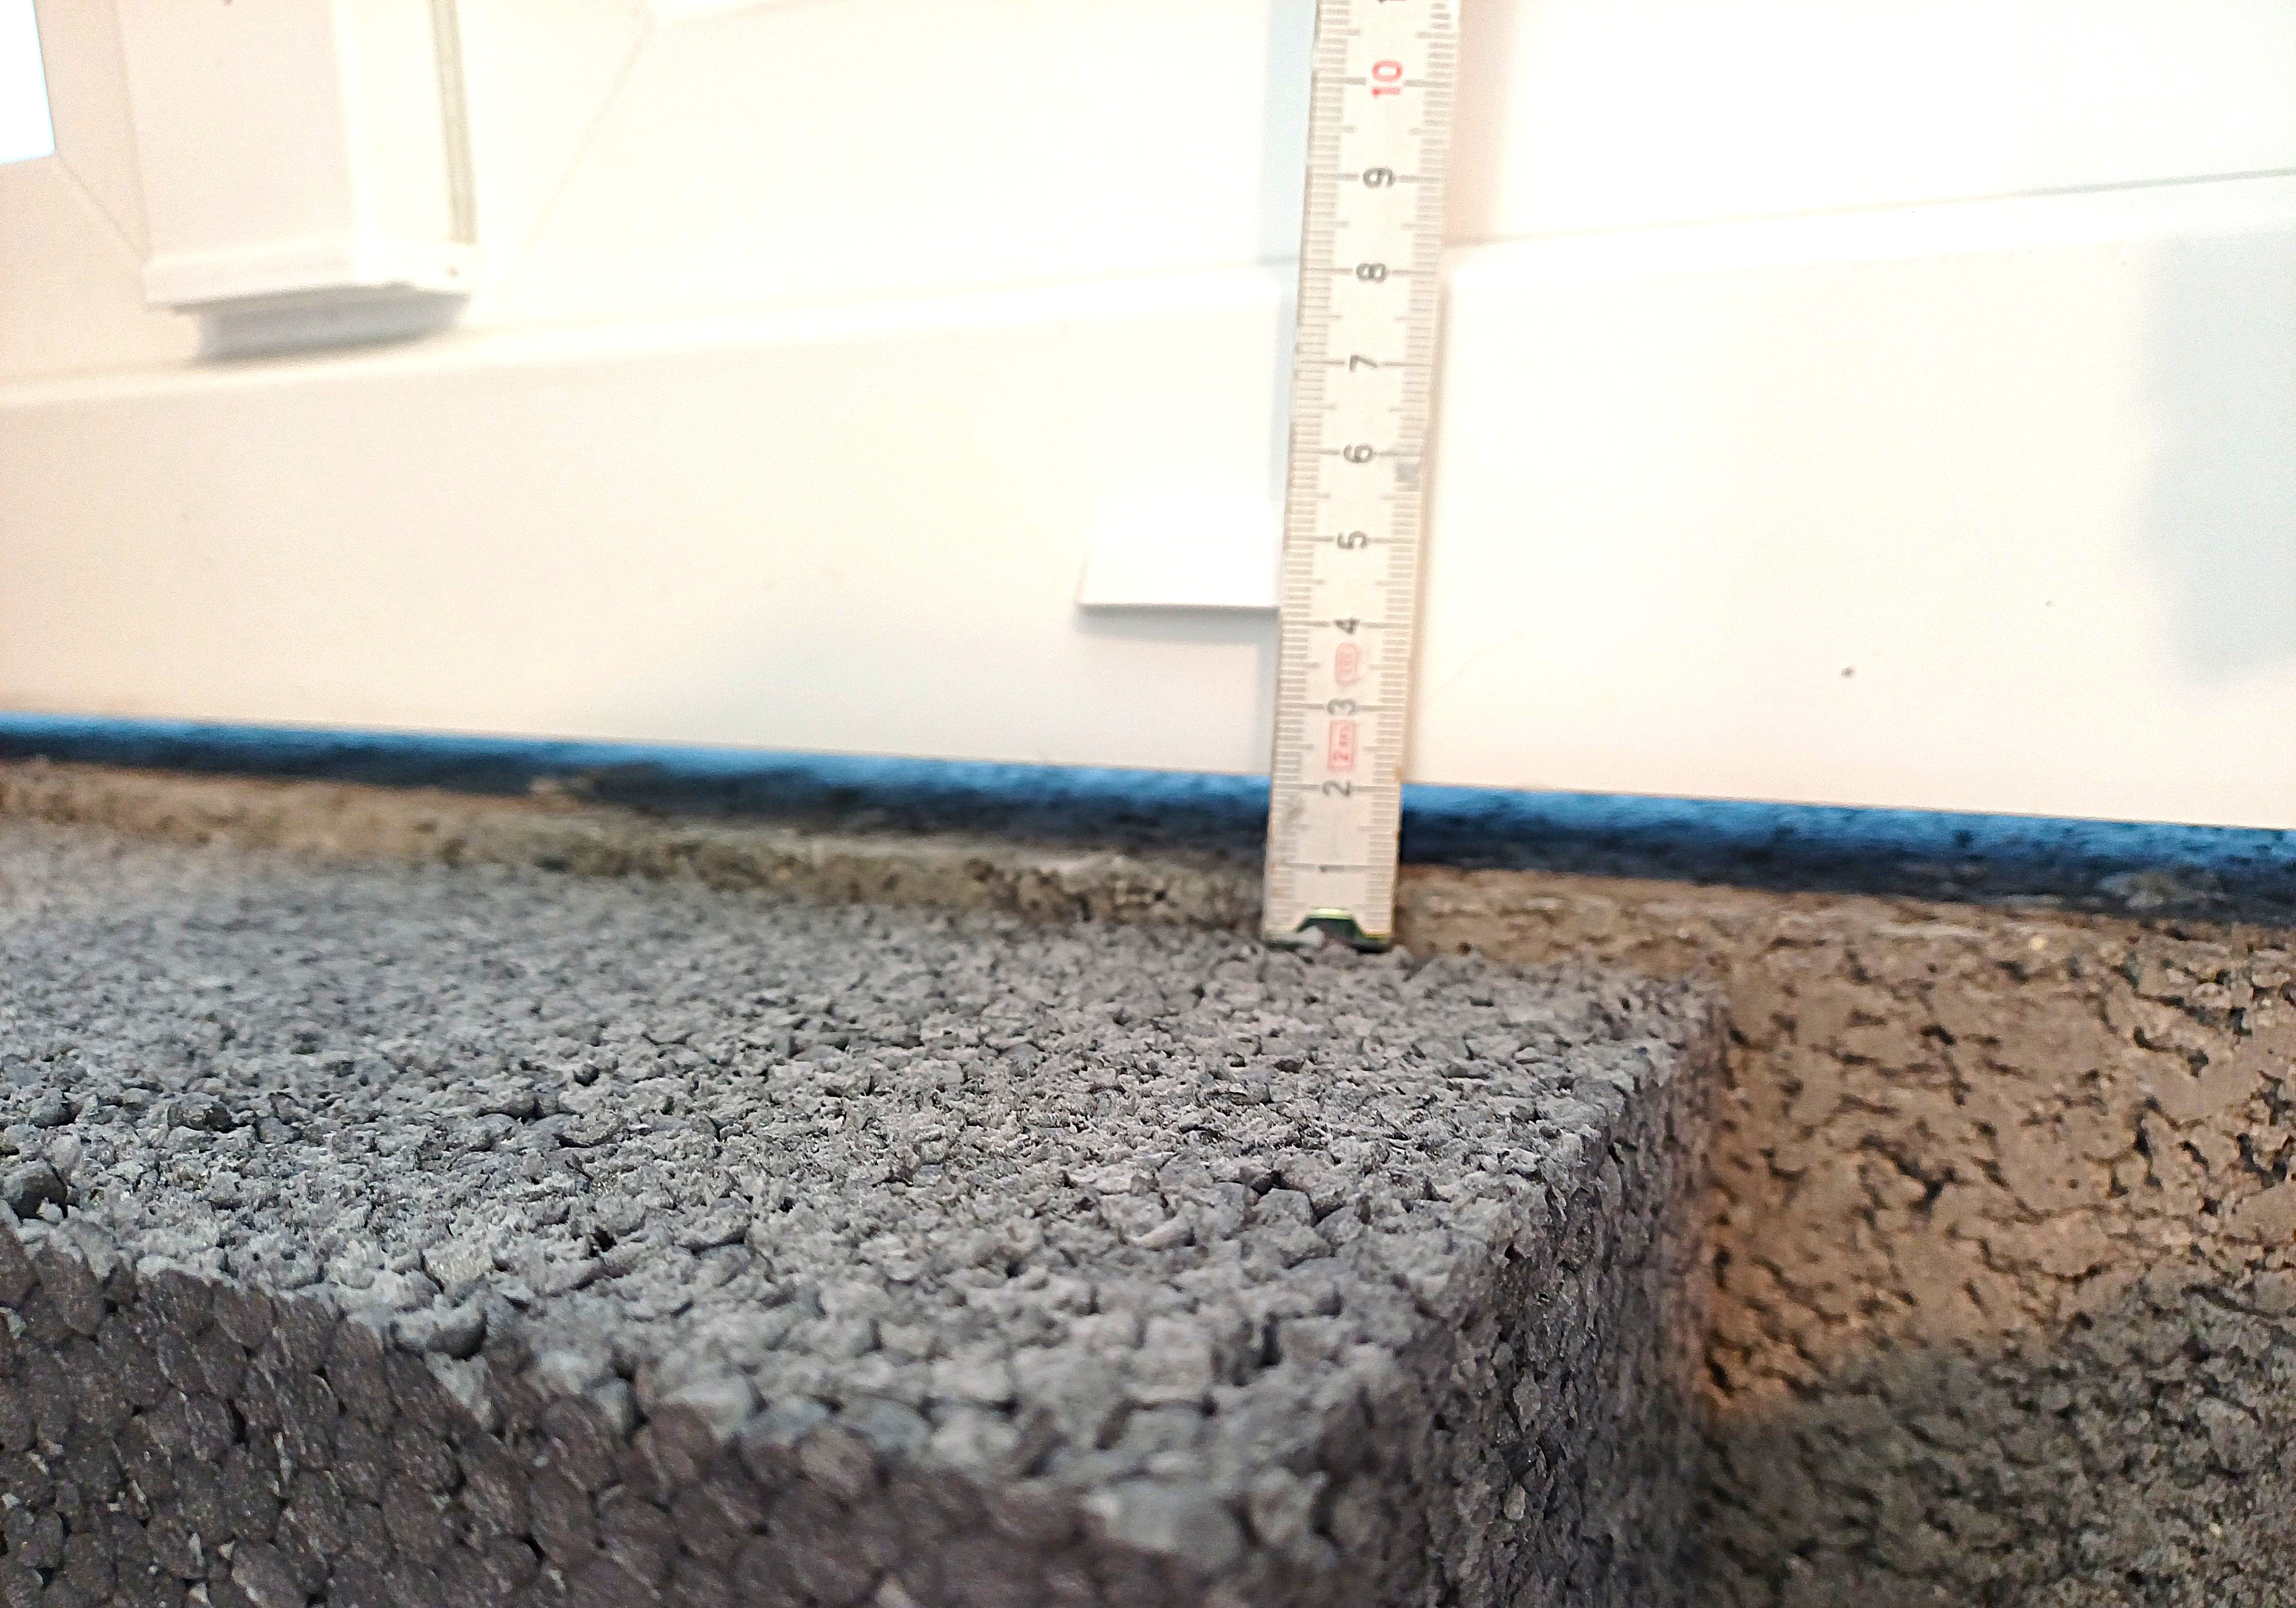
To begin, you must ensure that the top of the Adam Matériaux EPS insulation is 20mm from the bottom of the frame
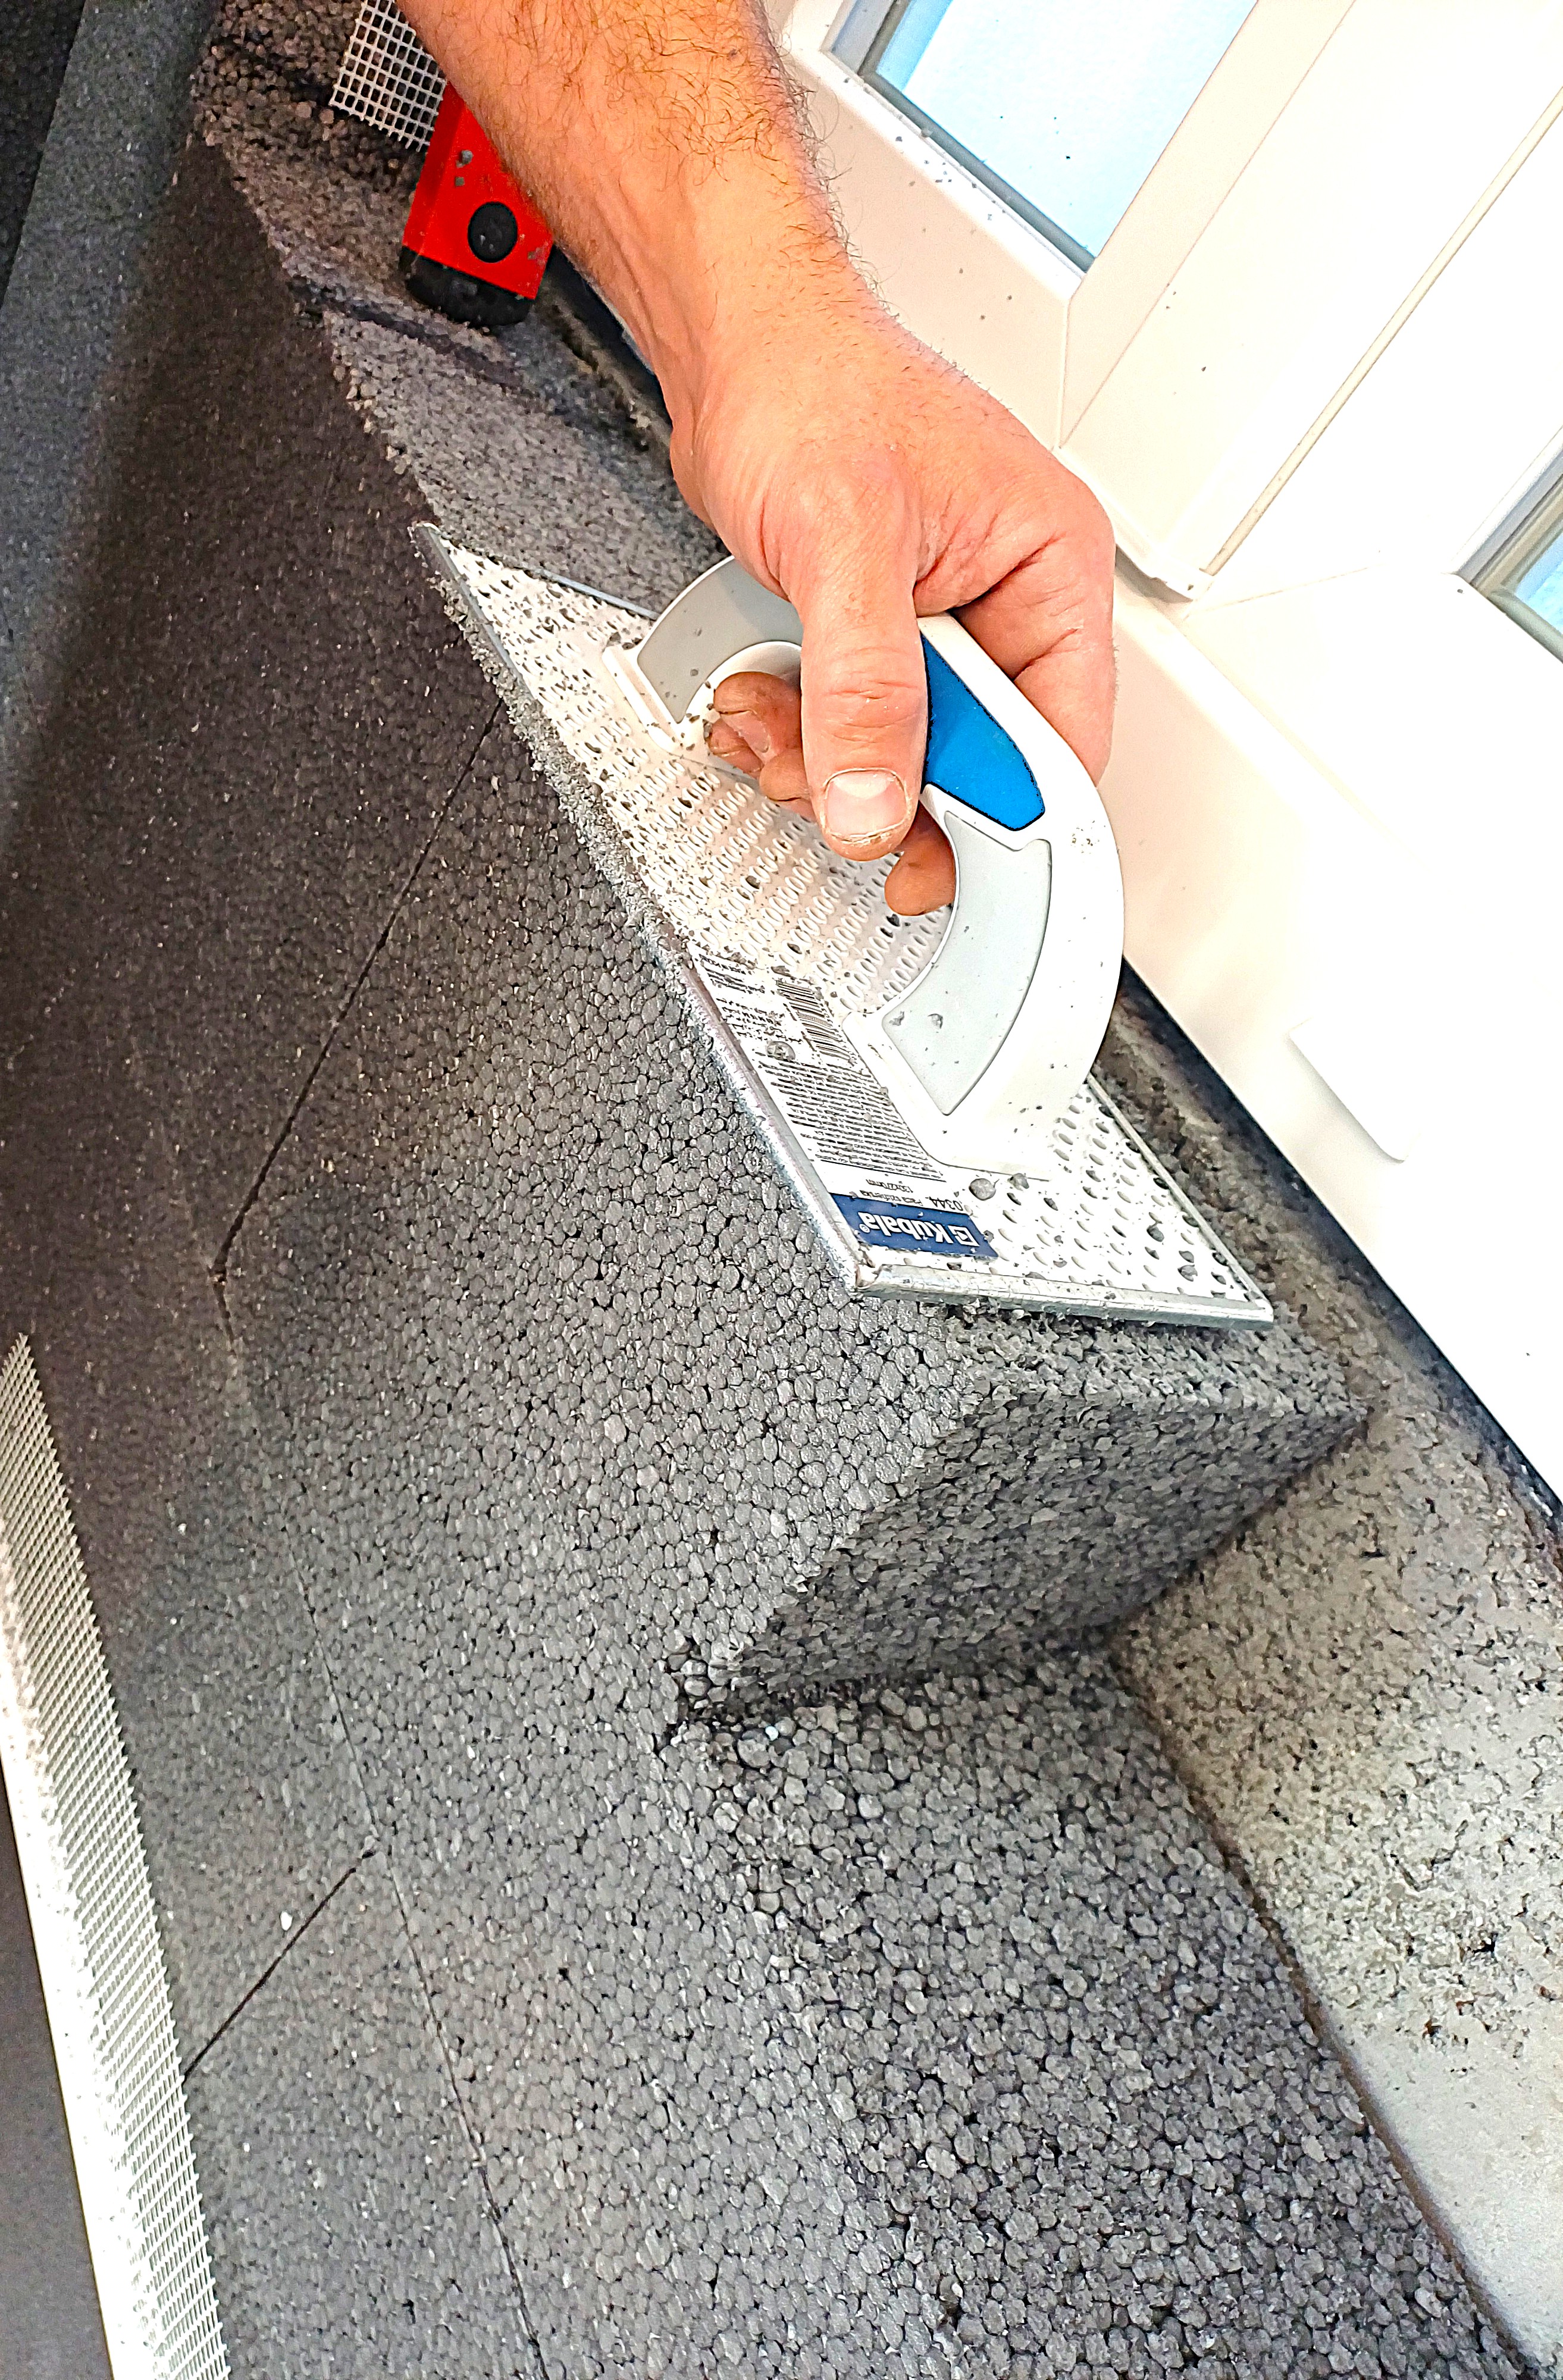
Use the Kubala 0344 or 0343 rasp to level the Adam Matériaux EPS insulation
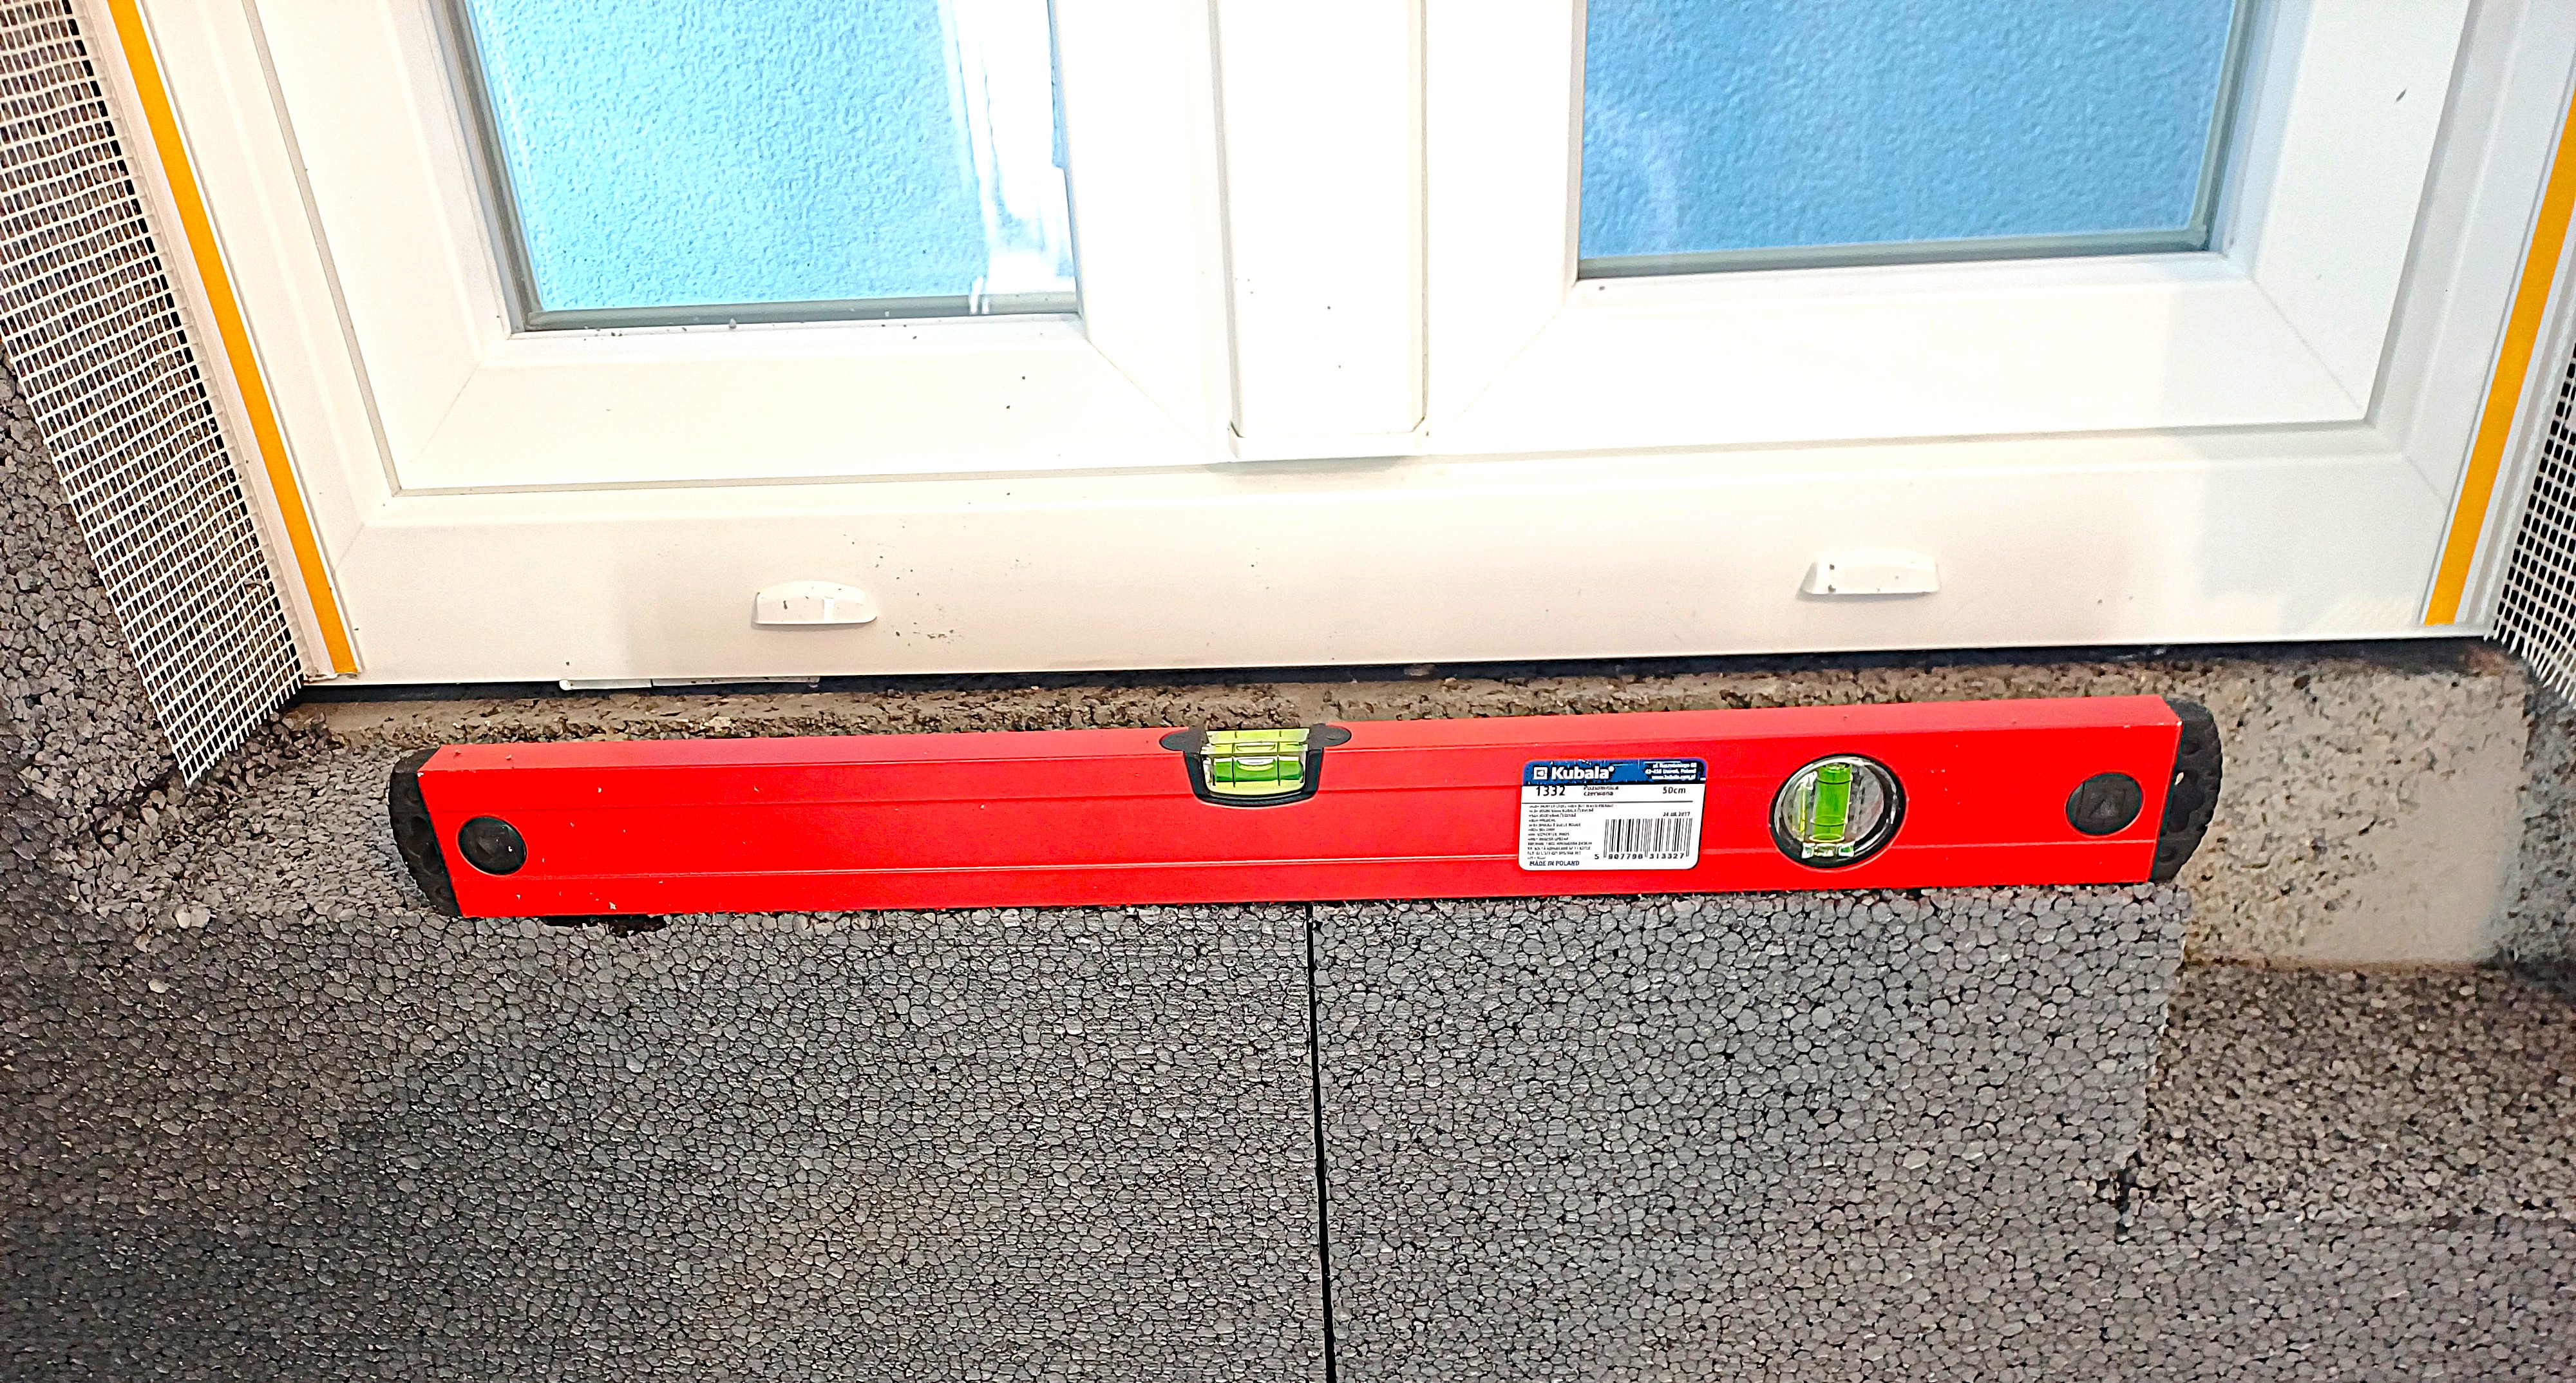
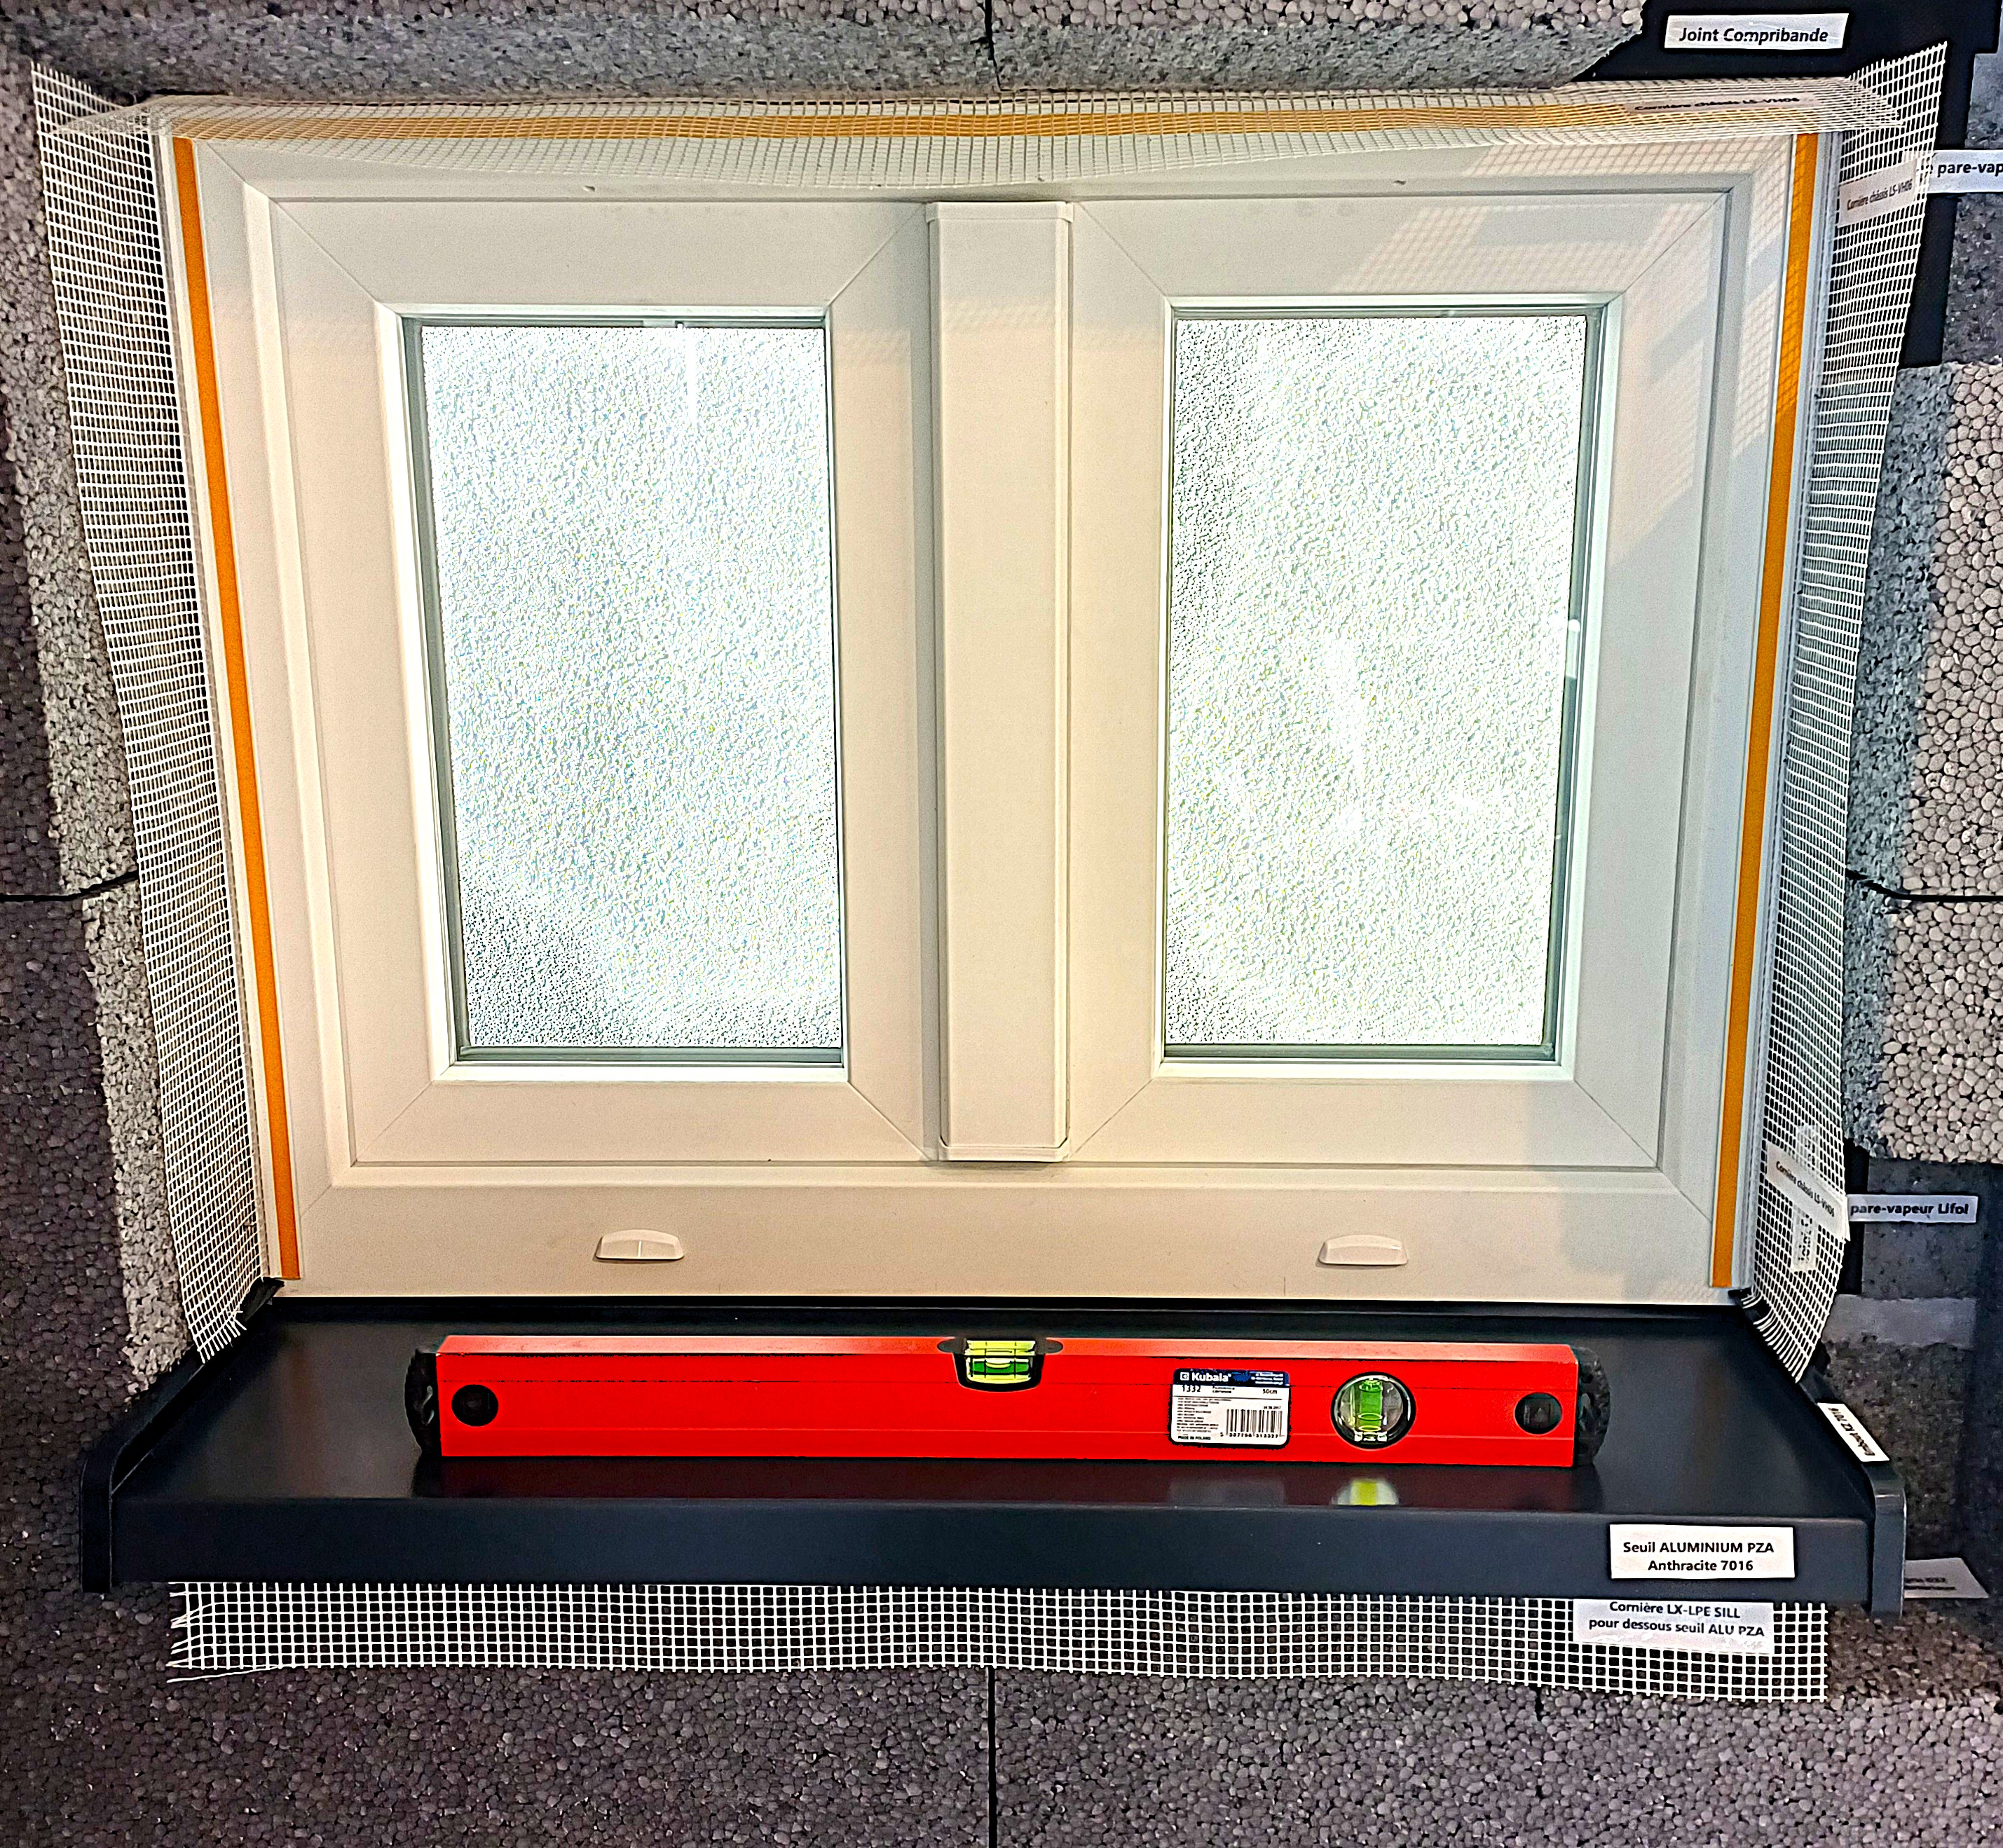
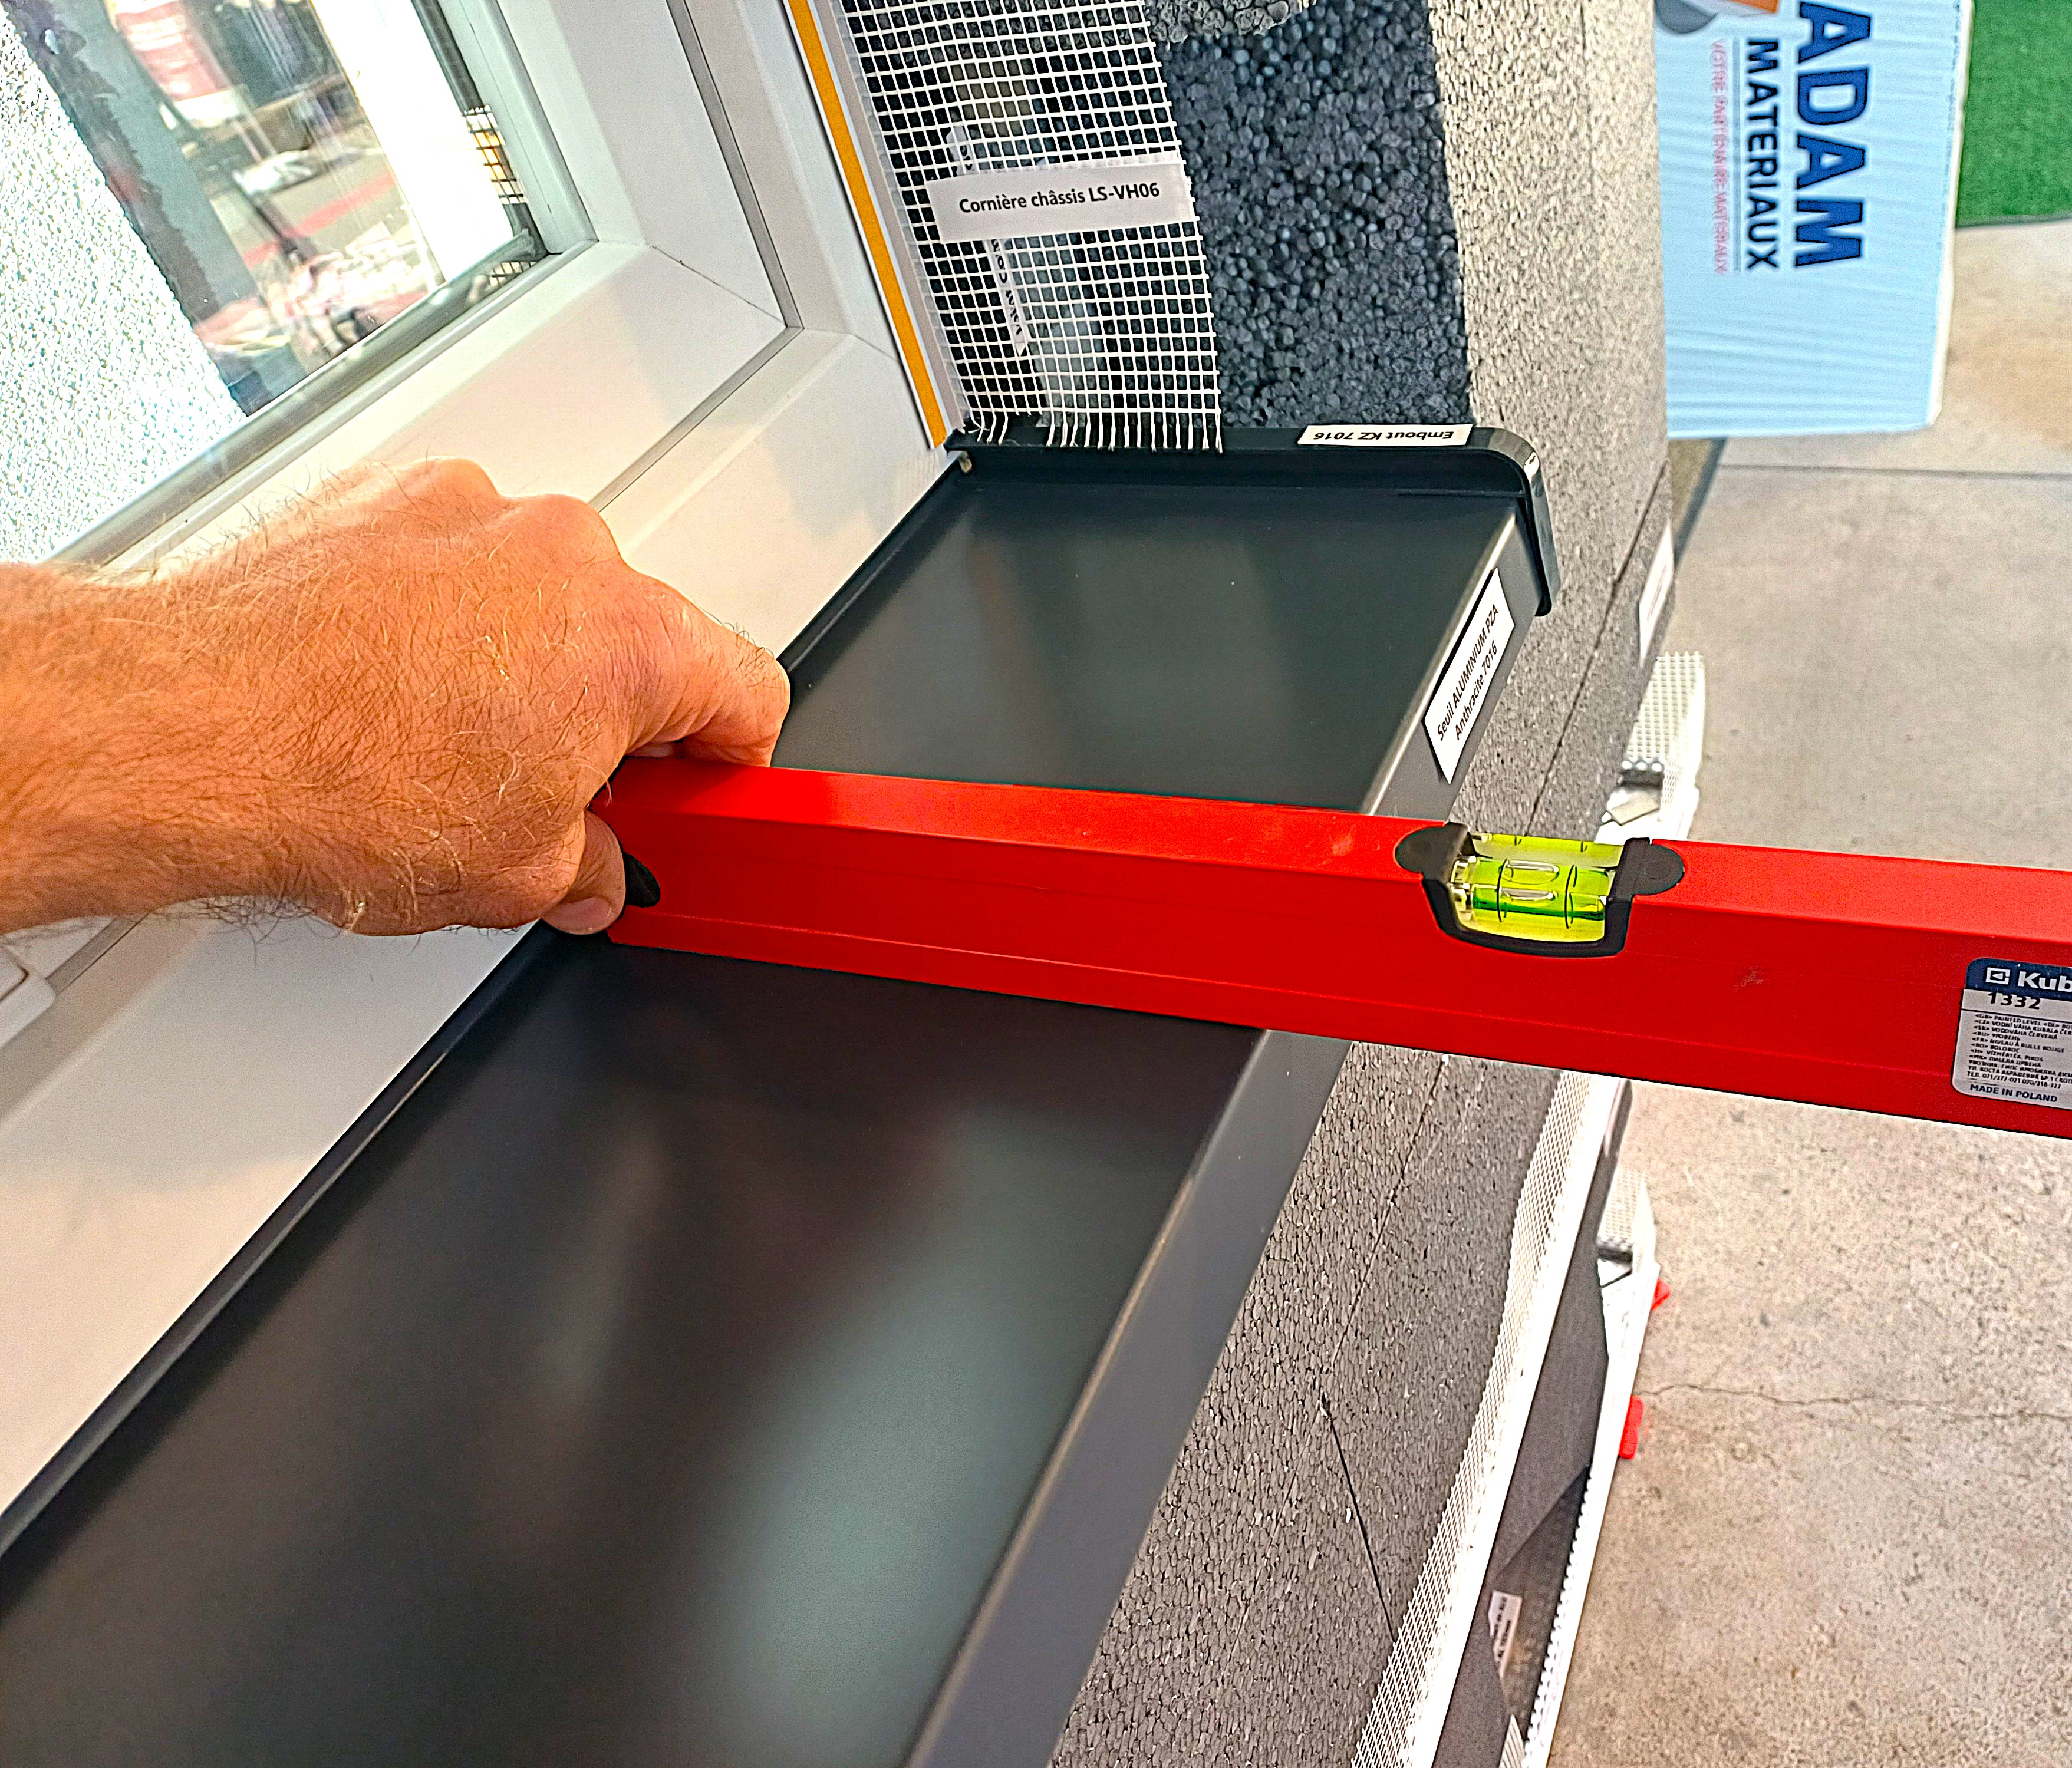
Use the Kubala 1333 level to check that the Adam Matériaux EPS insulation is level
Once this step is completed, you must use the following rule to obtain the length to cut from the PZA Aluminium threshold:
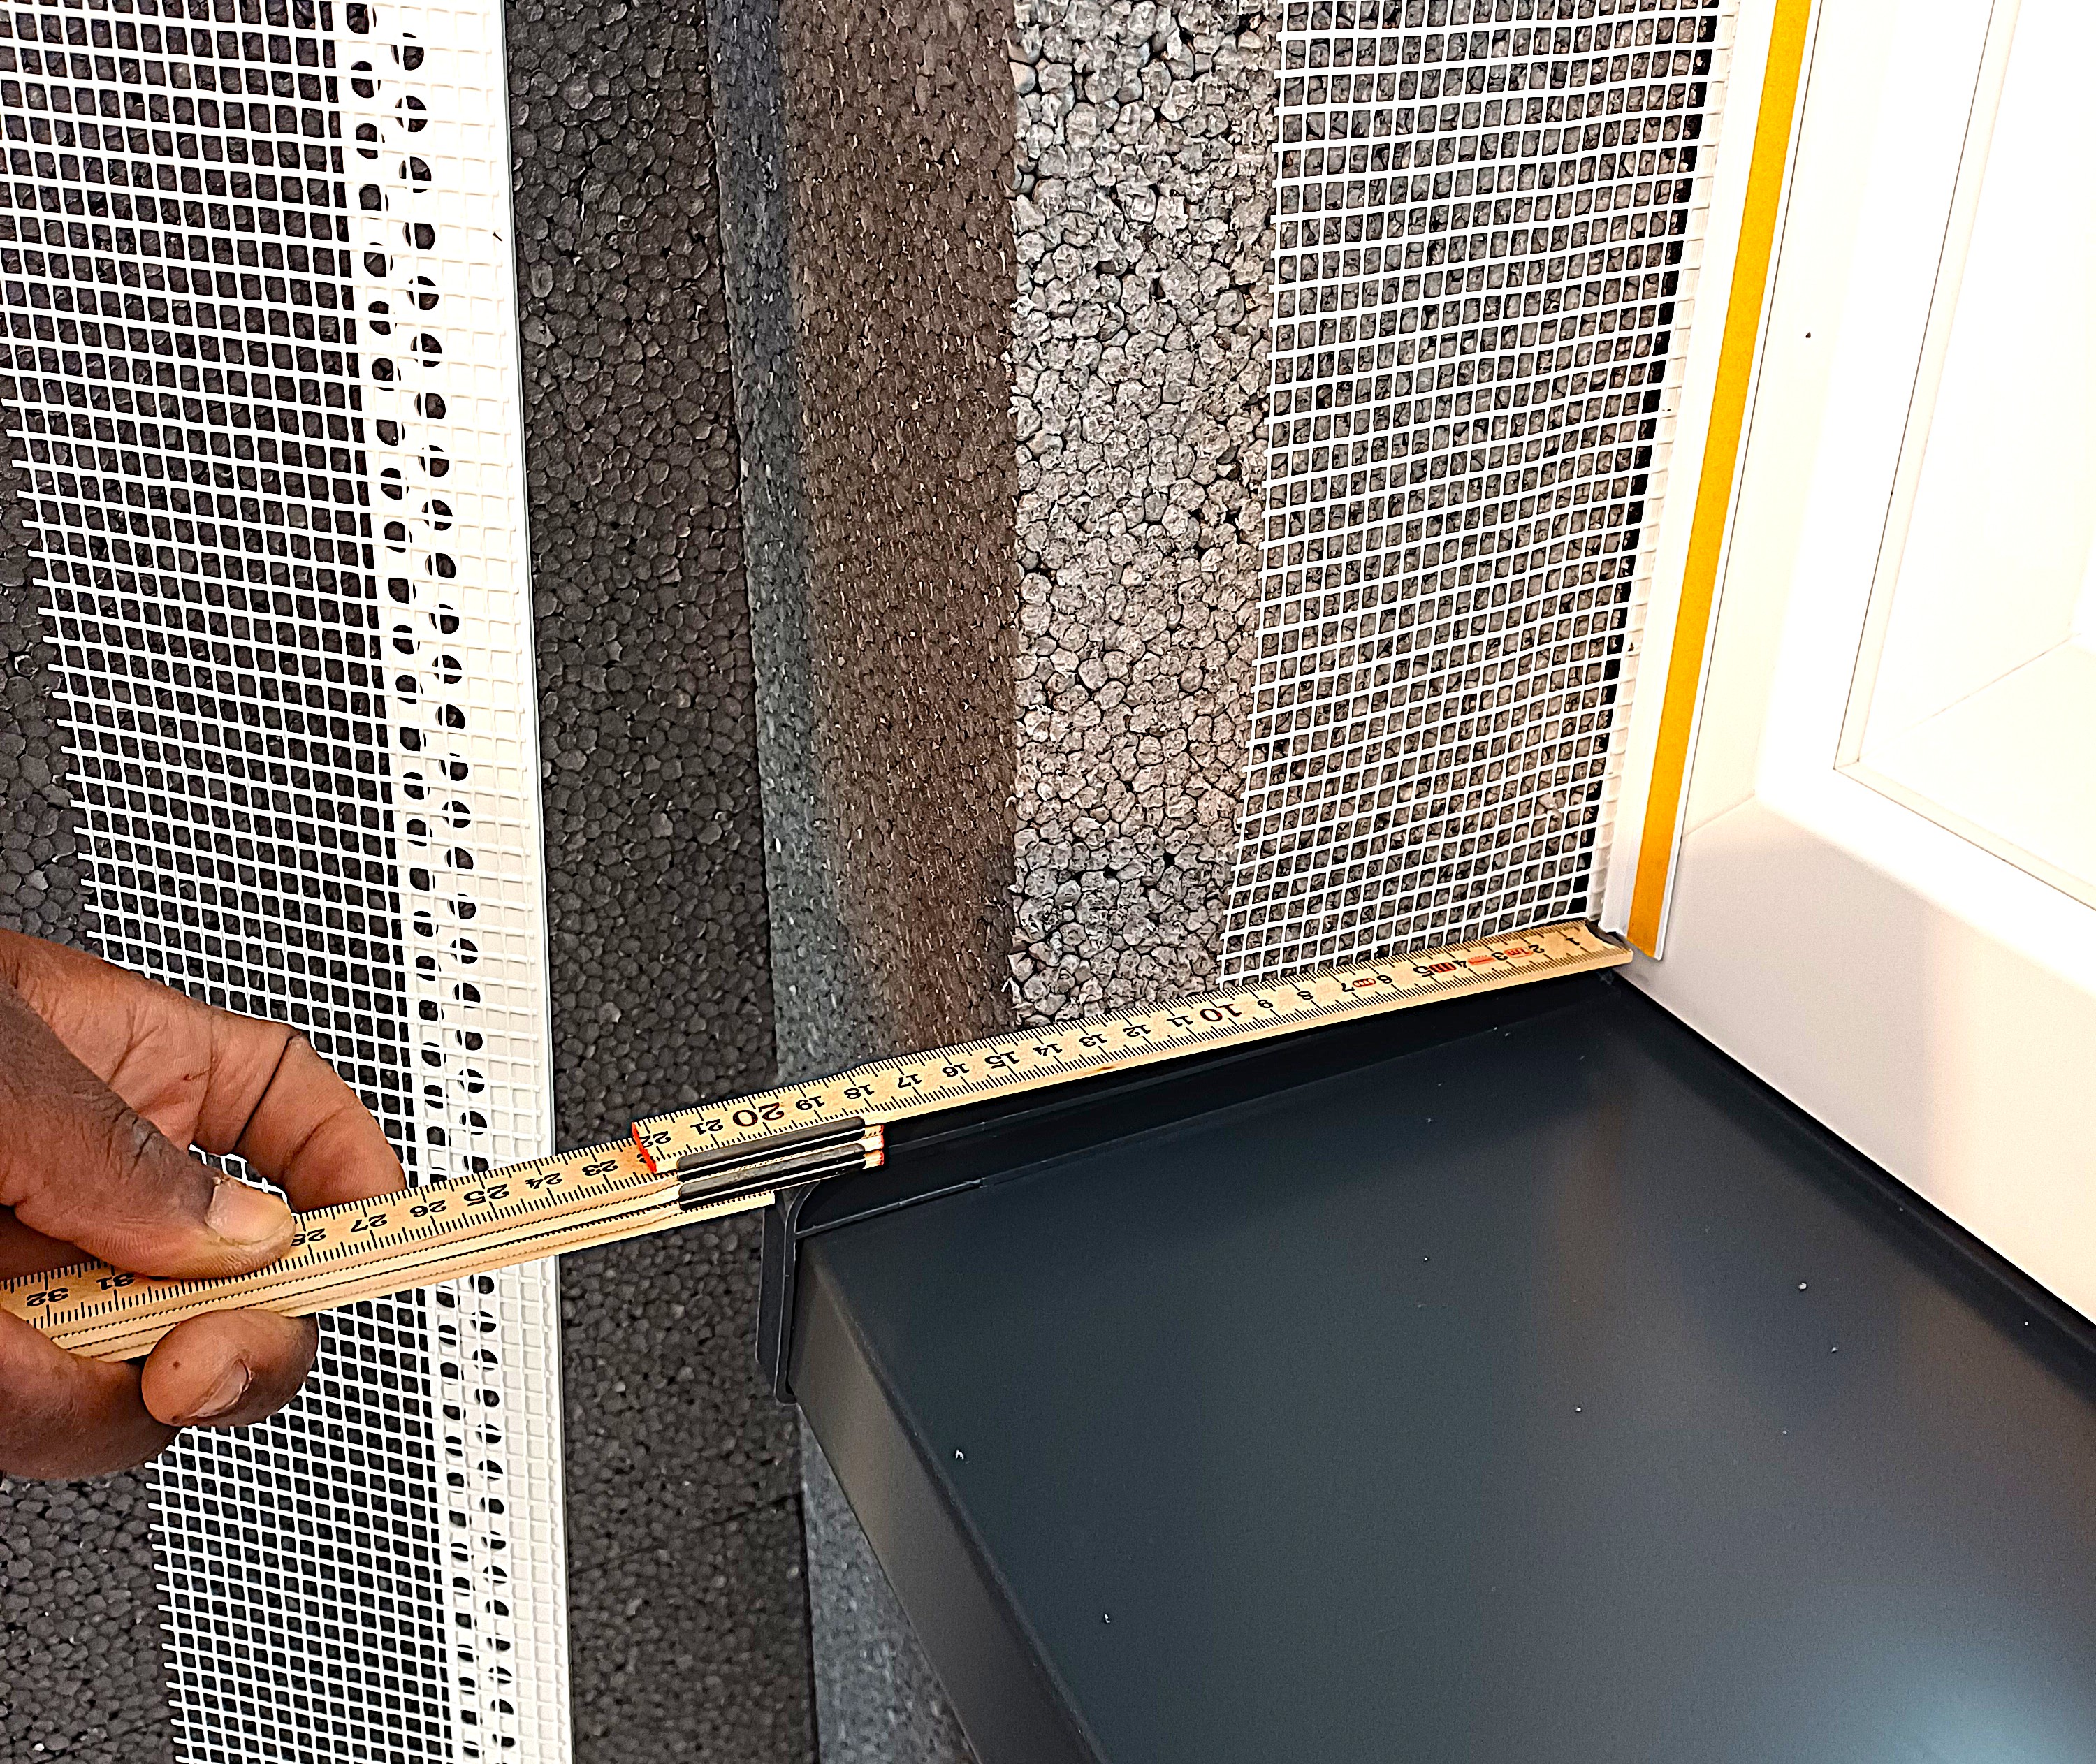
You must measure the length between the two stops of the LS-VH06 window corner brackets + add 8mm for the right side and 8mm for the left side. Example: if the length between the two stops of the LS-VH06 corner brackets is 100cm, your threshold to cut is 100 + 0.8 + 0.8cm = 101.6cm
A 2 to 4 cm overhang of the PZA aluminum threshold must be allowed at the end of the insulation and plastering work Adam Matériaux
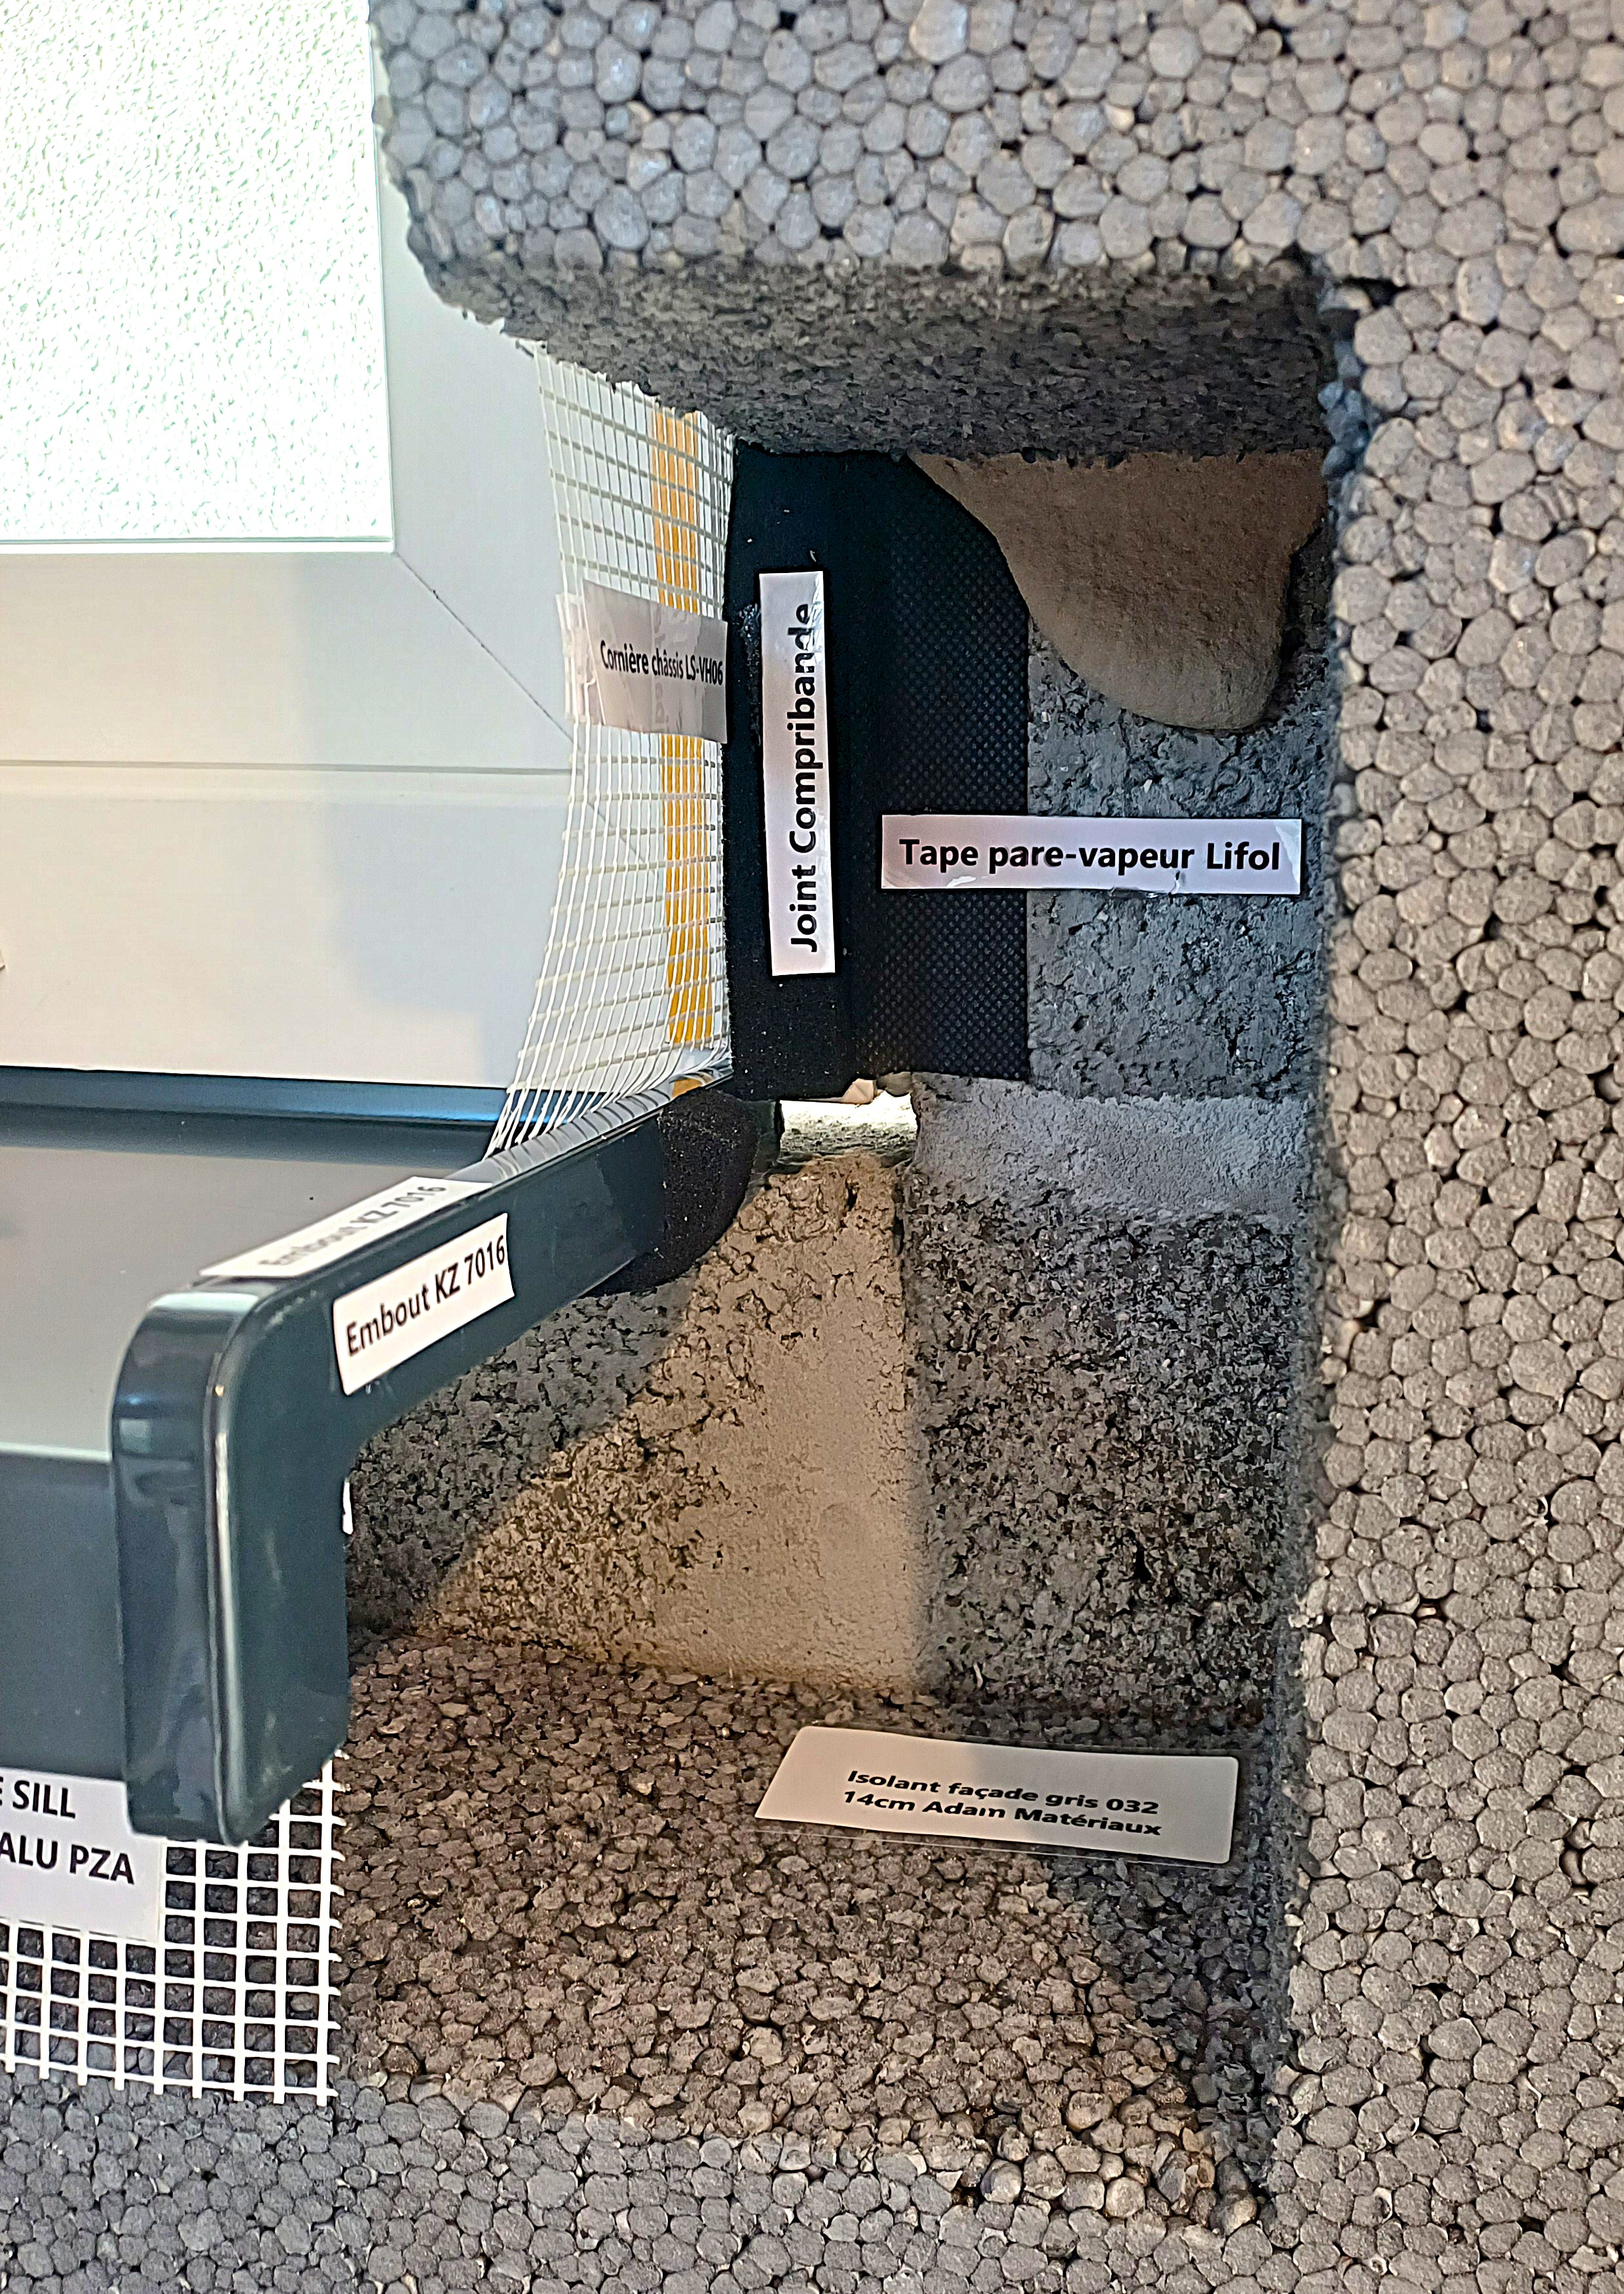
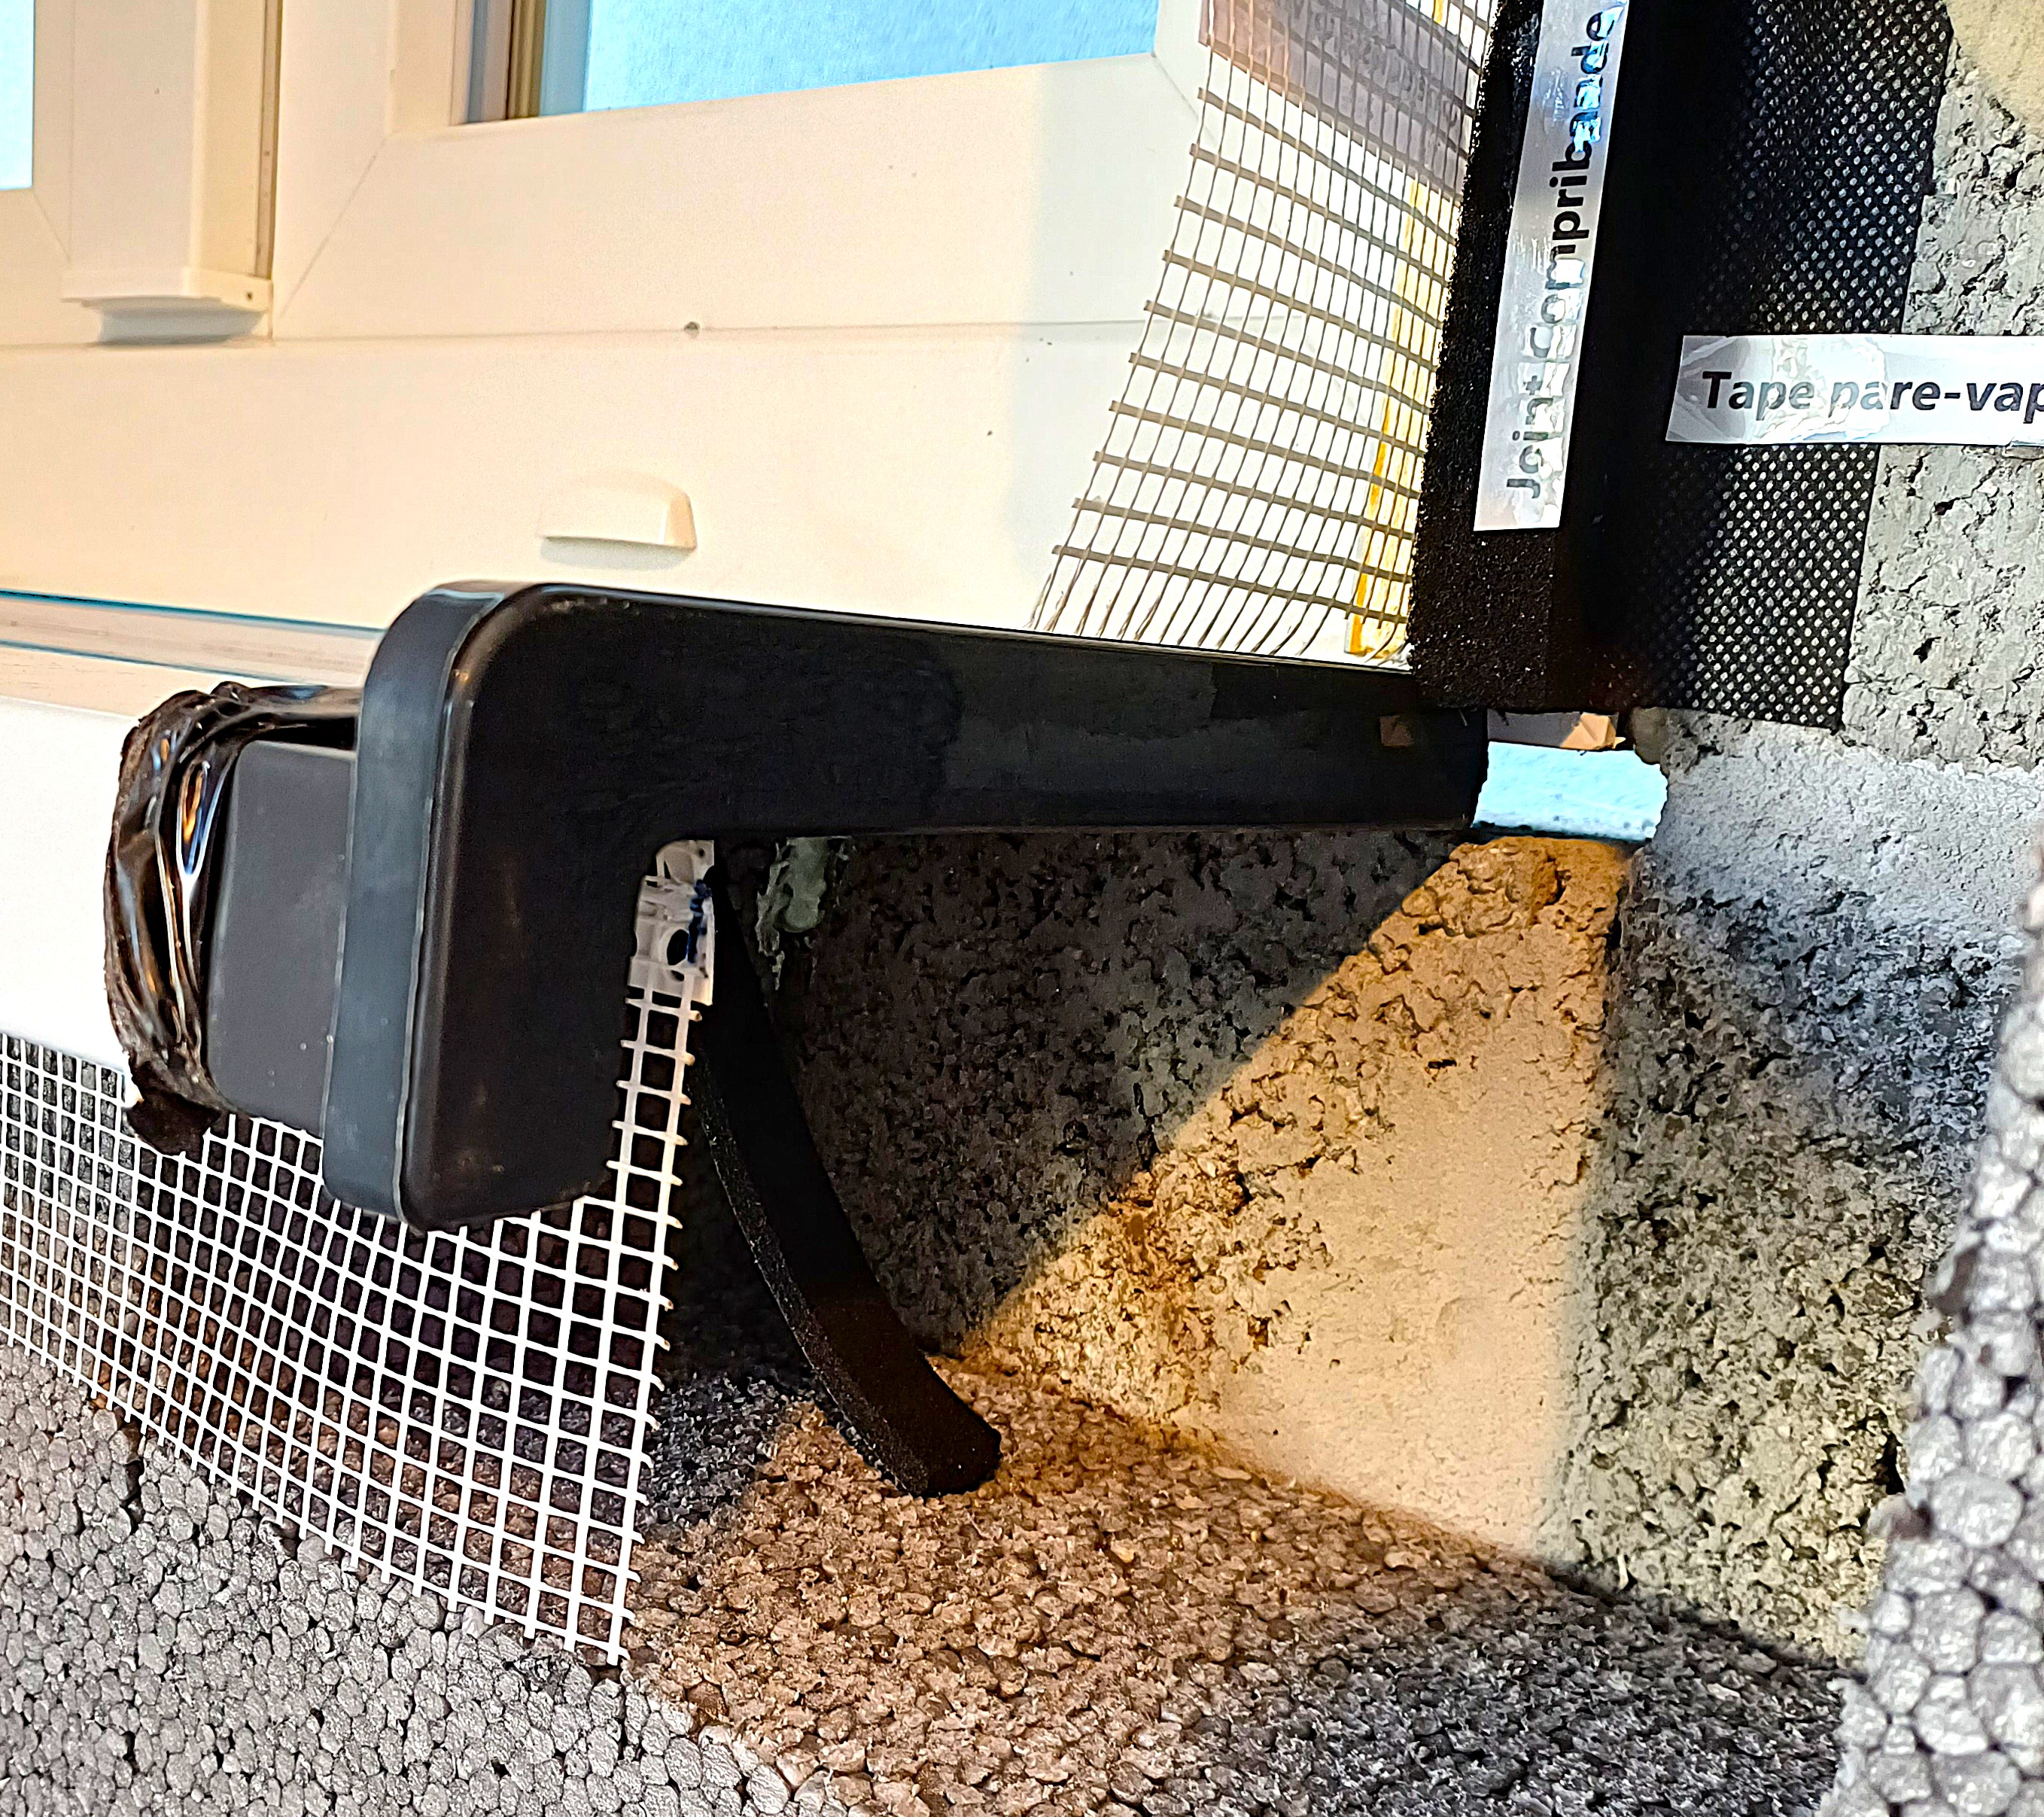
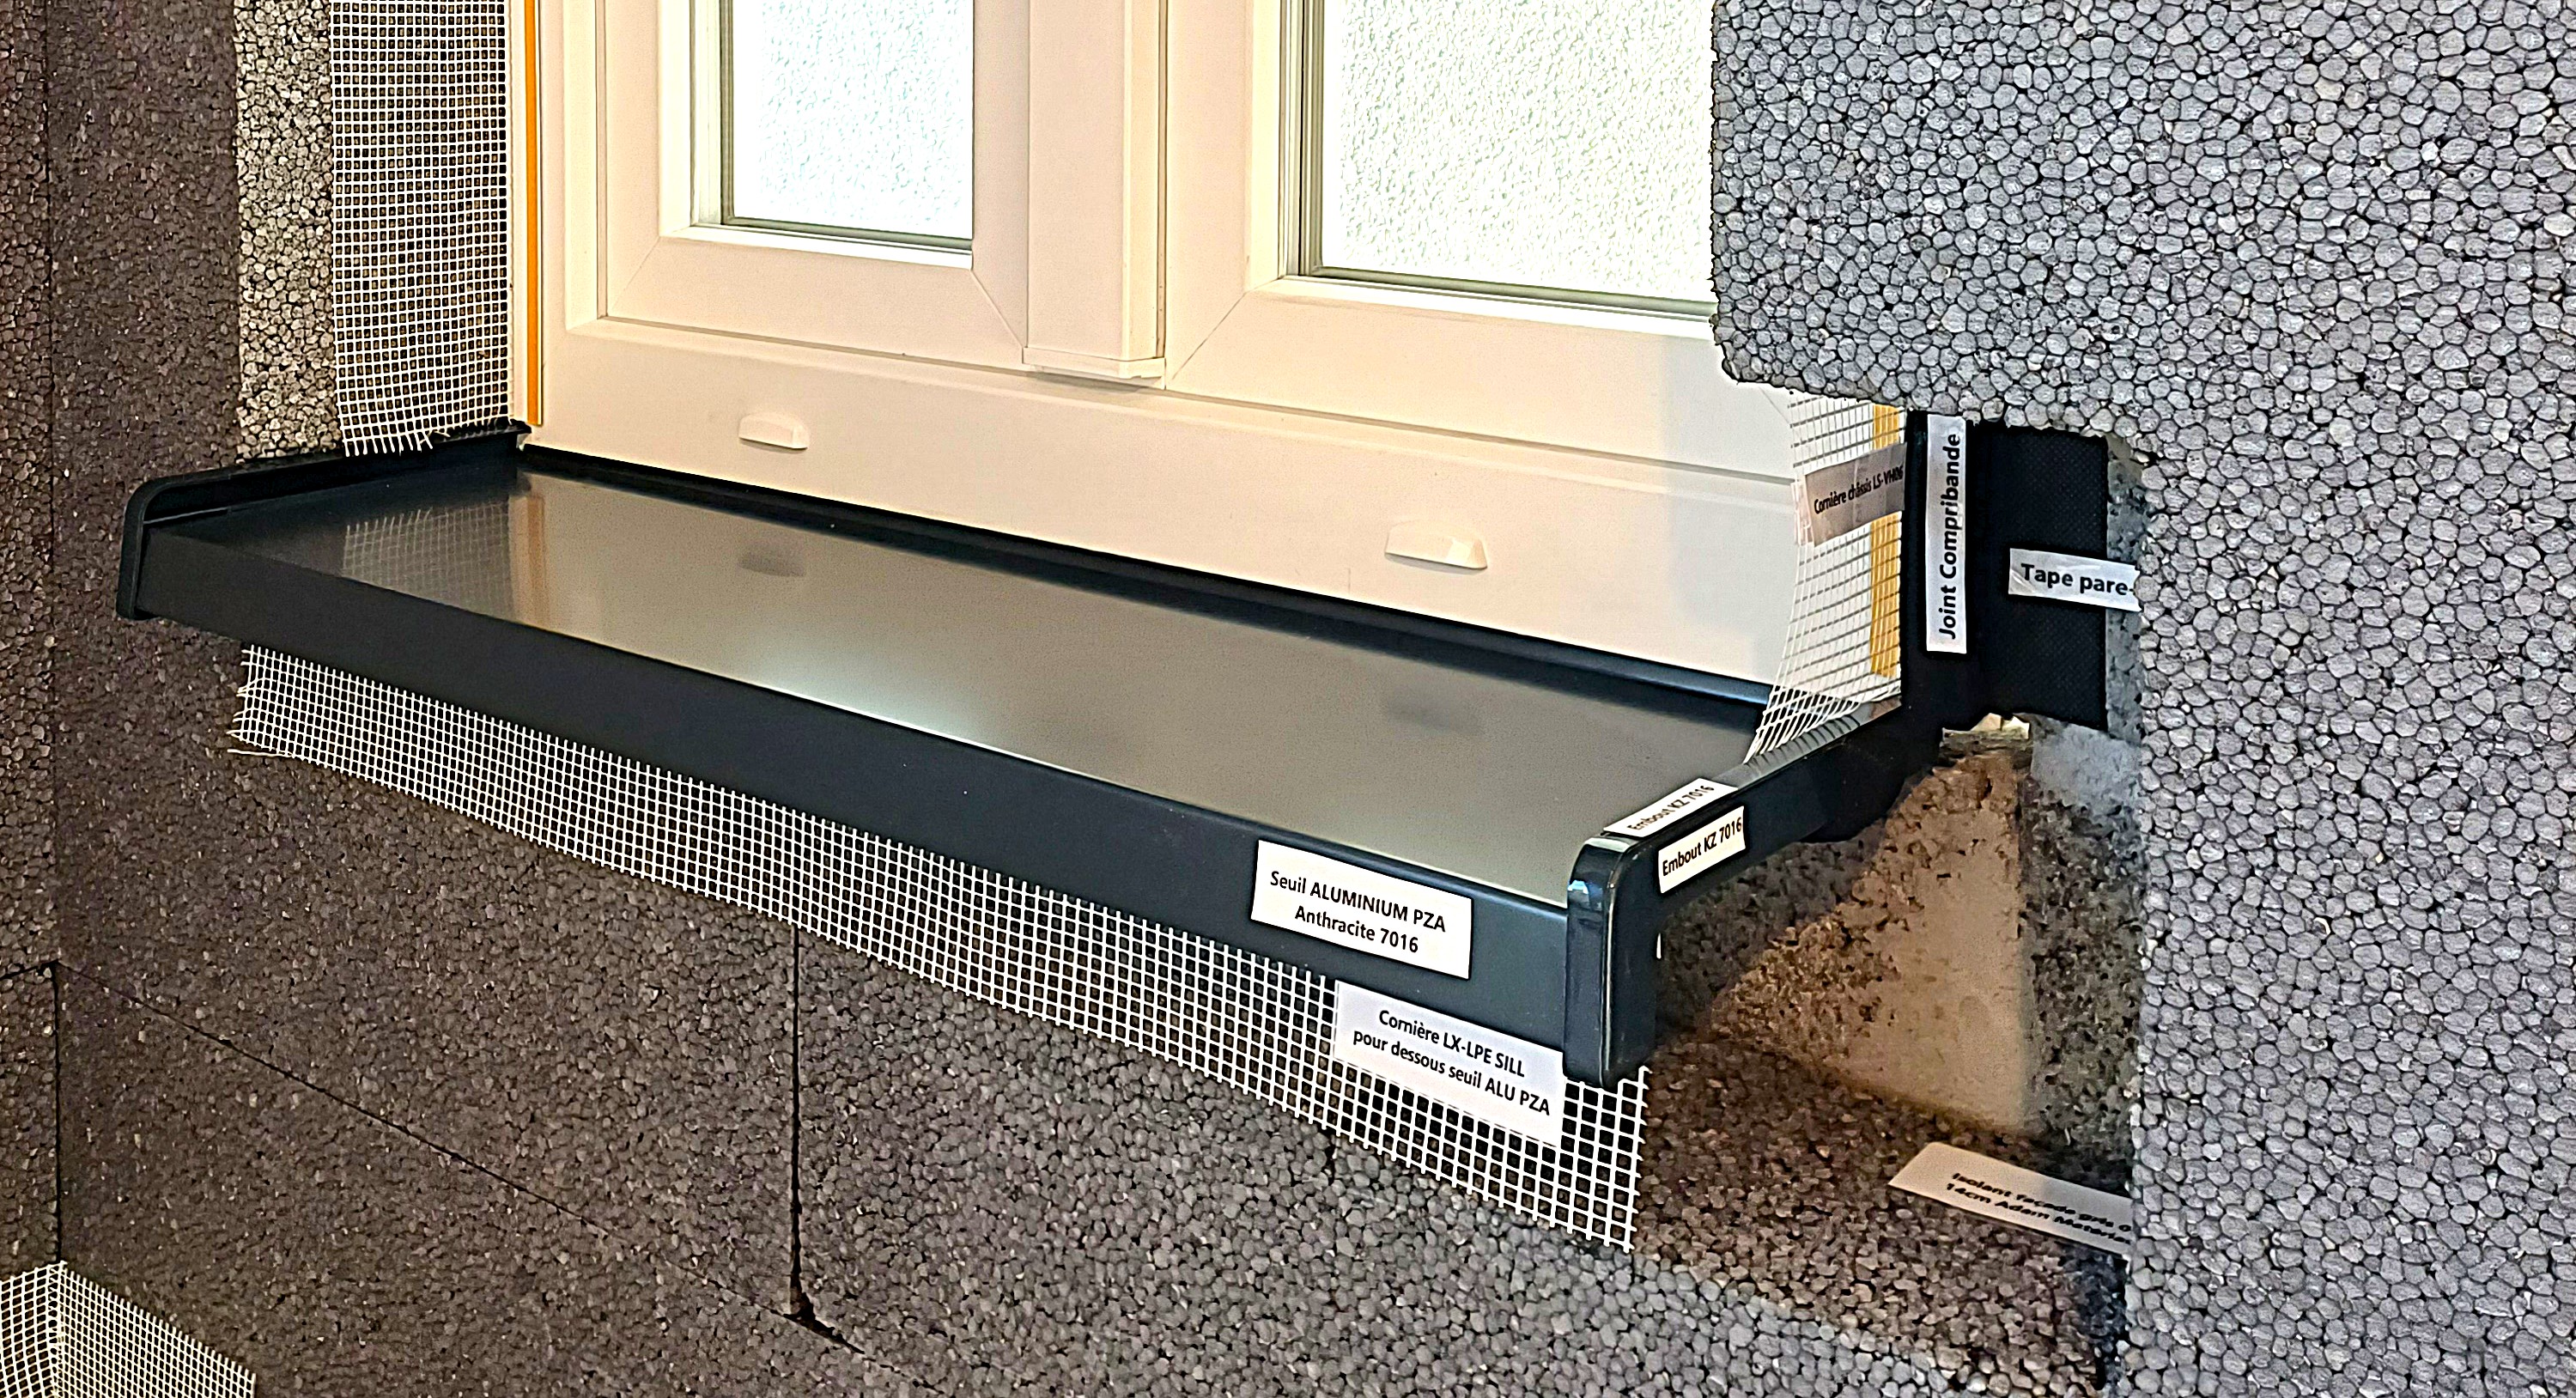
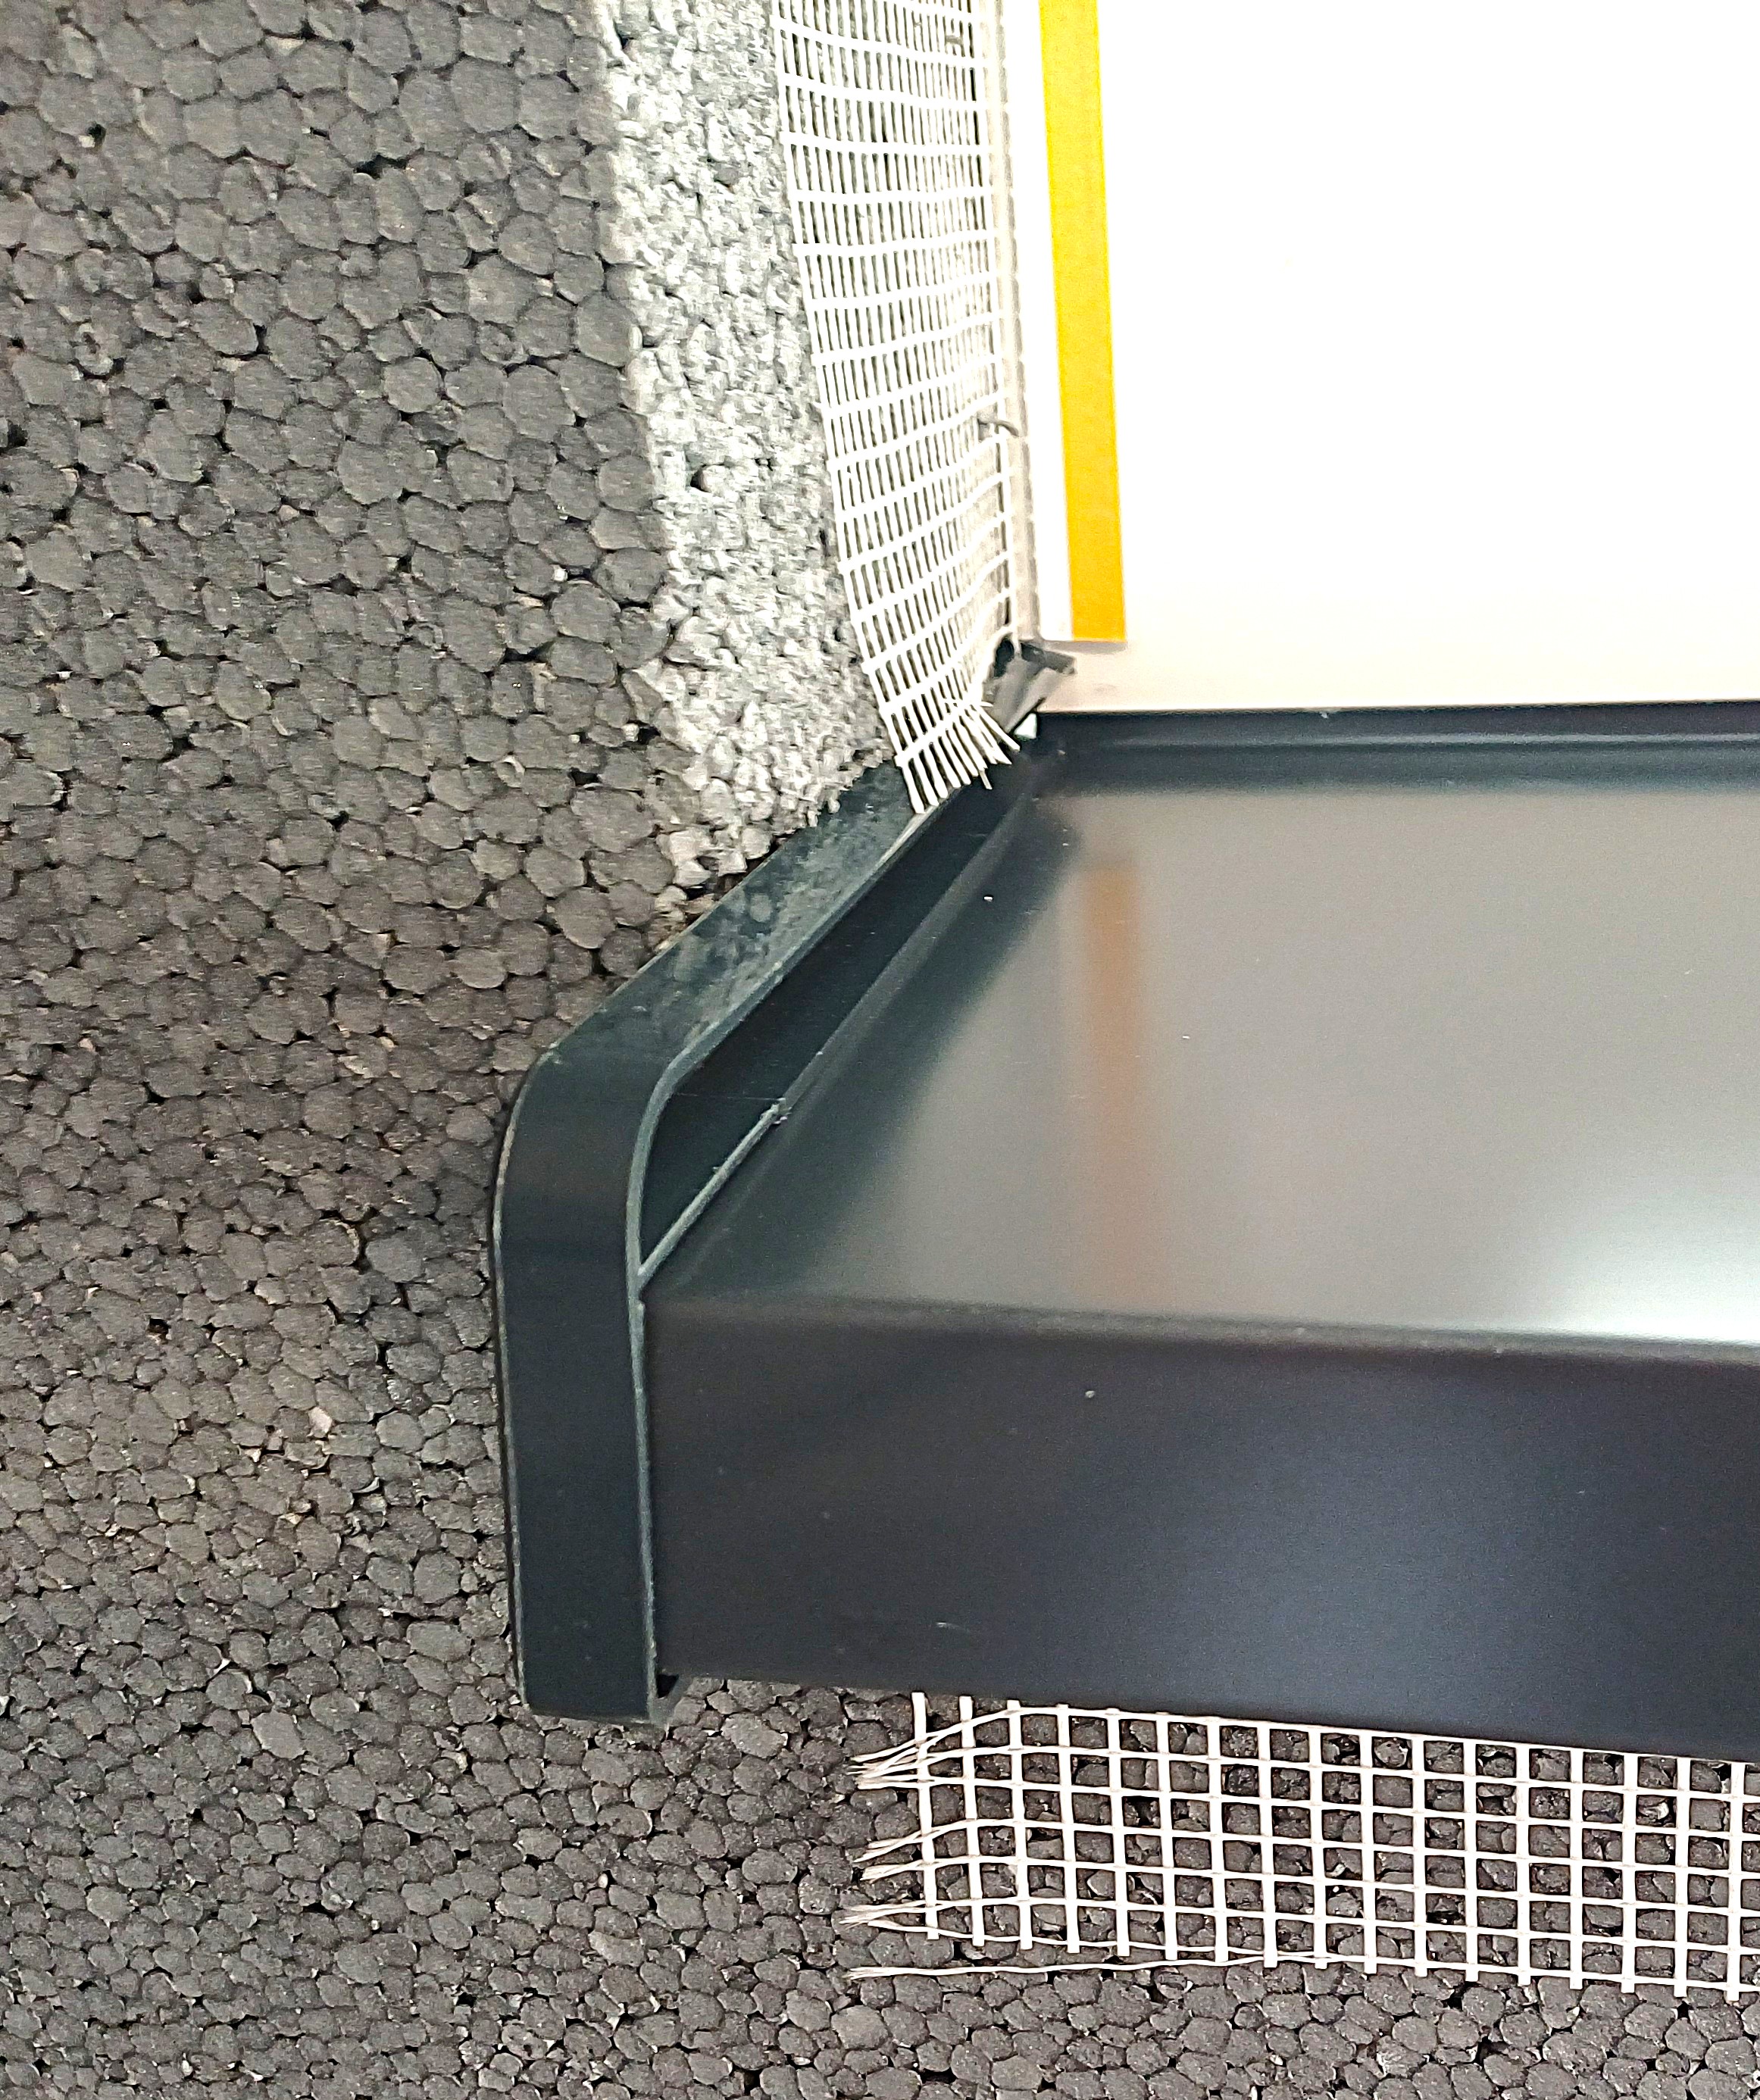
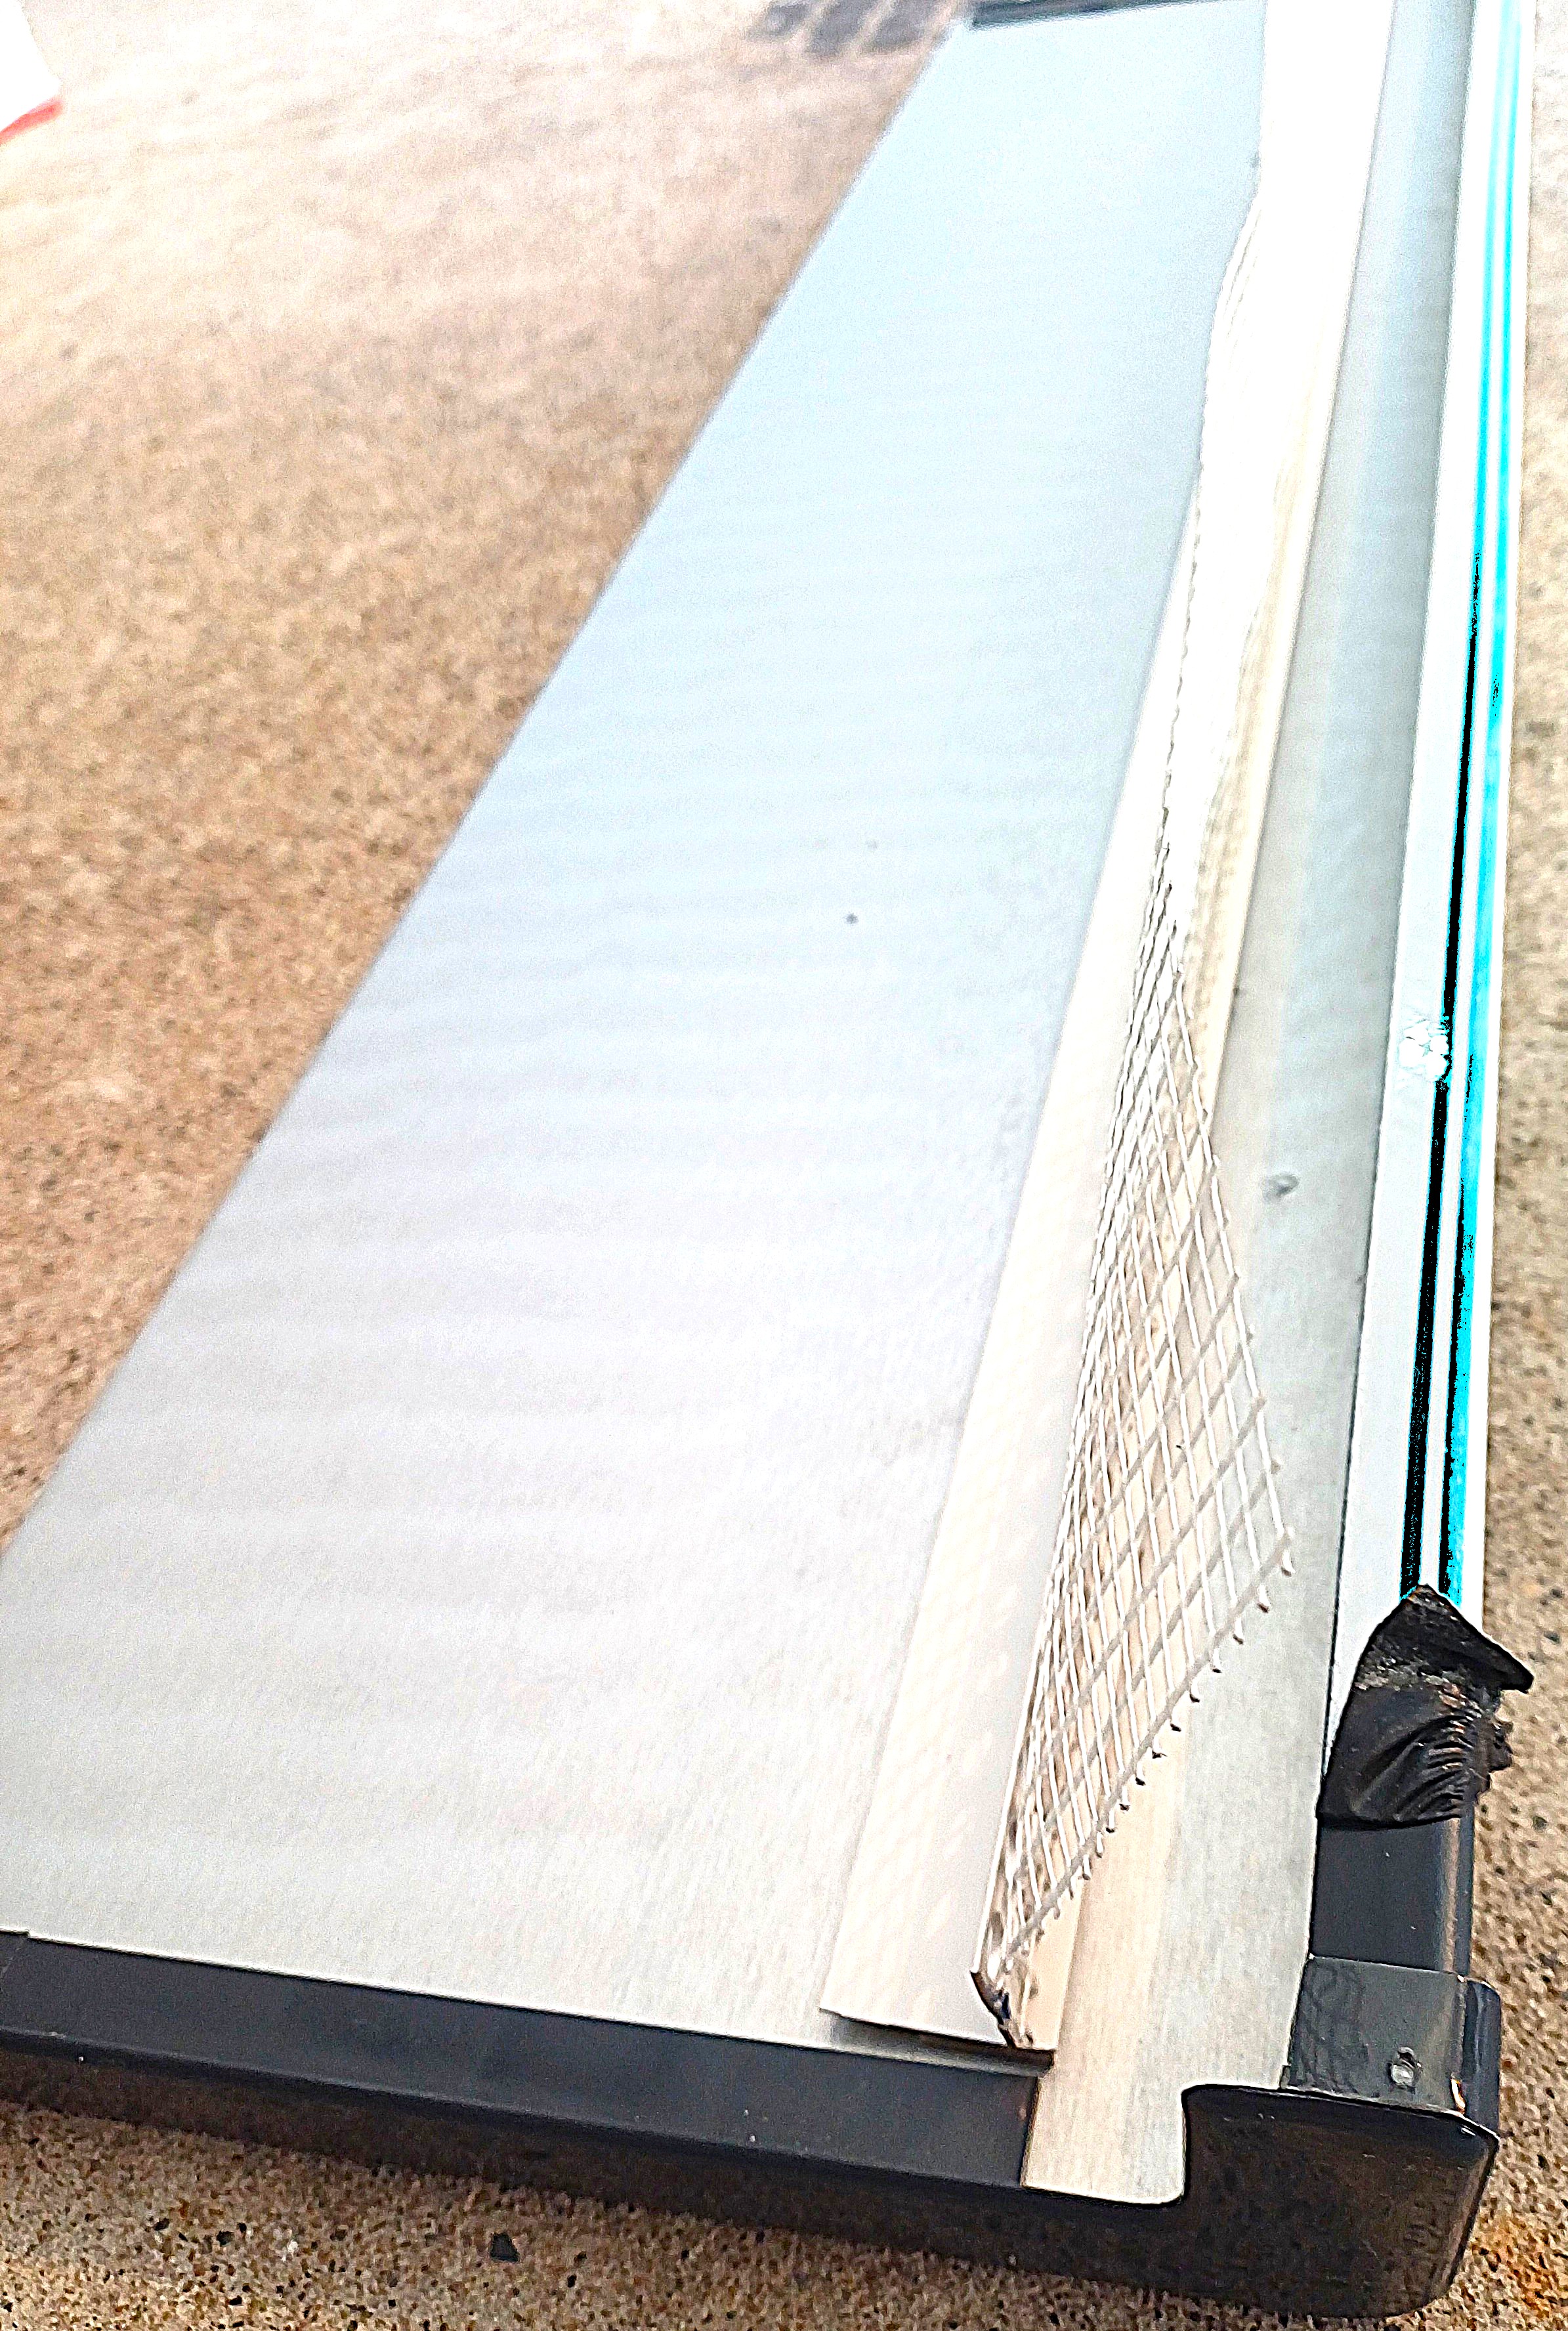
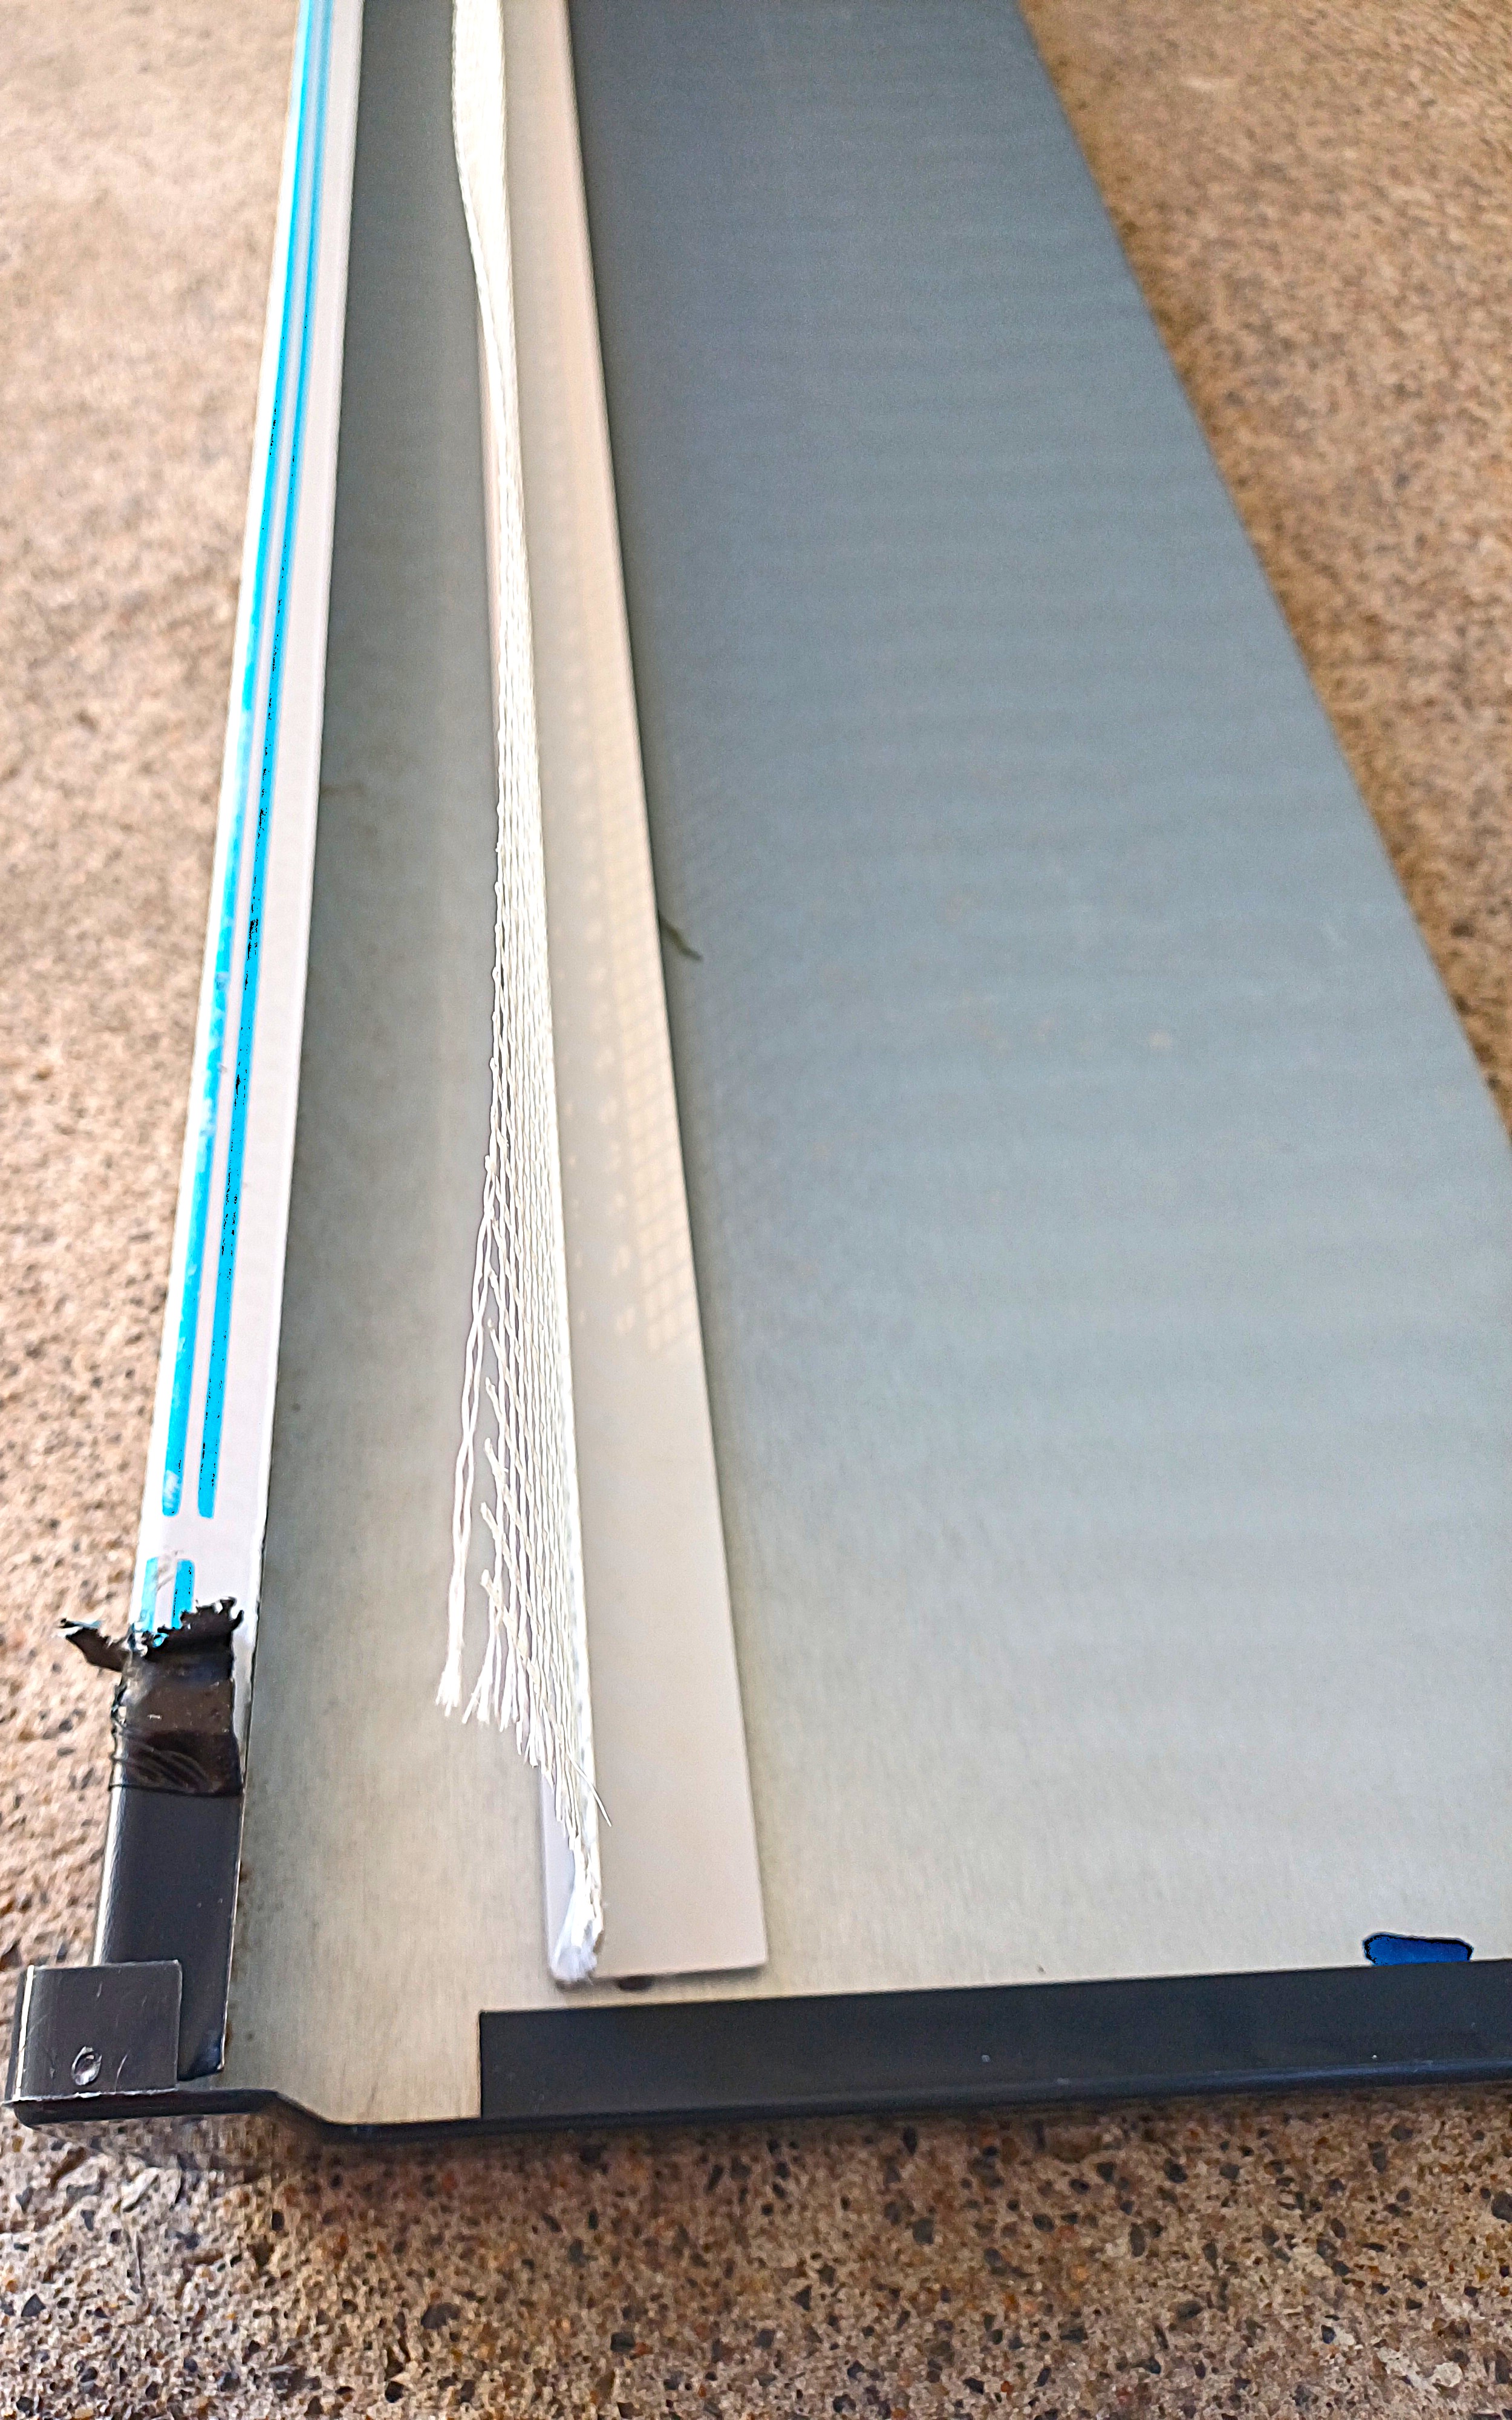
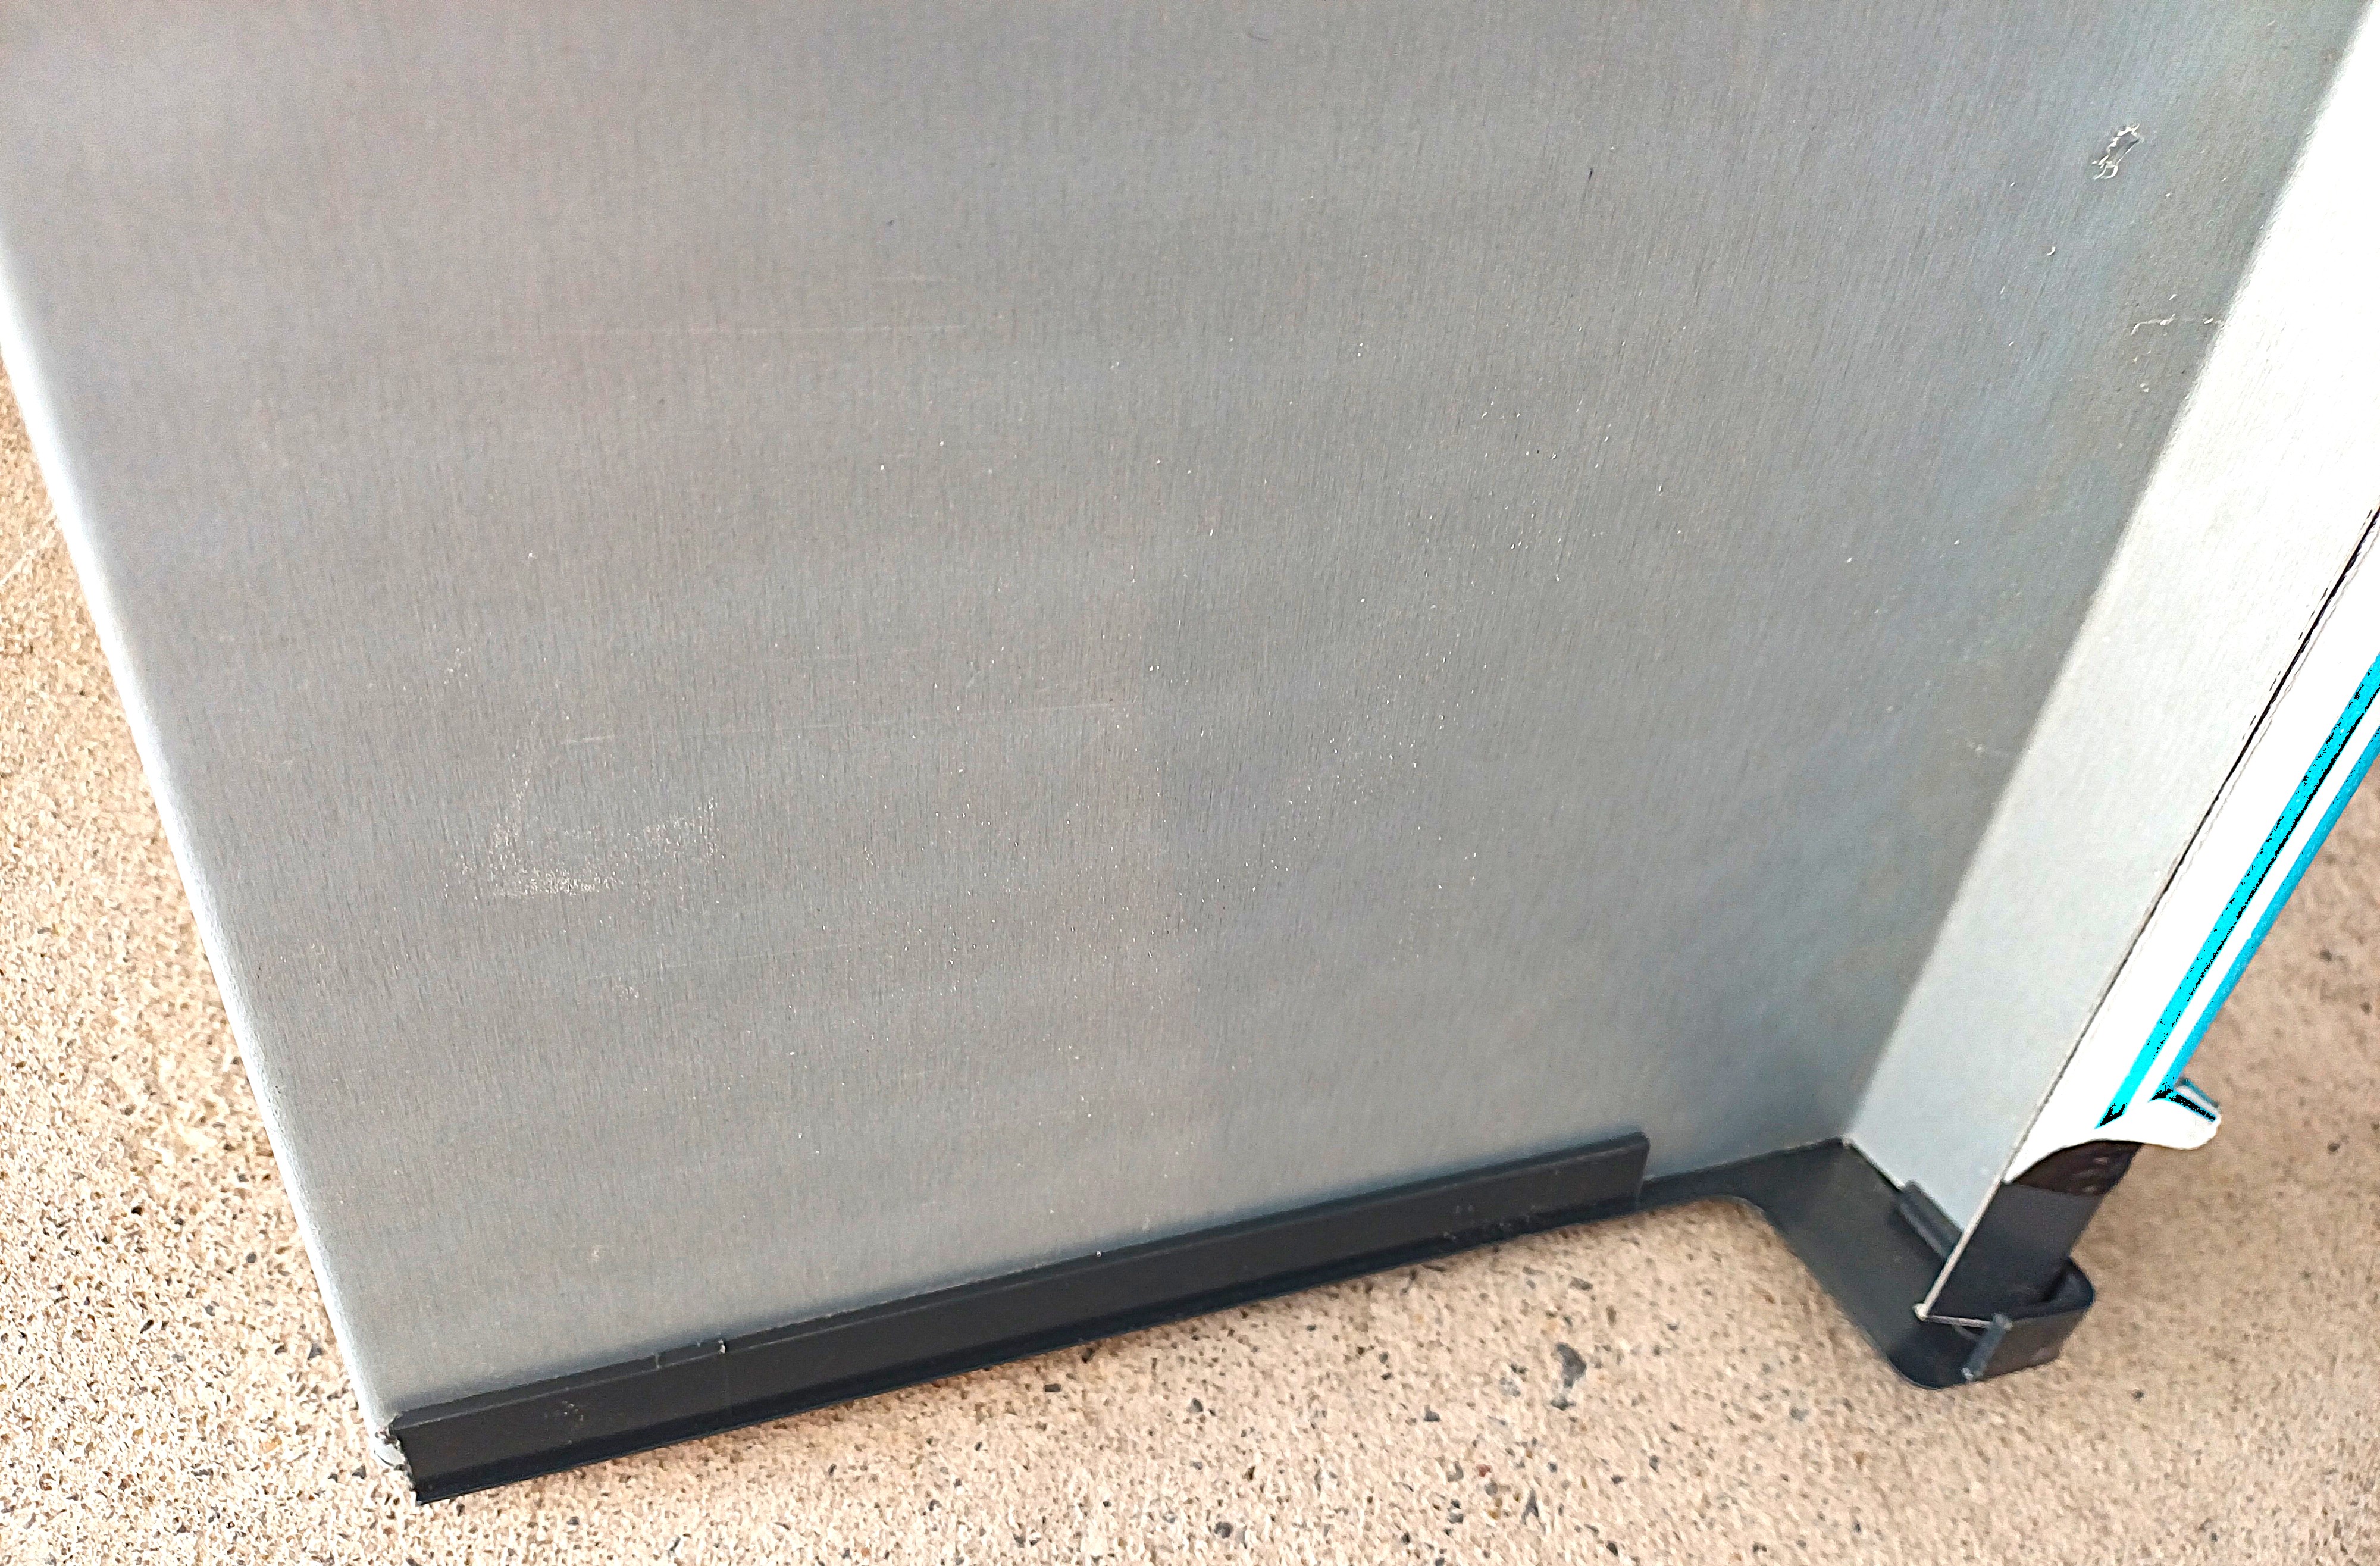
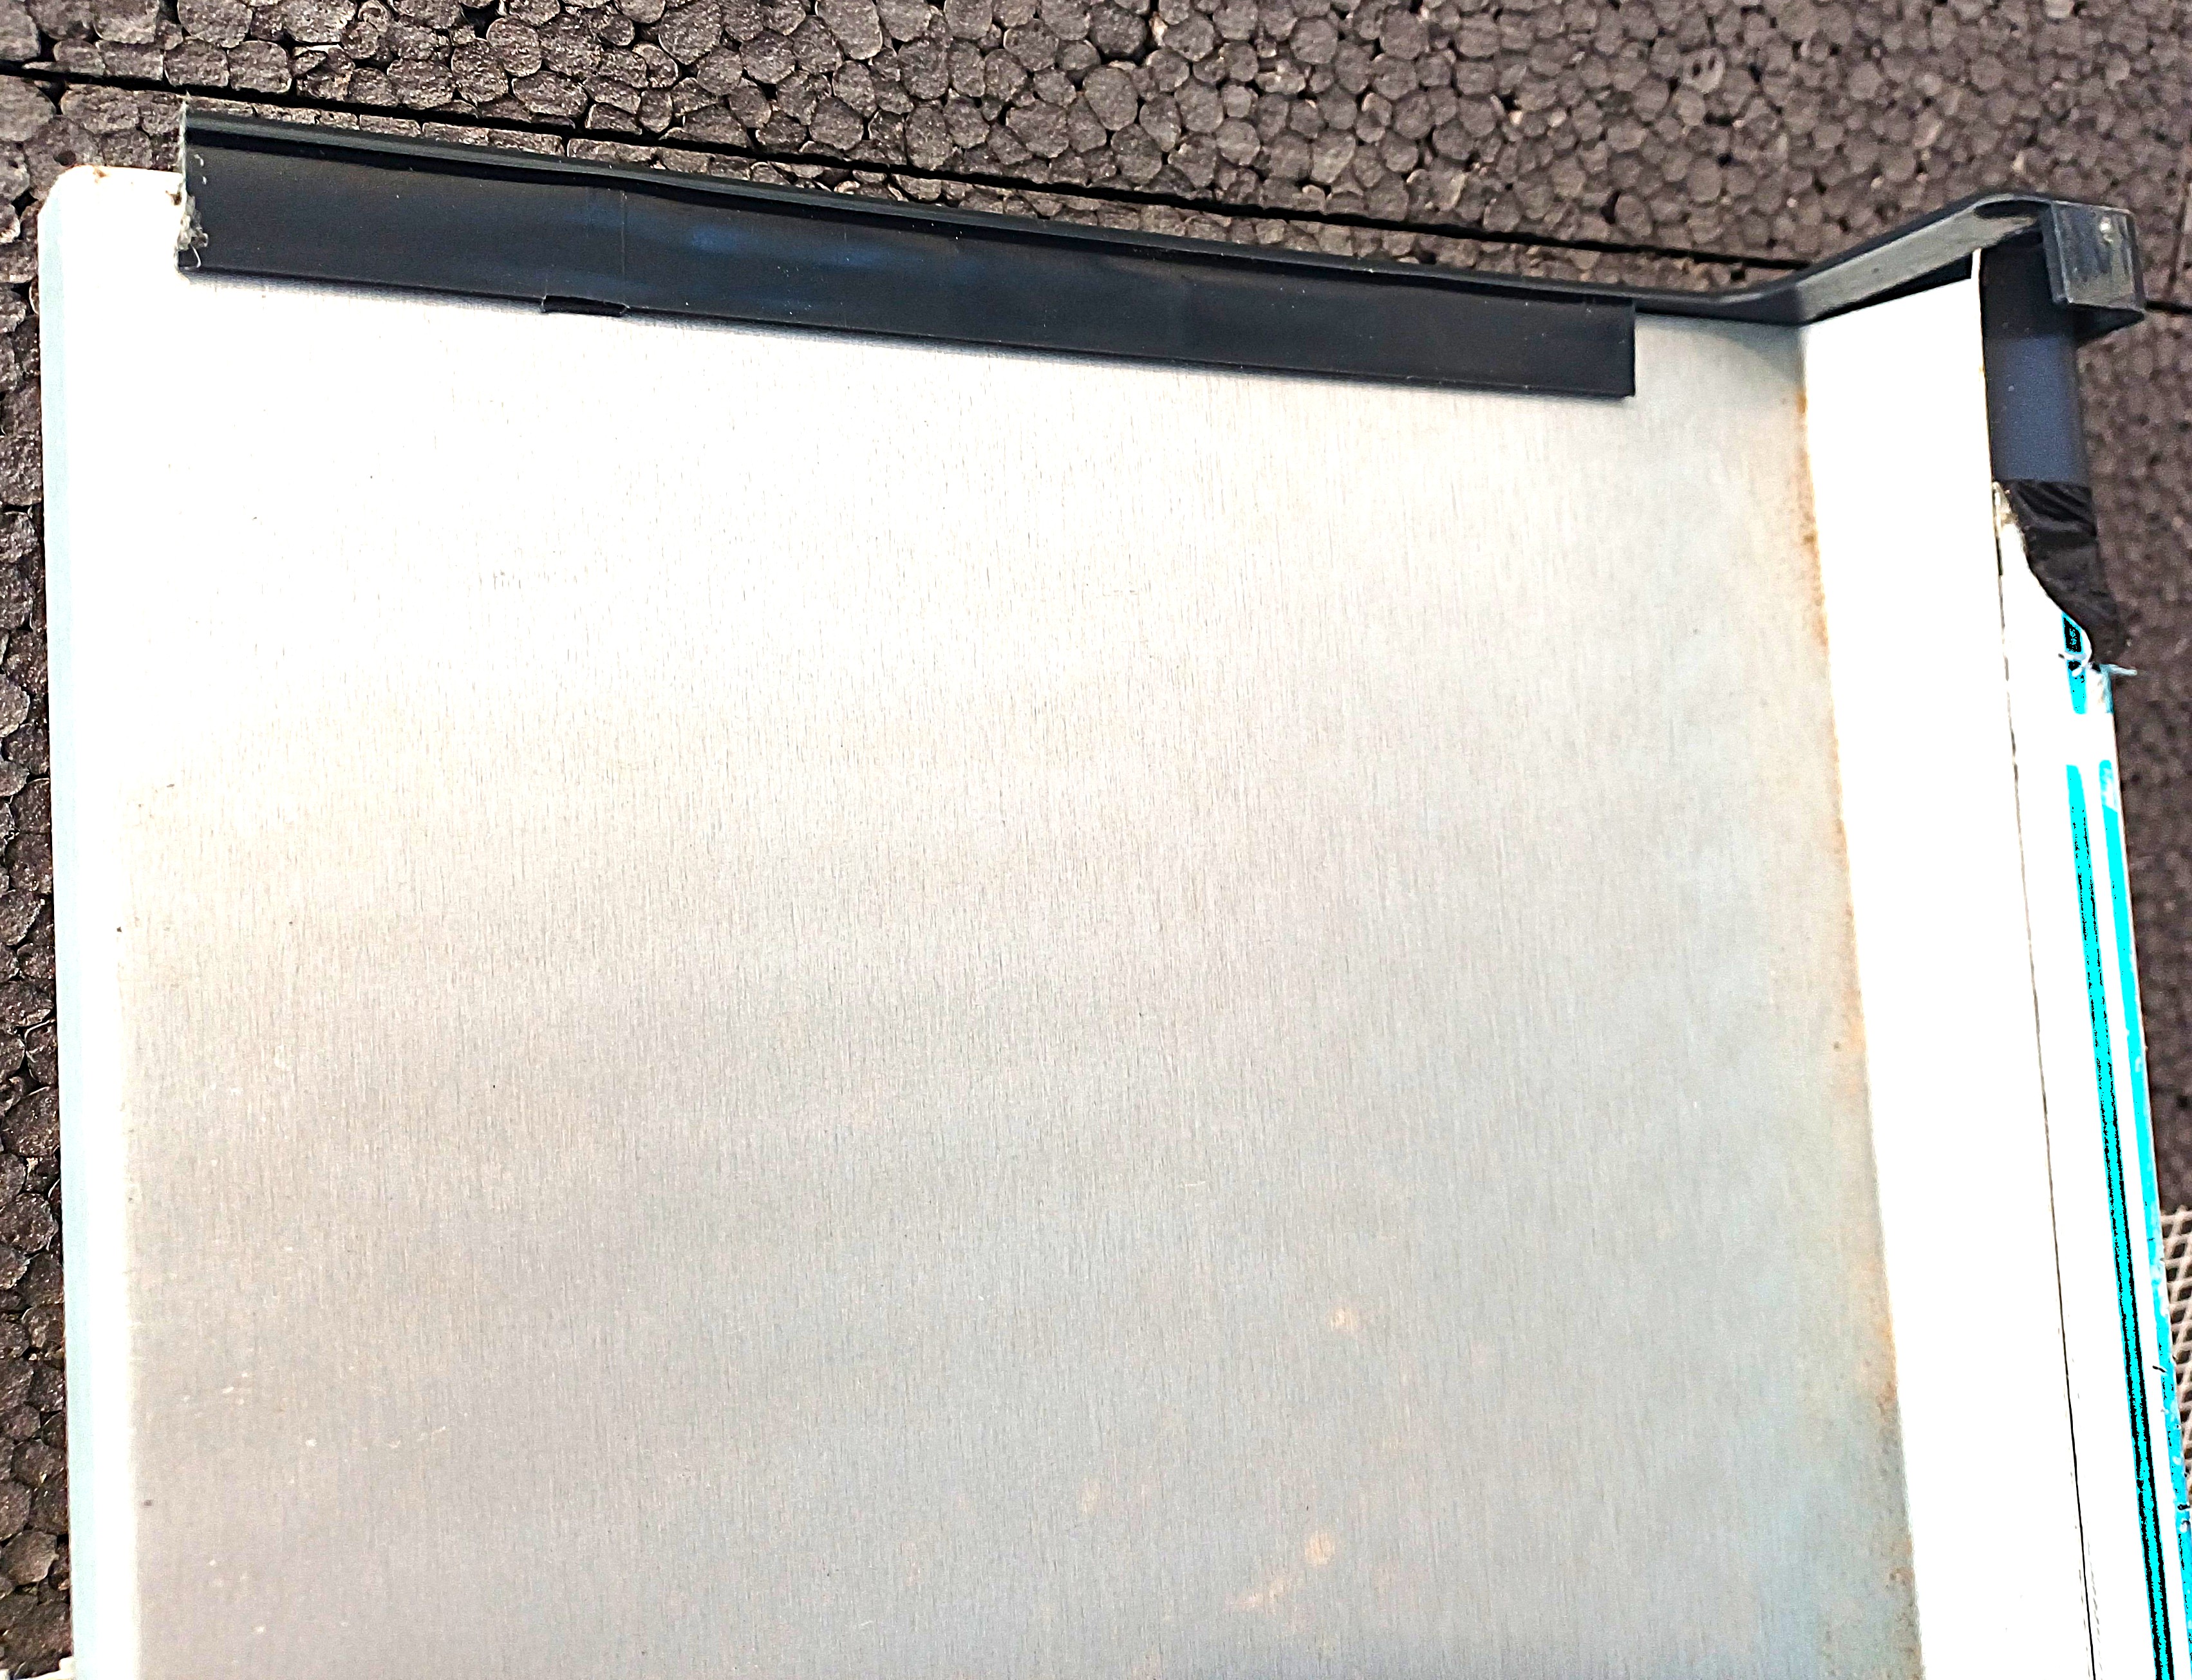
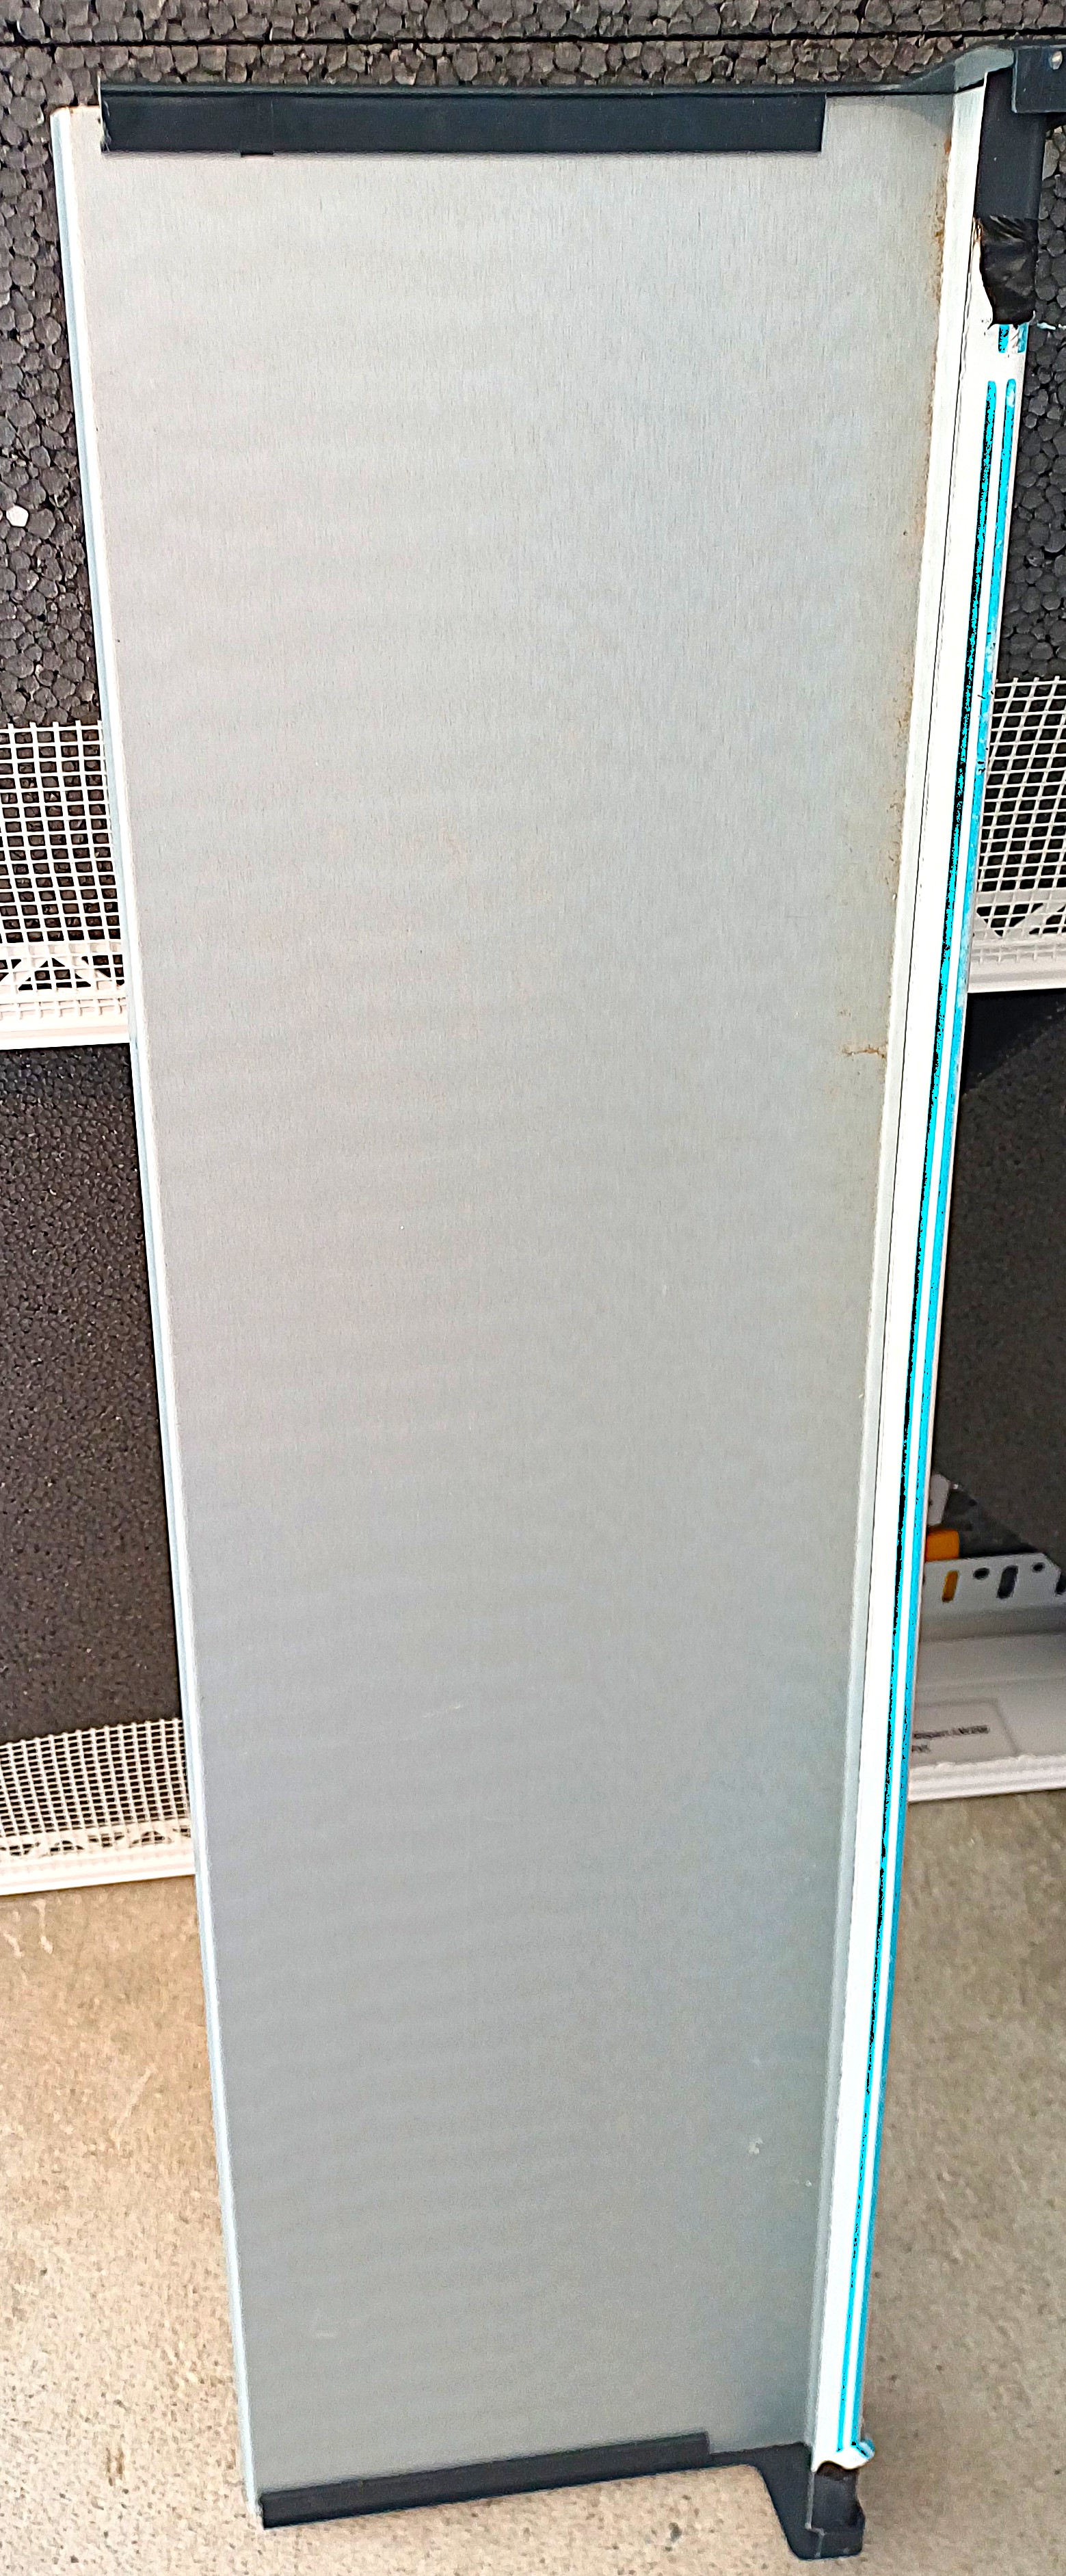
Once the PZA aluminum sill is cut, the pair of KZ end caps must be fitted by trimming them so that they sit flush against the raised edge of the PZA aluminum sill, which must be inserted into the slot provided at the bottom of the chassis
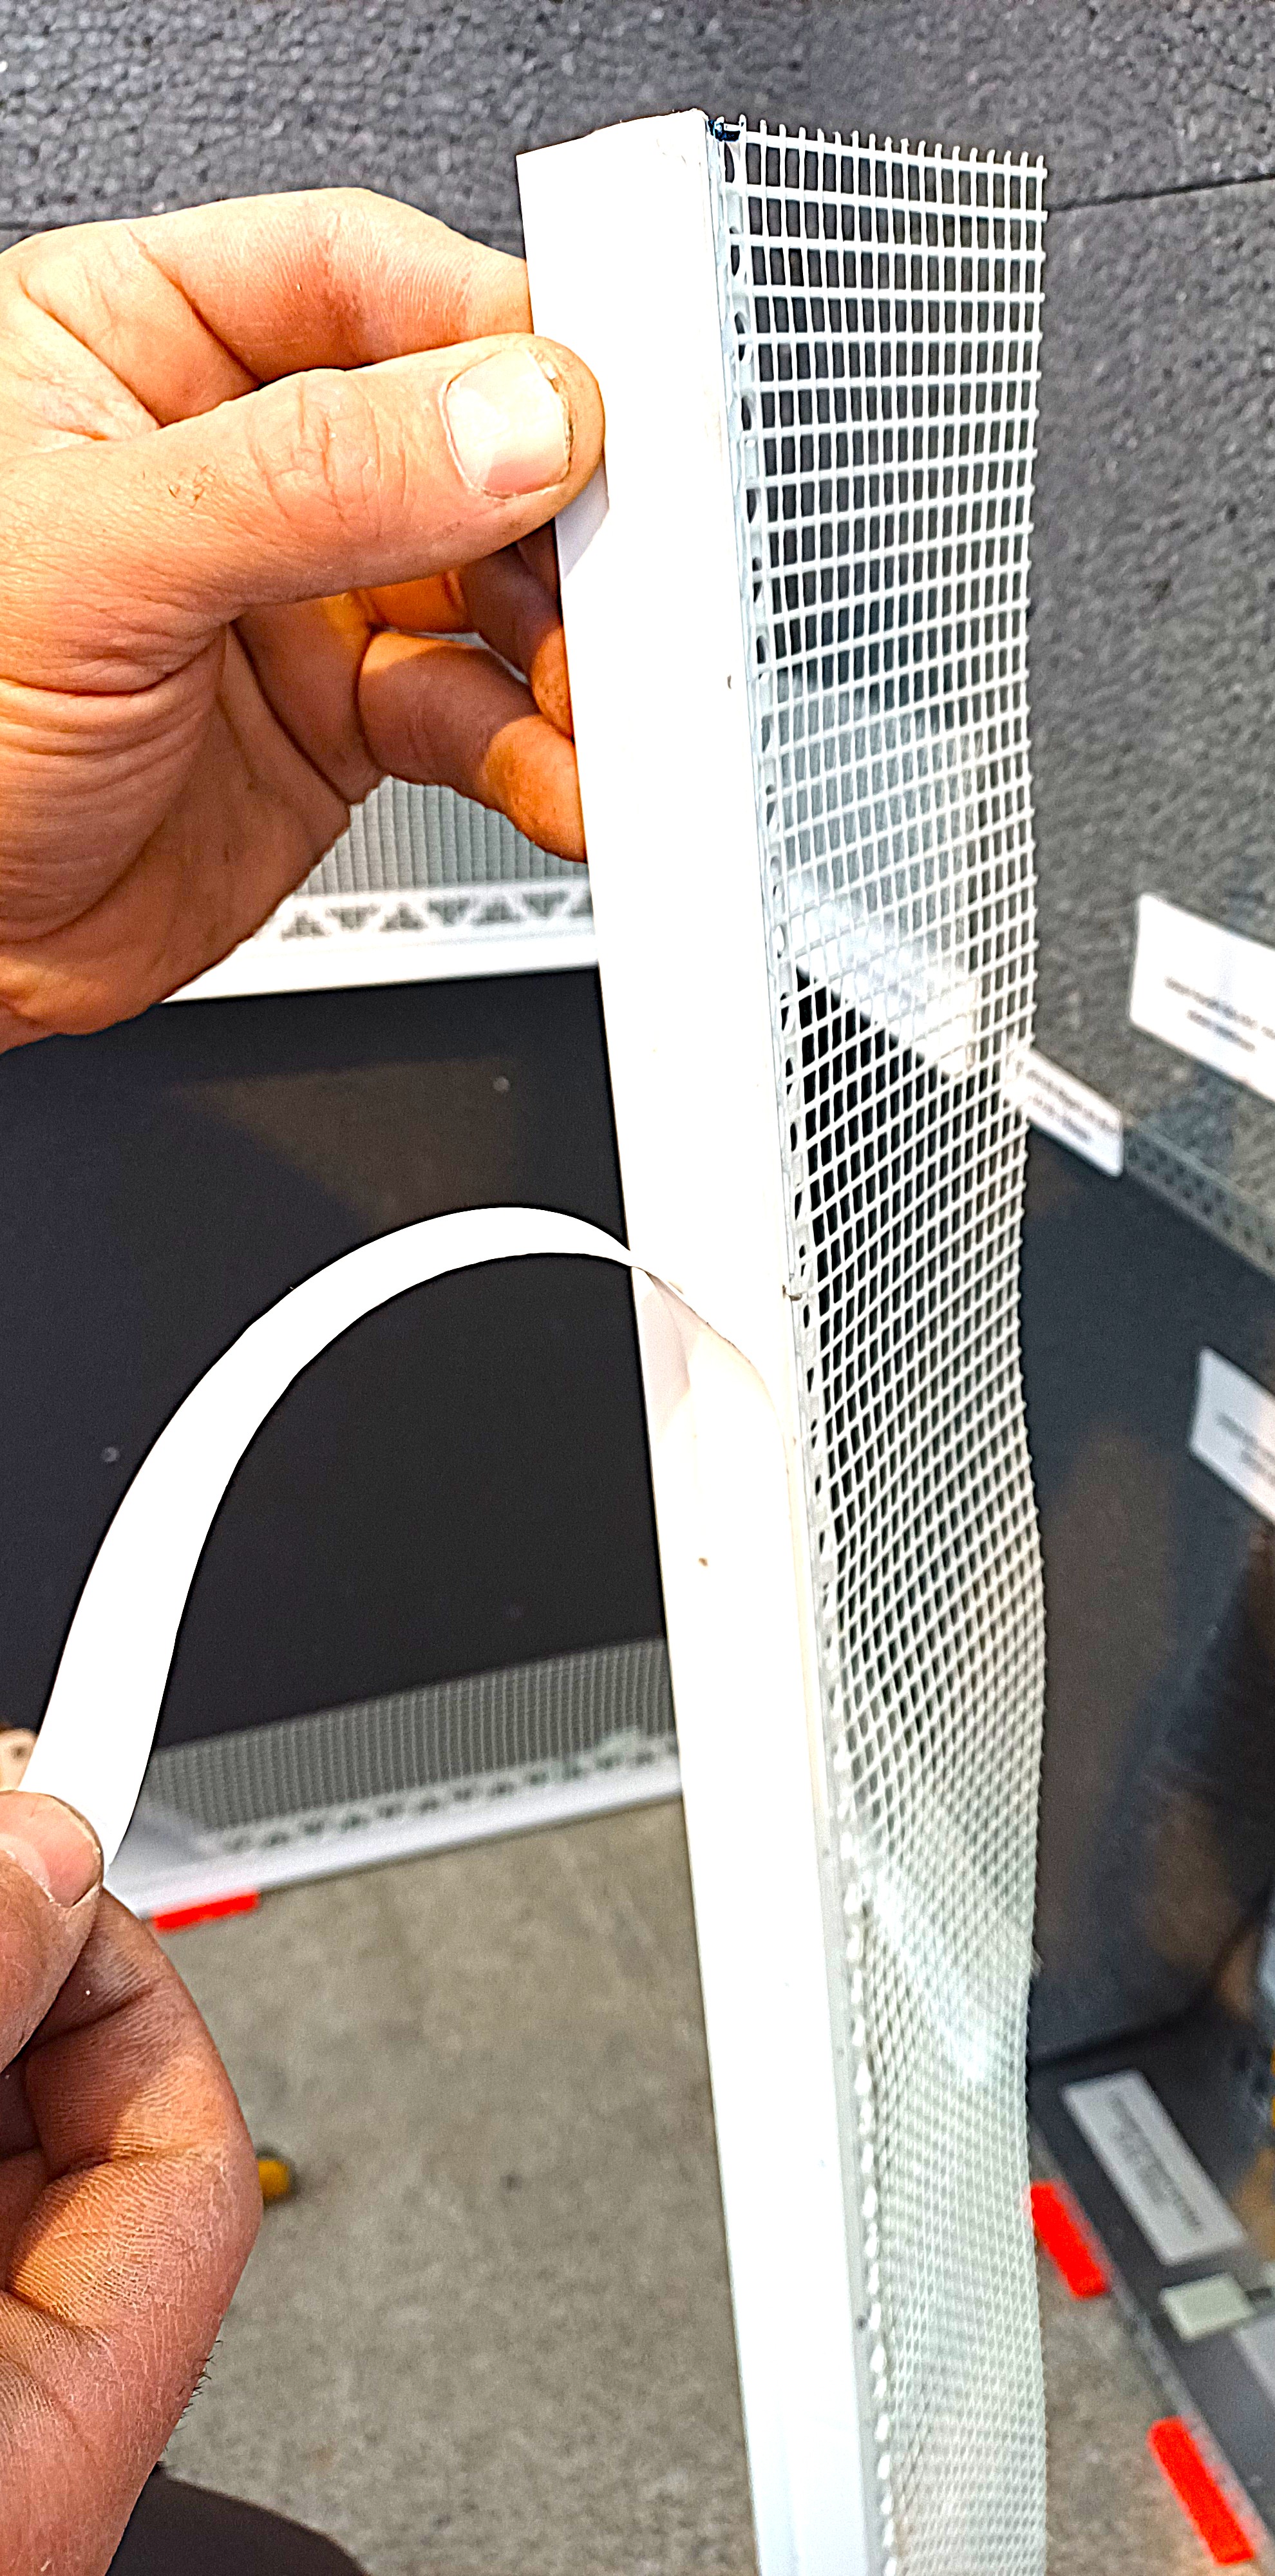
LX-LPE SILL threshold angle bracket: cut this angle bracket to the distance between the inside edges of the two KZ end caps to be placed on either side of the aluminum thresholds
This LX-LPE SILL angle bracket is equipped with a reinforcing mesh and is important because it will connect the PZA aluminum thresholds to the Adam Matériaux reinforcing mesh placed on the Adam Matériaux EPS insulation
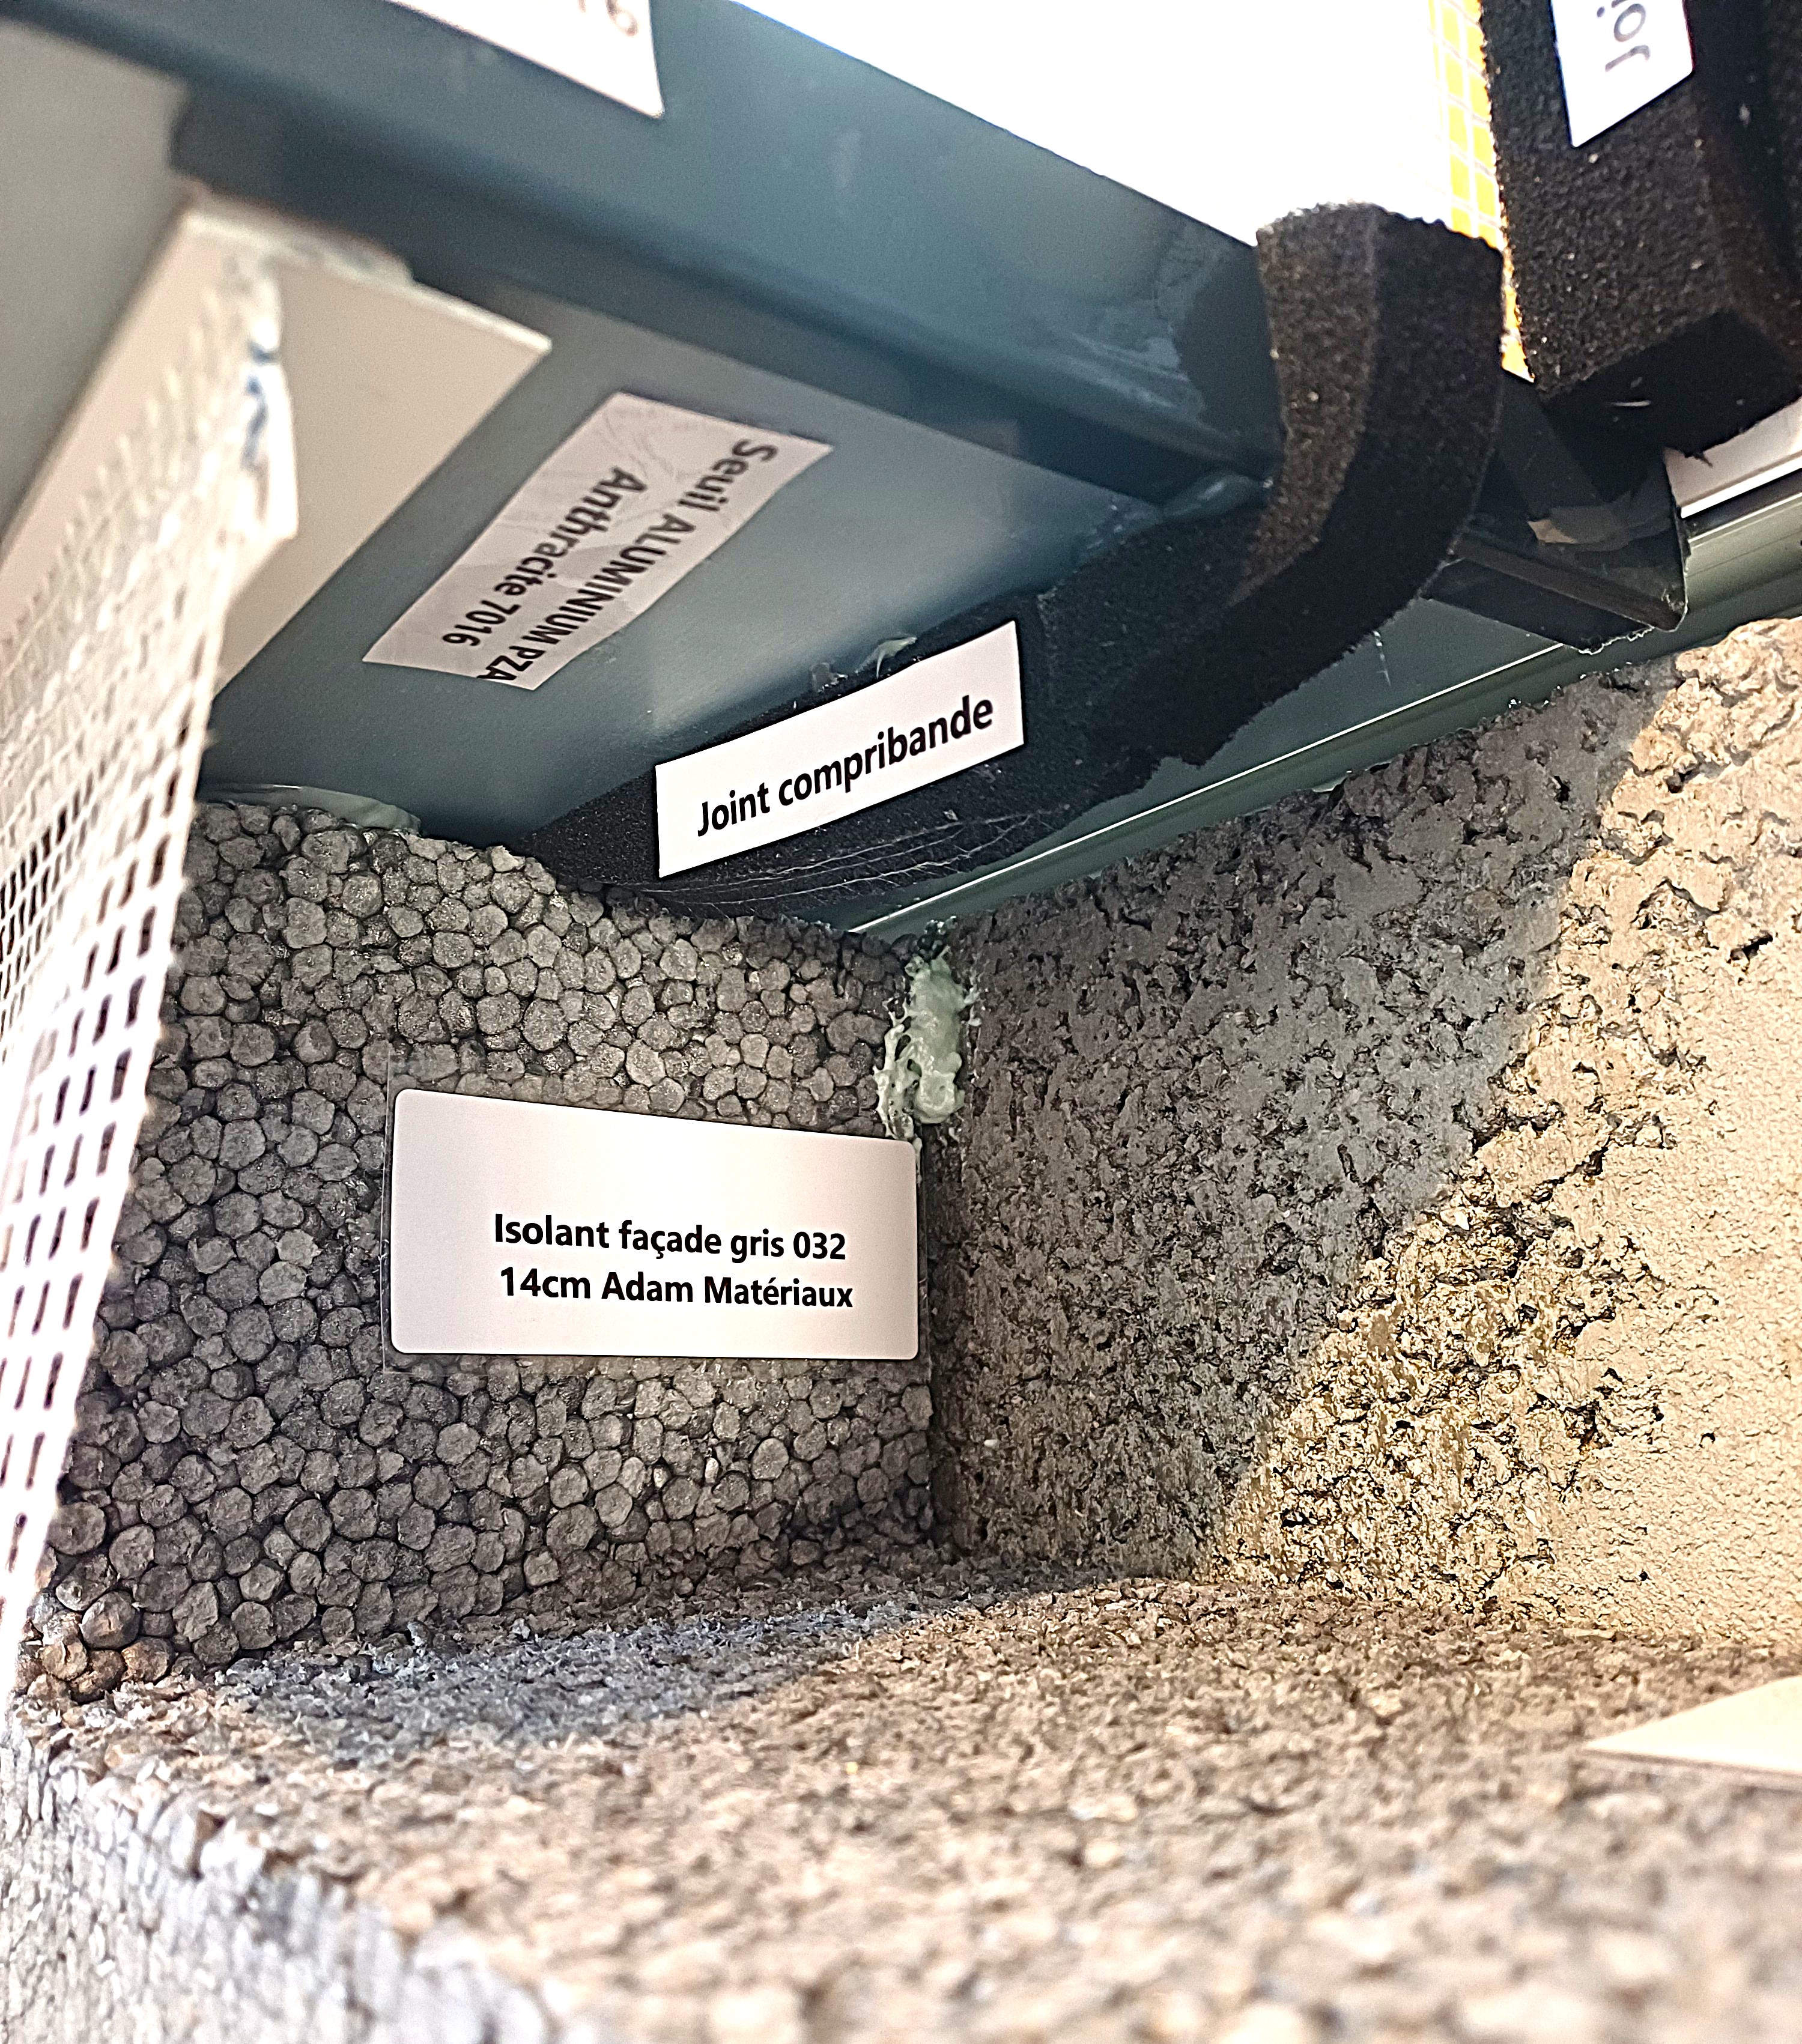
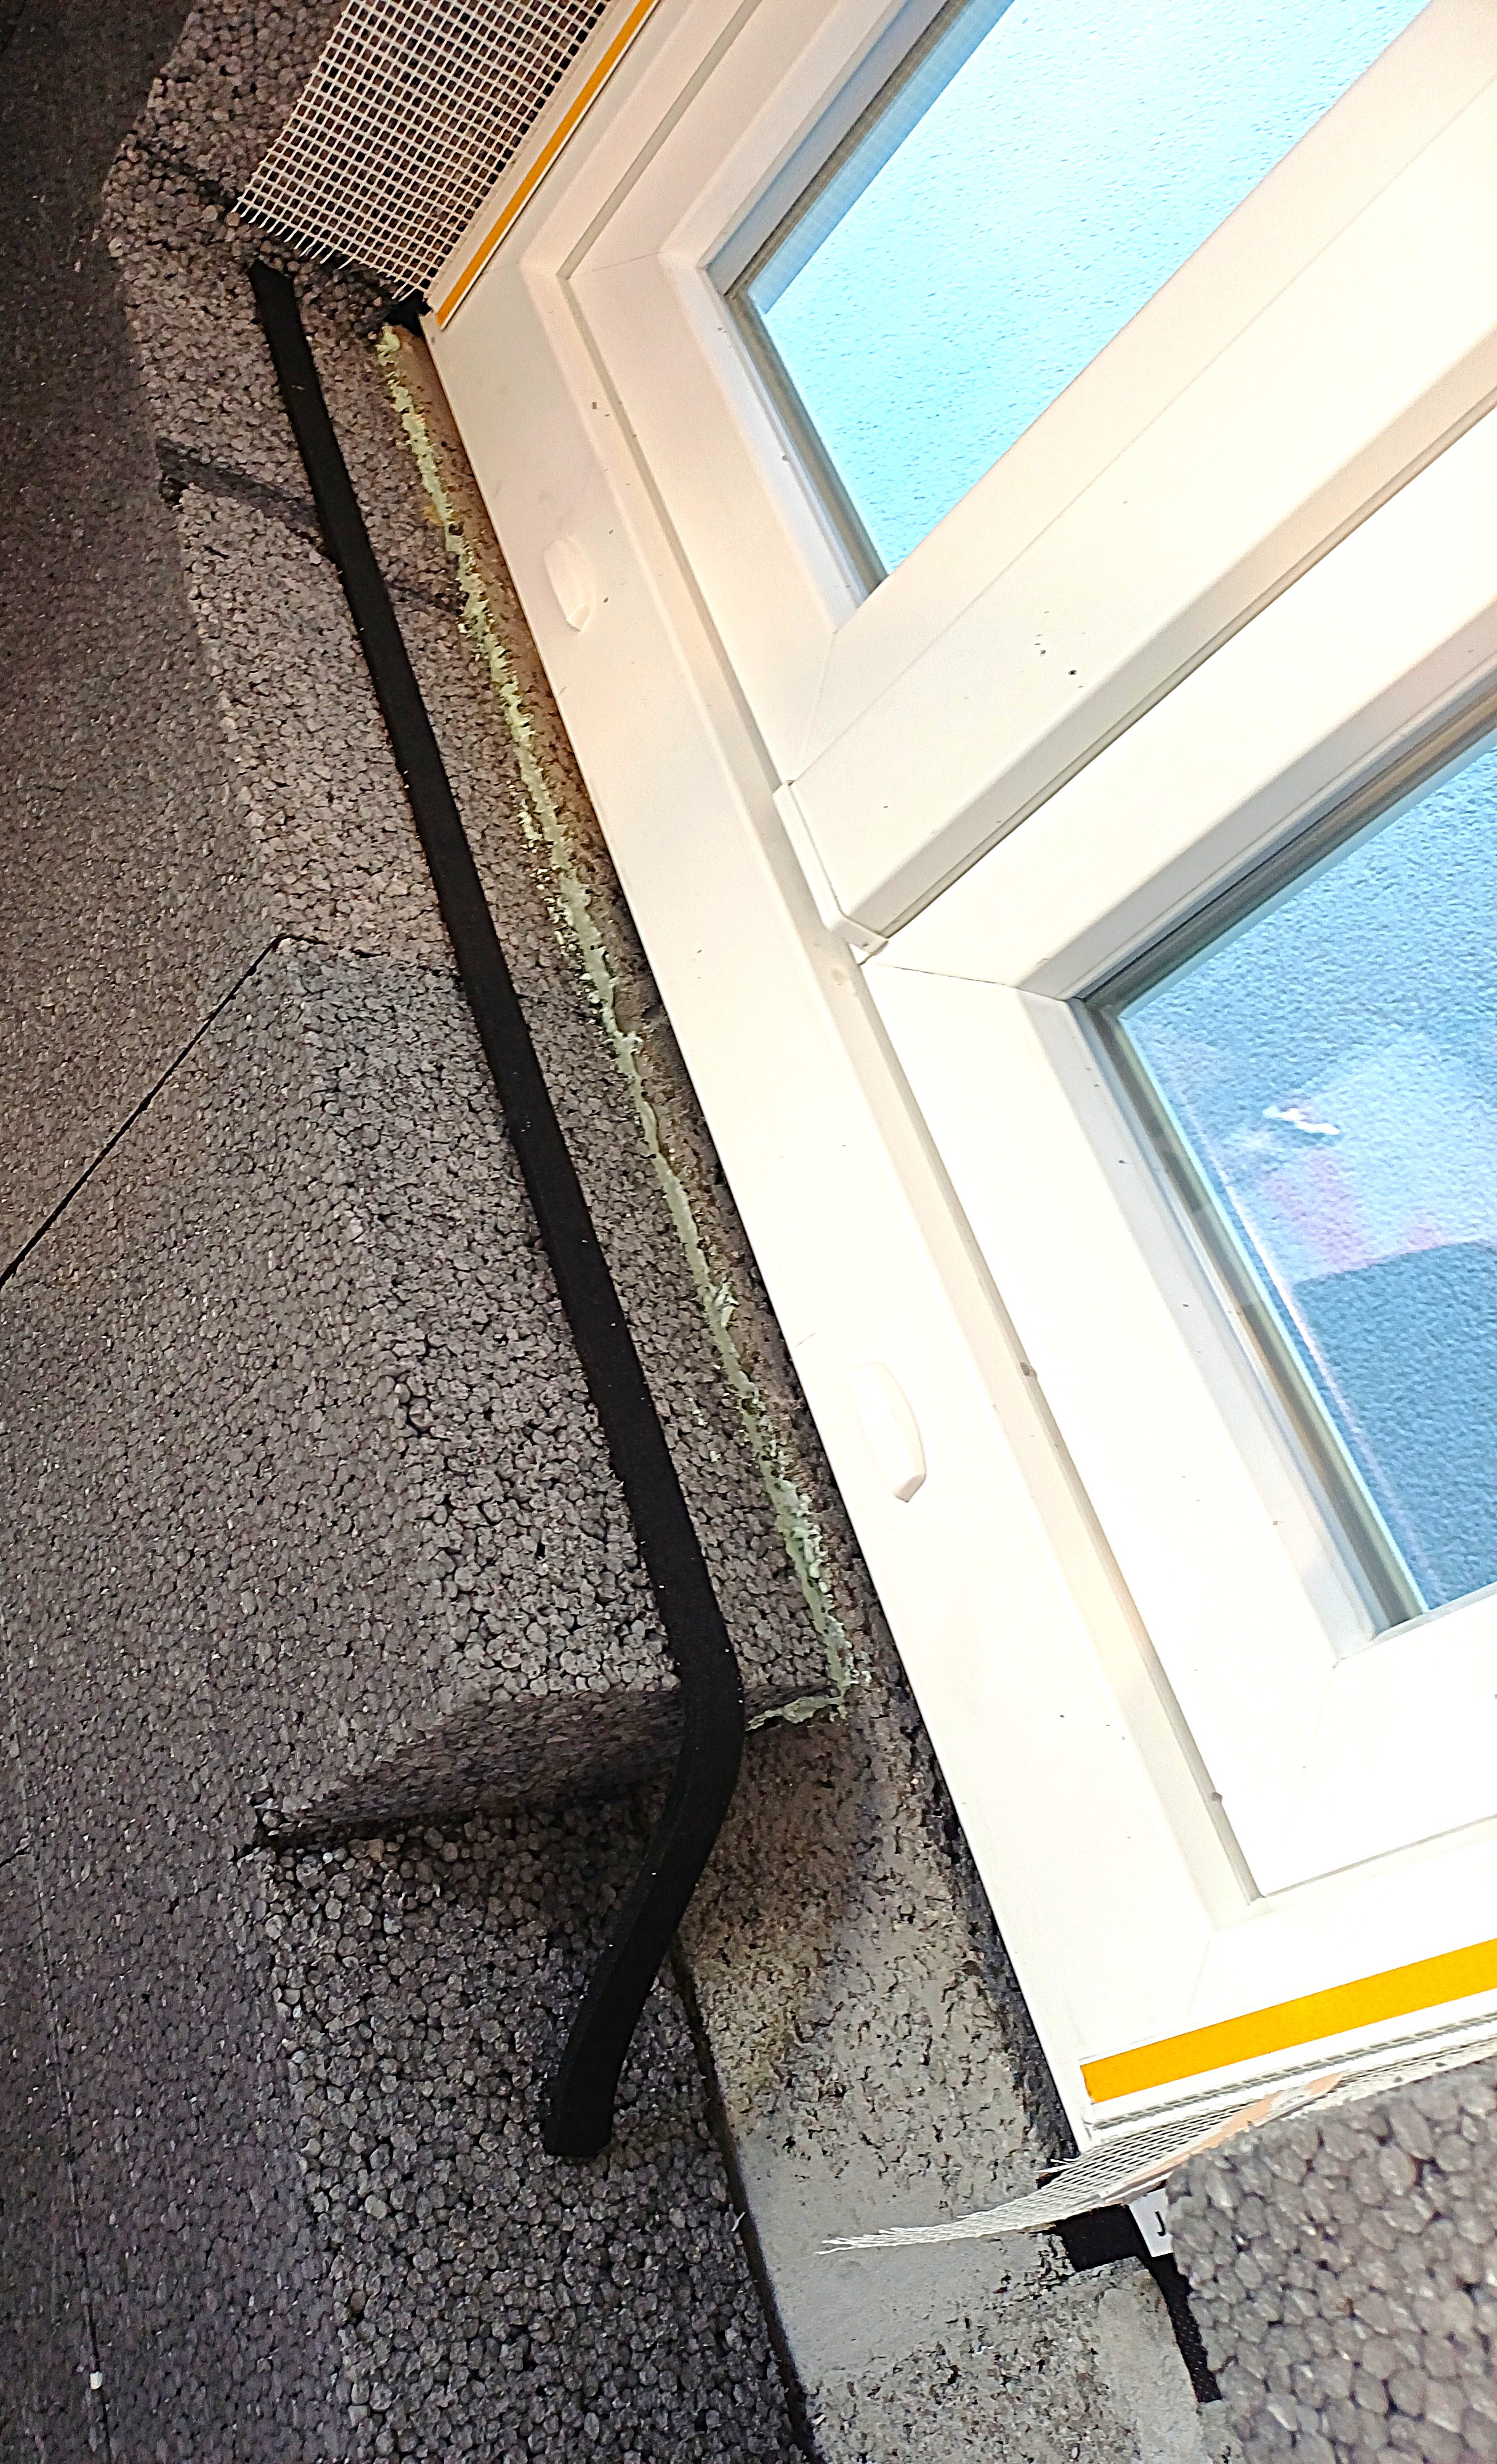
Next, place Adam Matériaux PUR foam between the facade wall and the Adam Matériaux EPS insulation
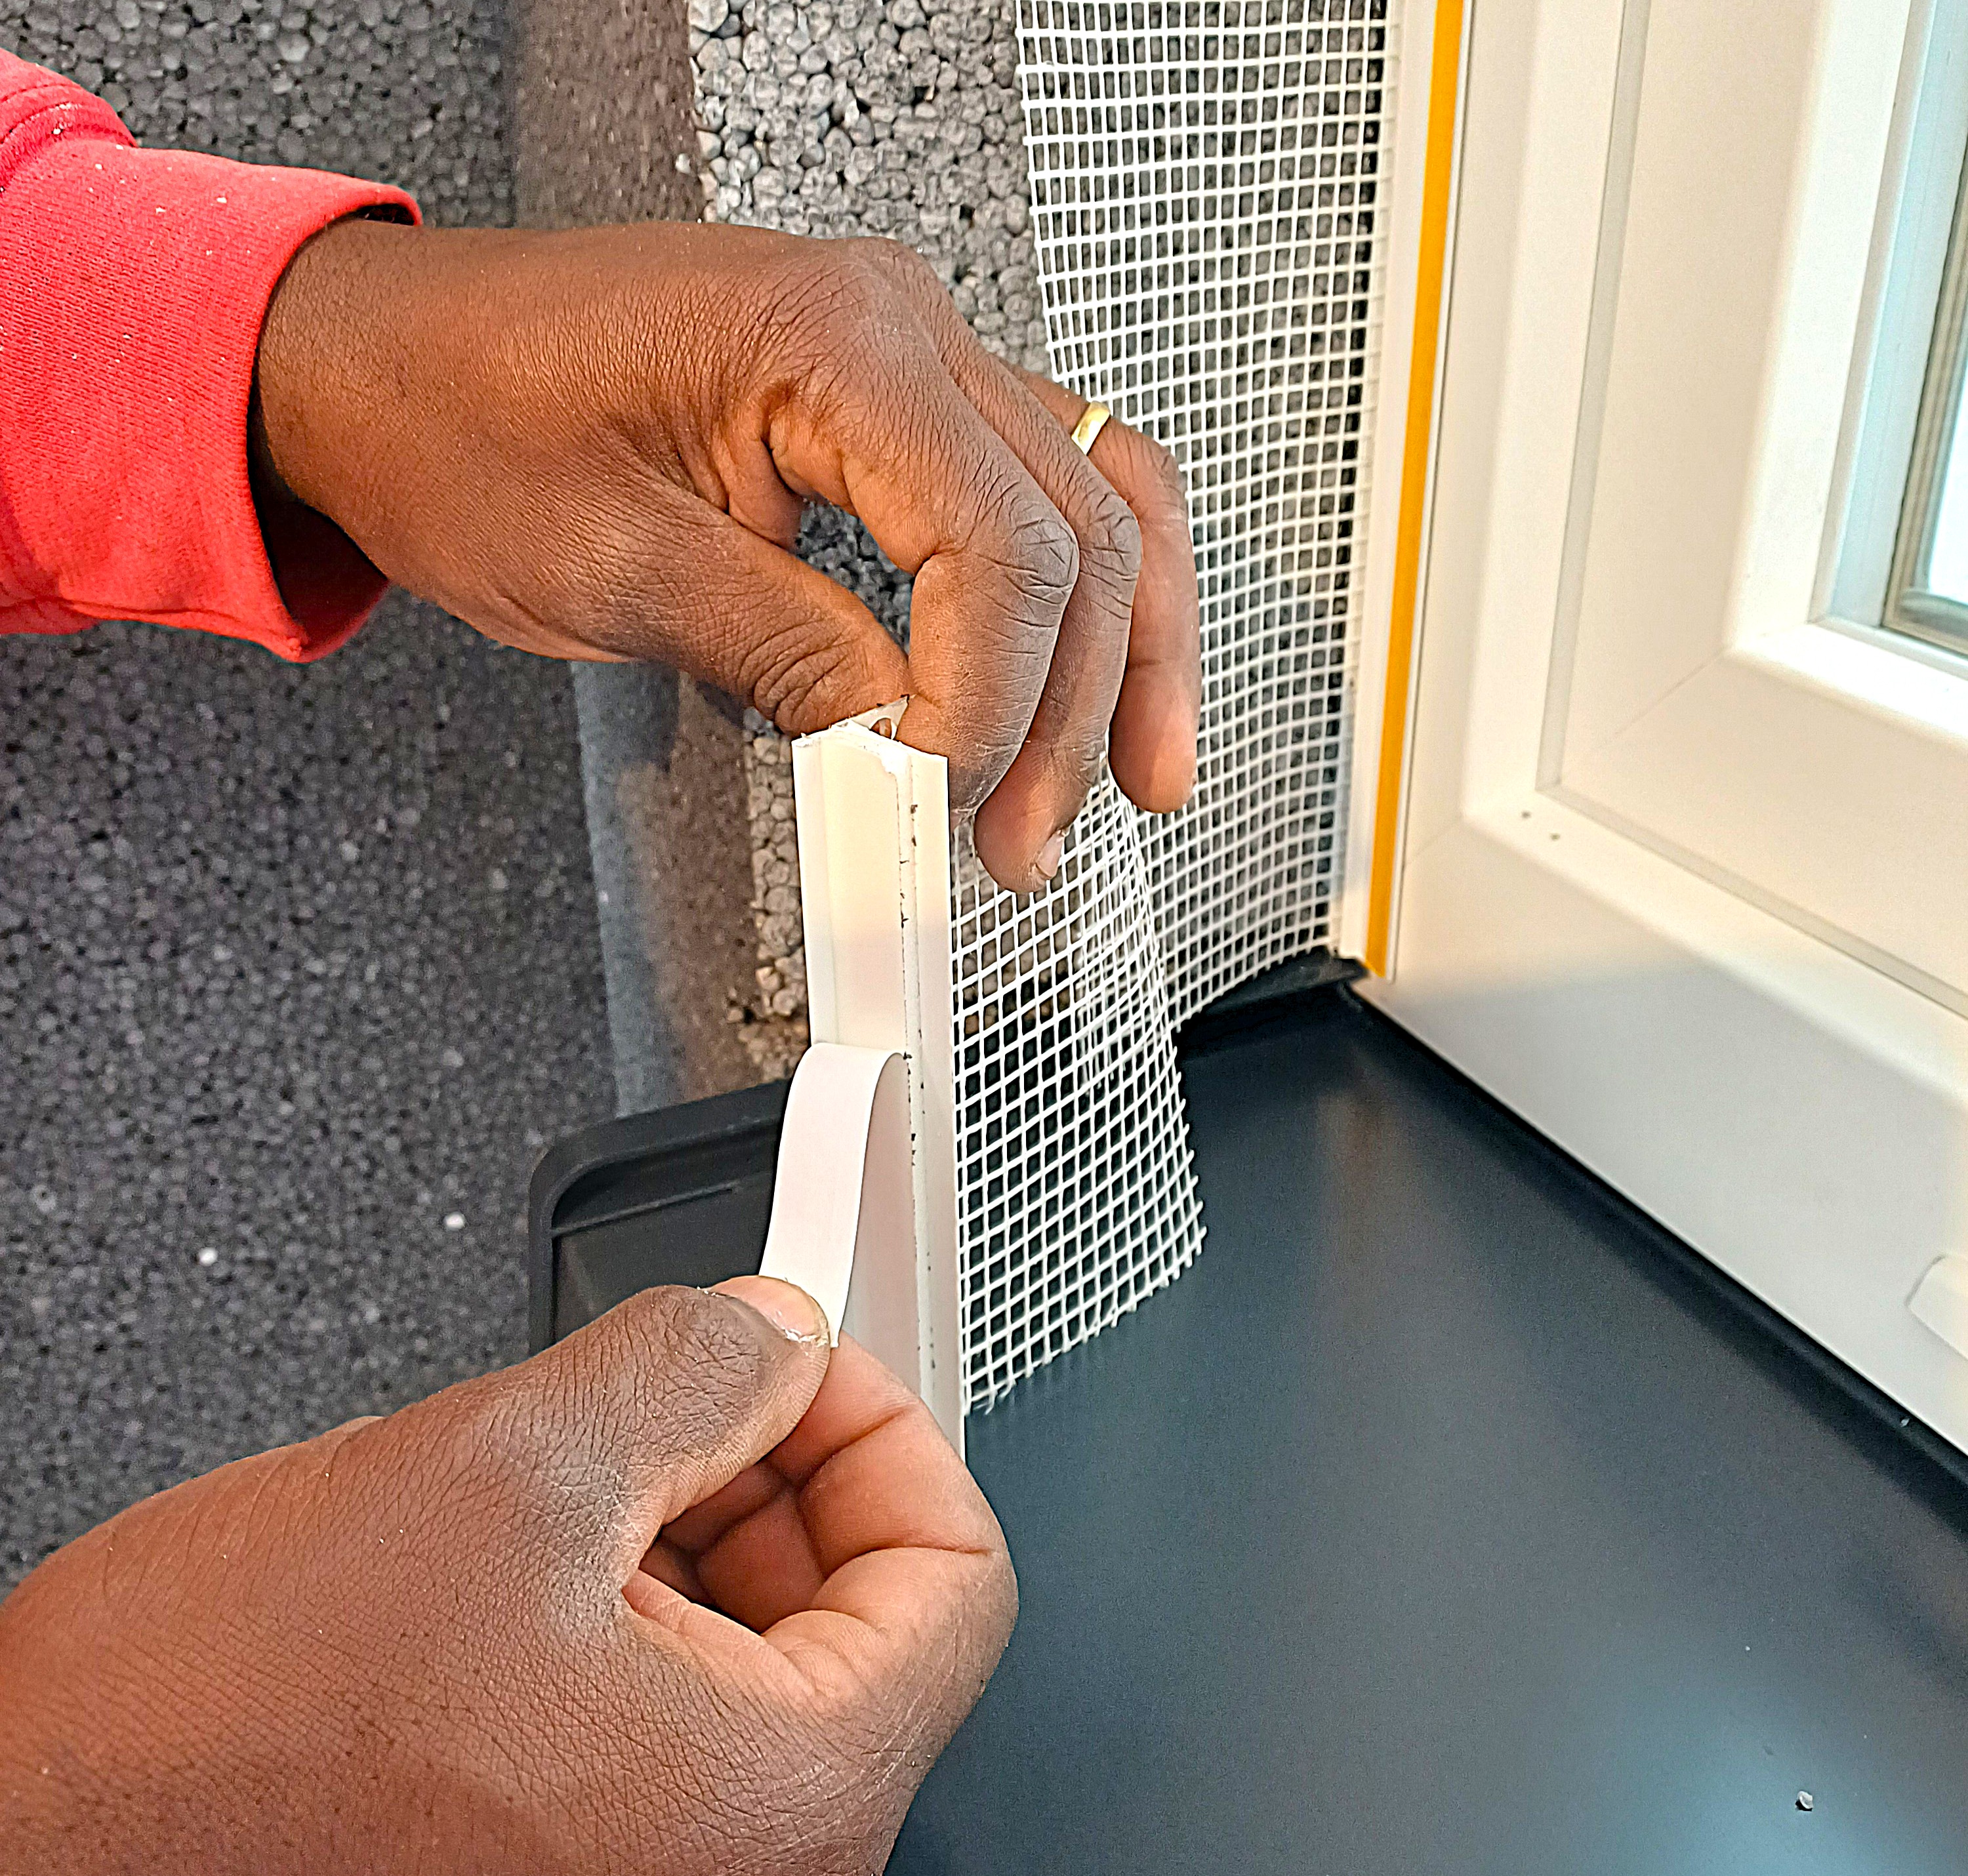
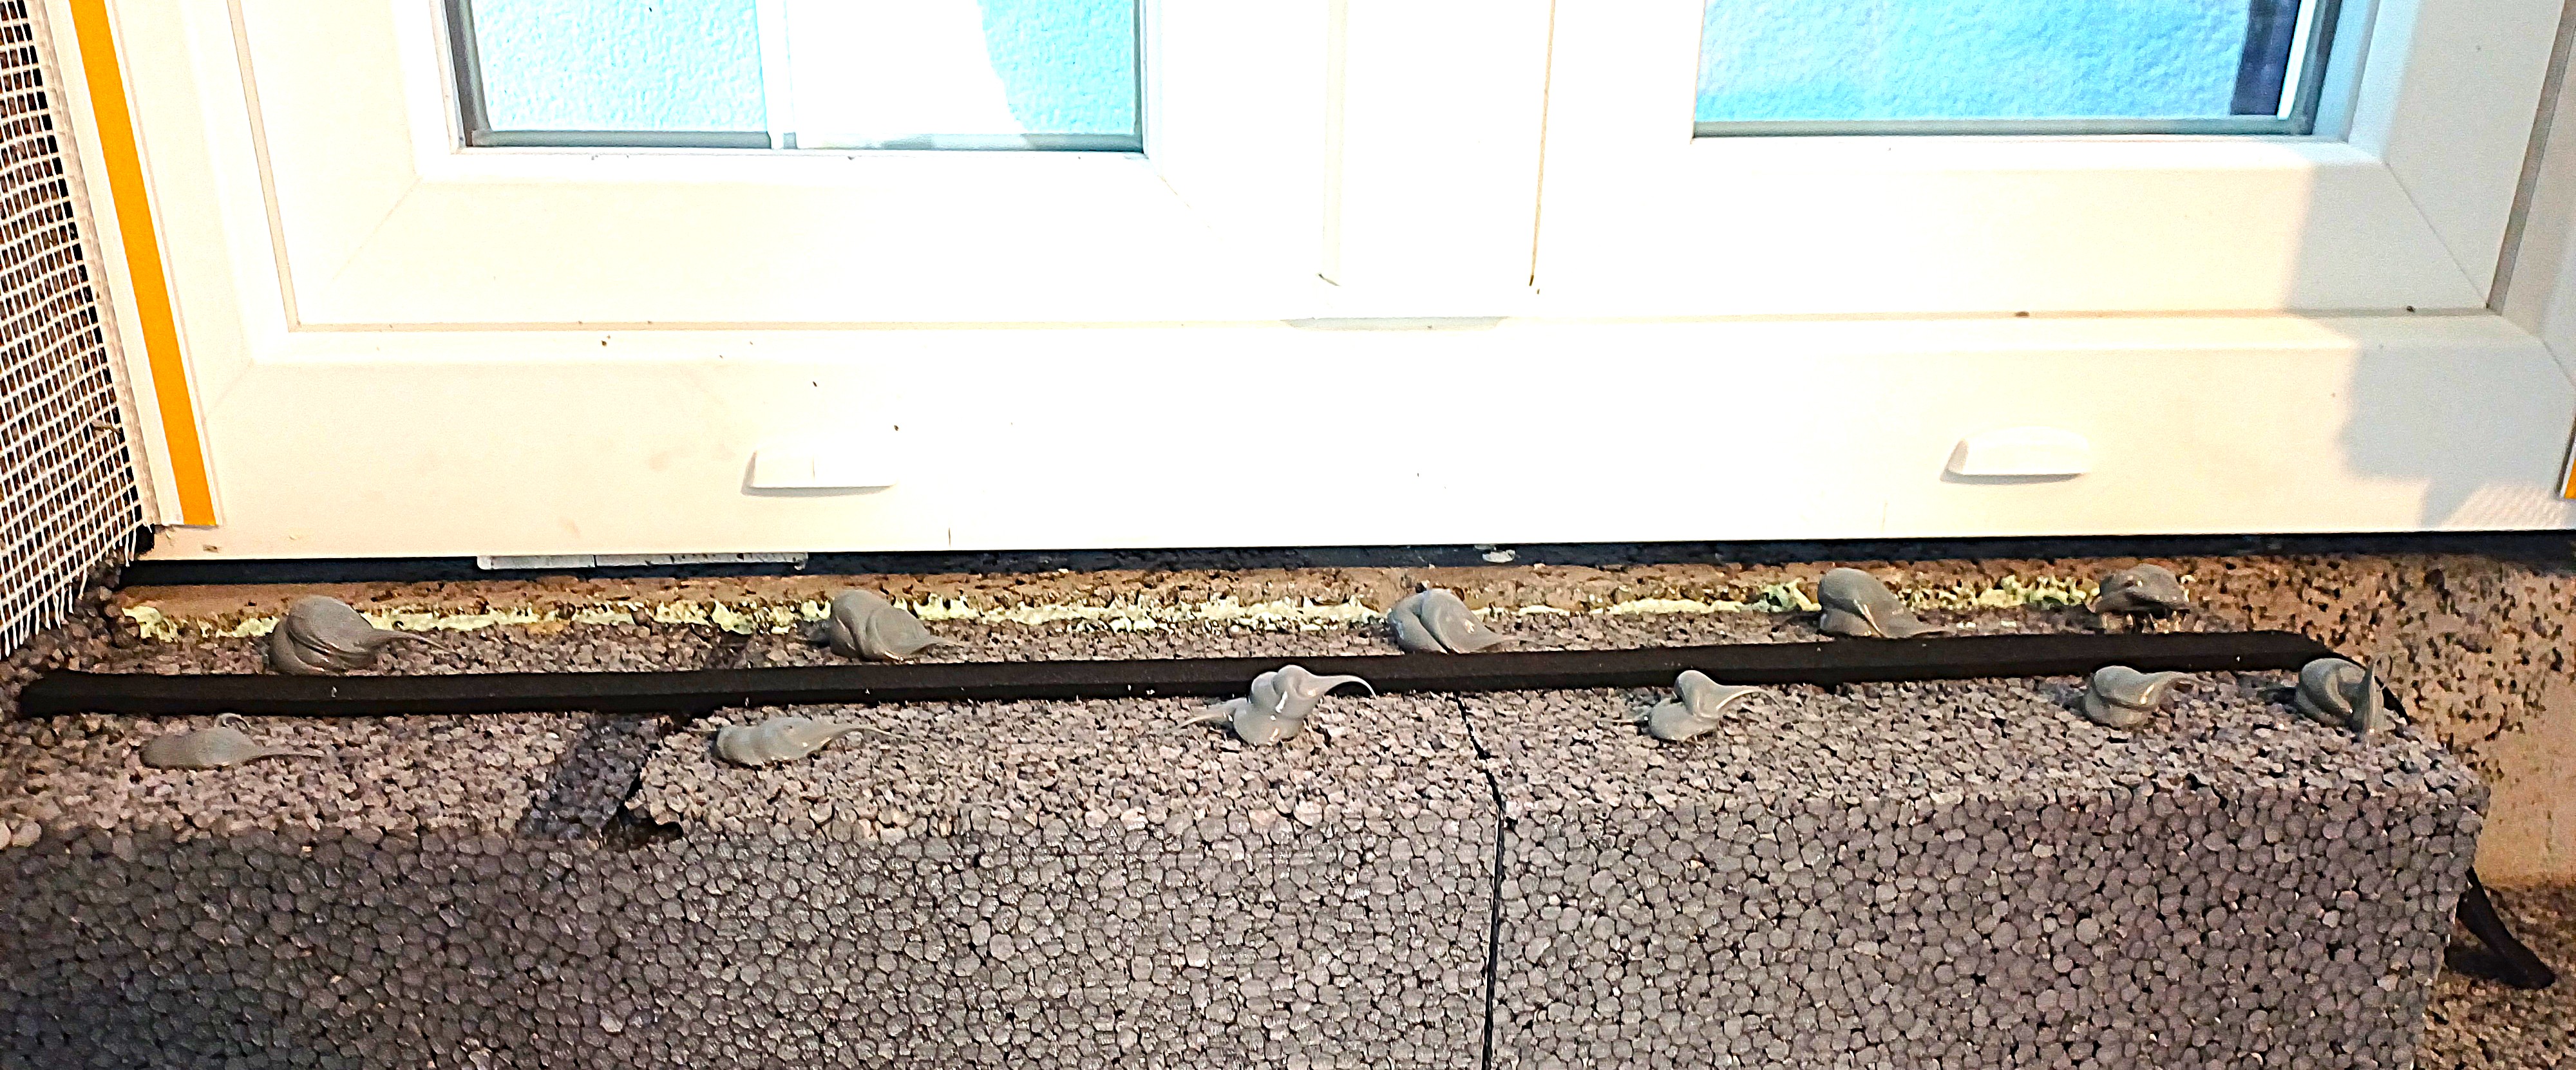
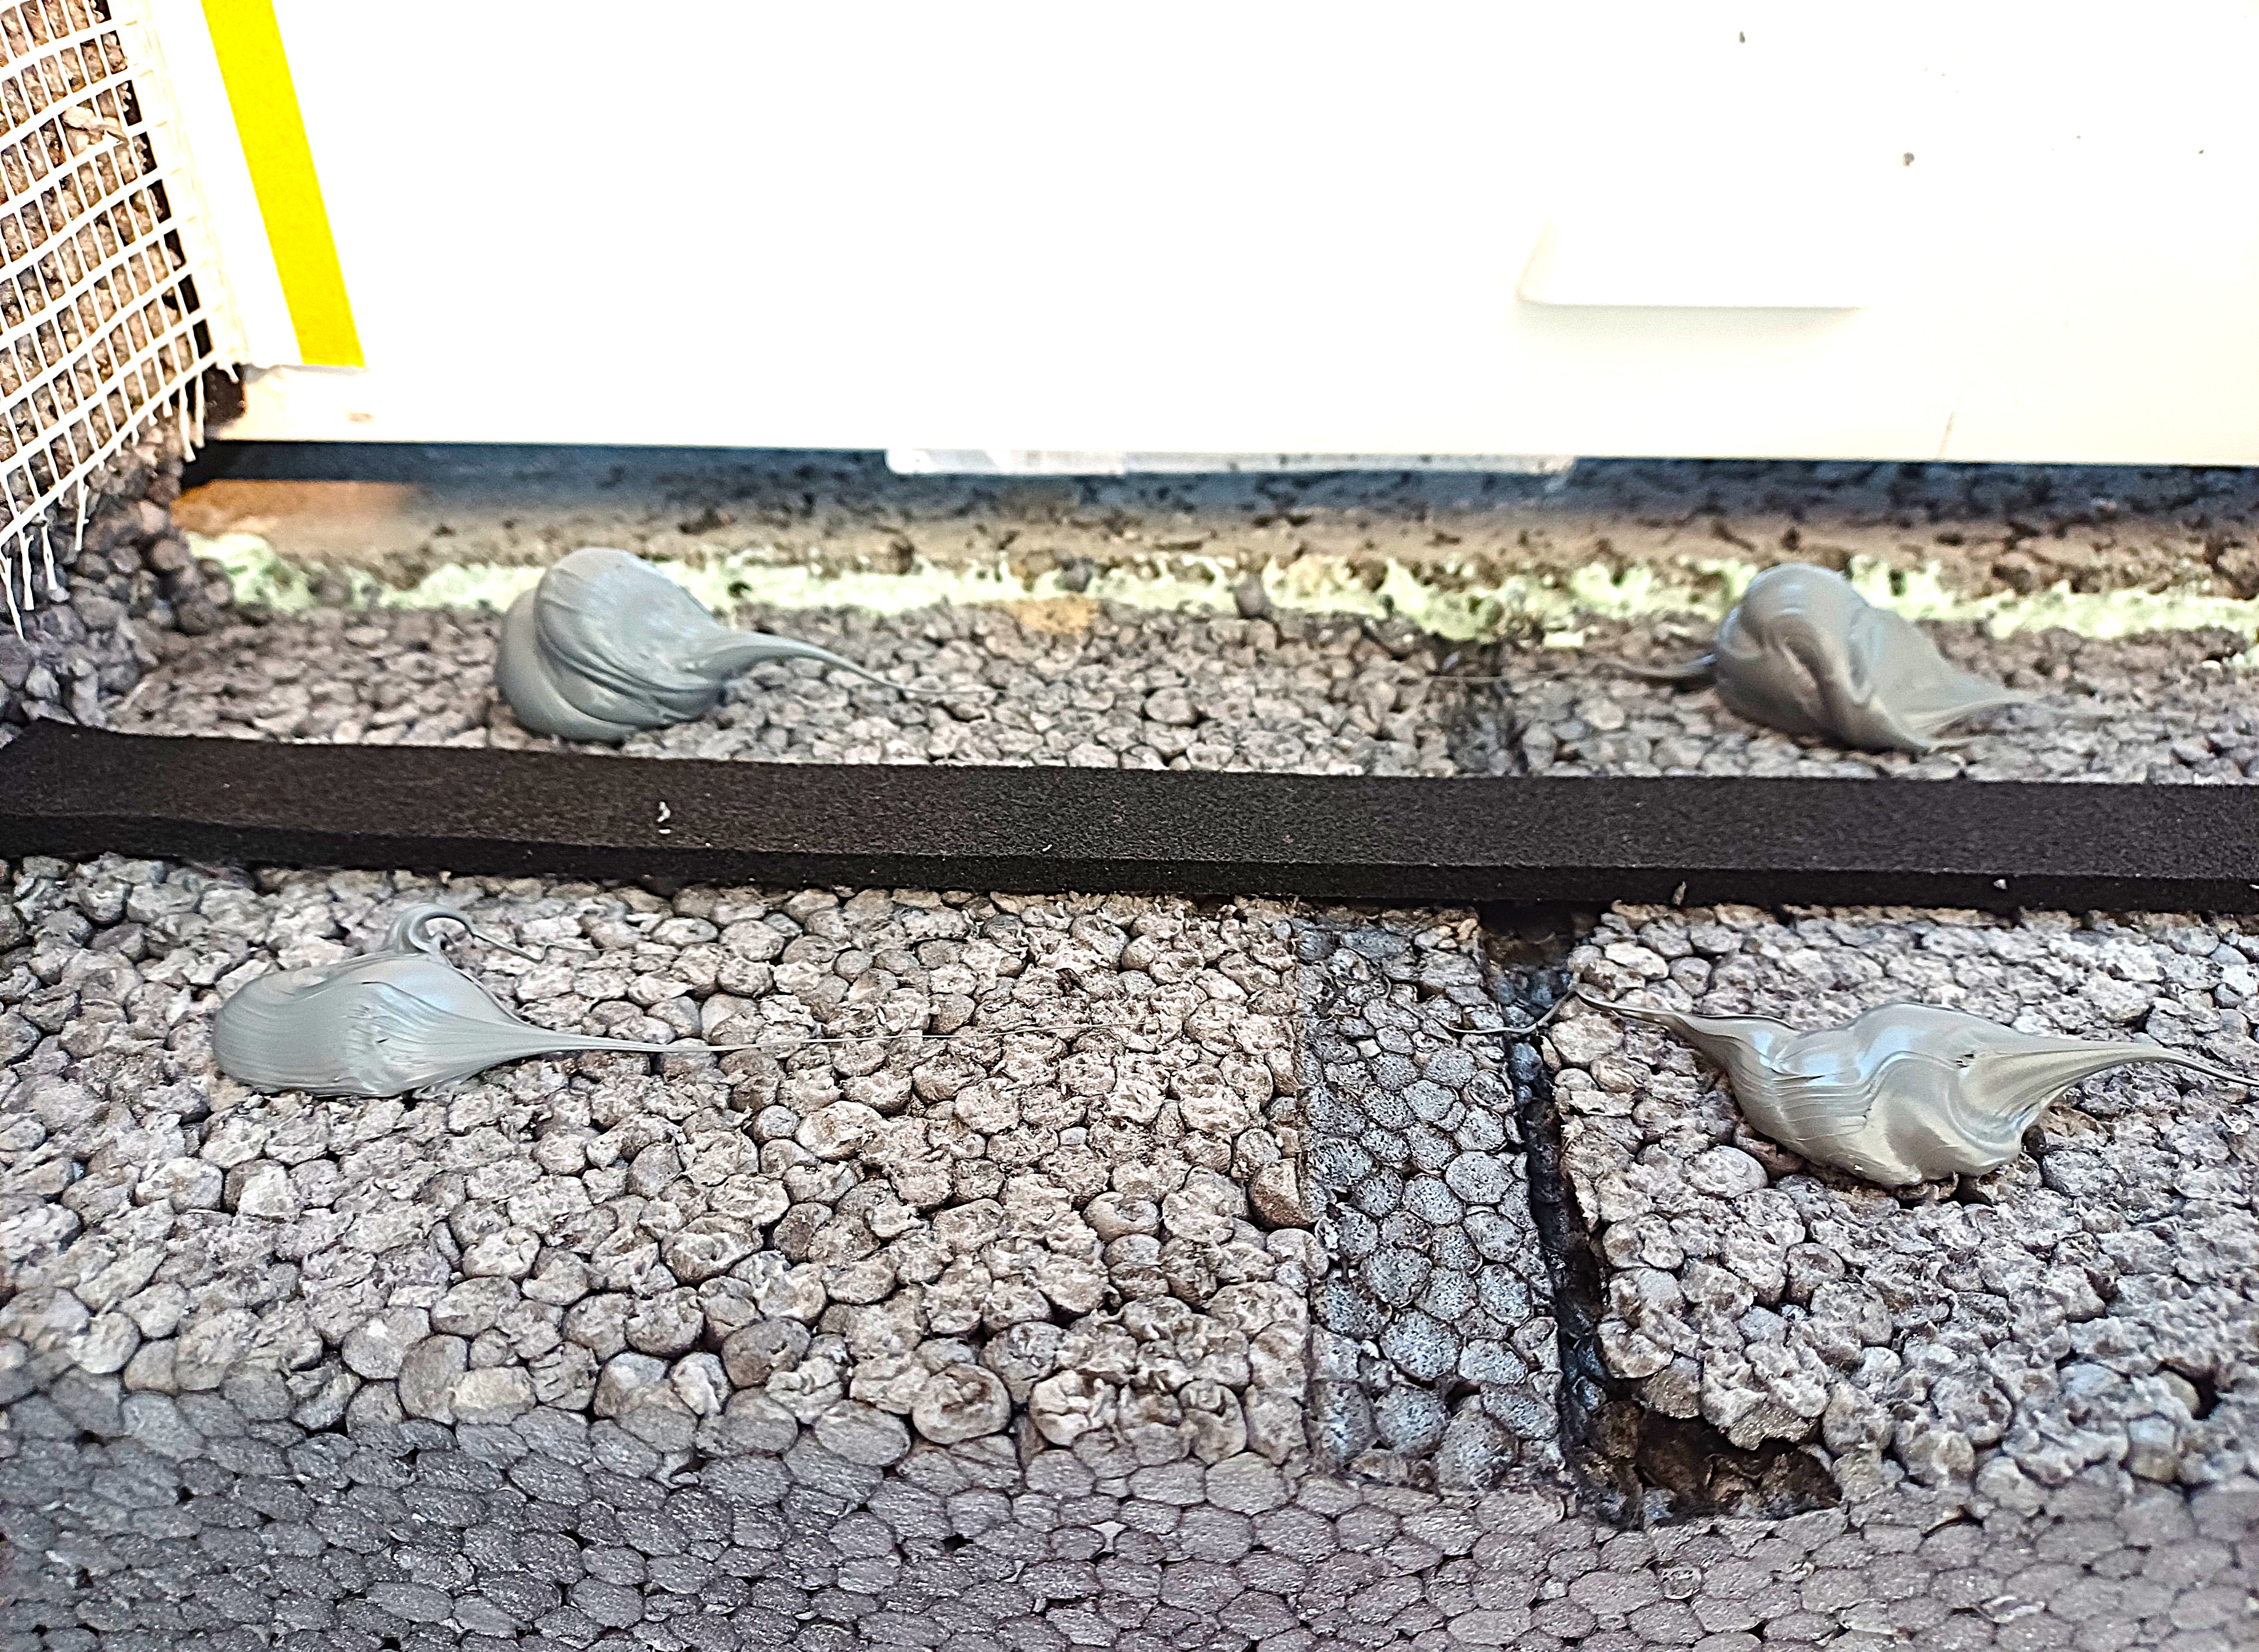
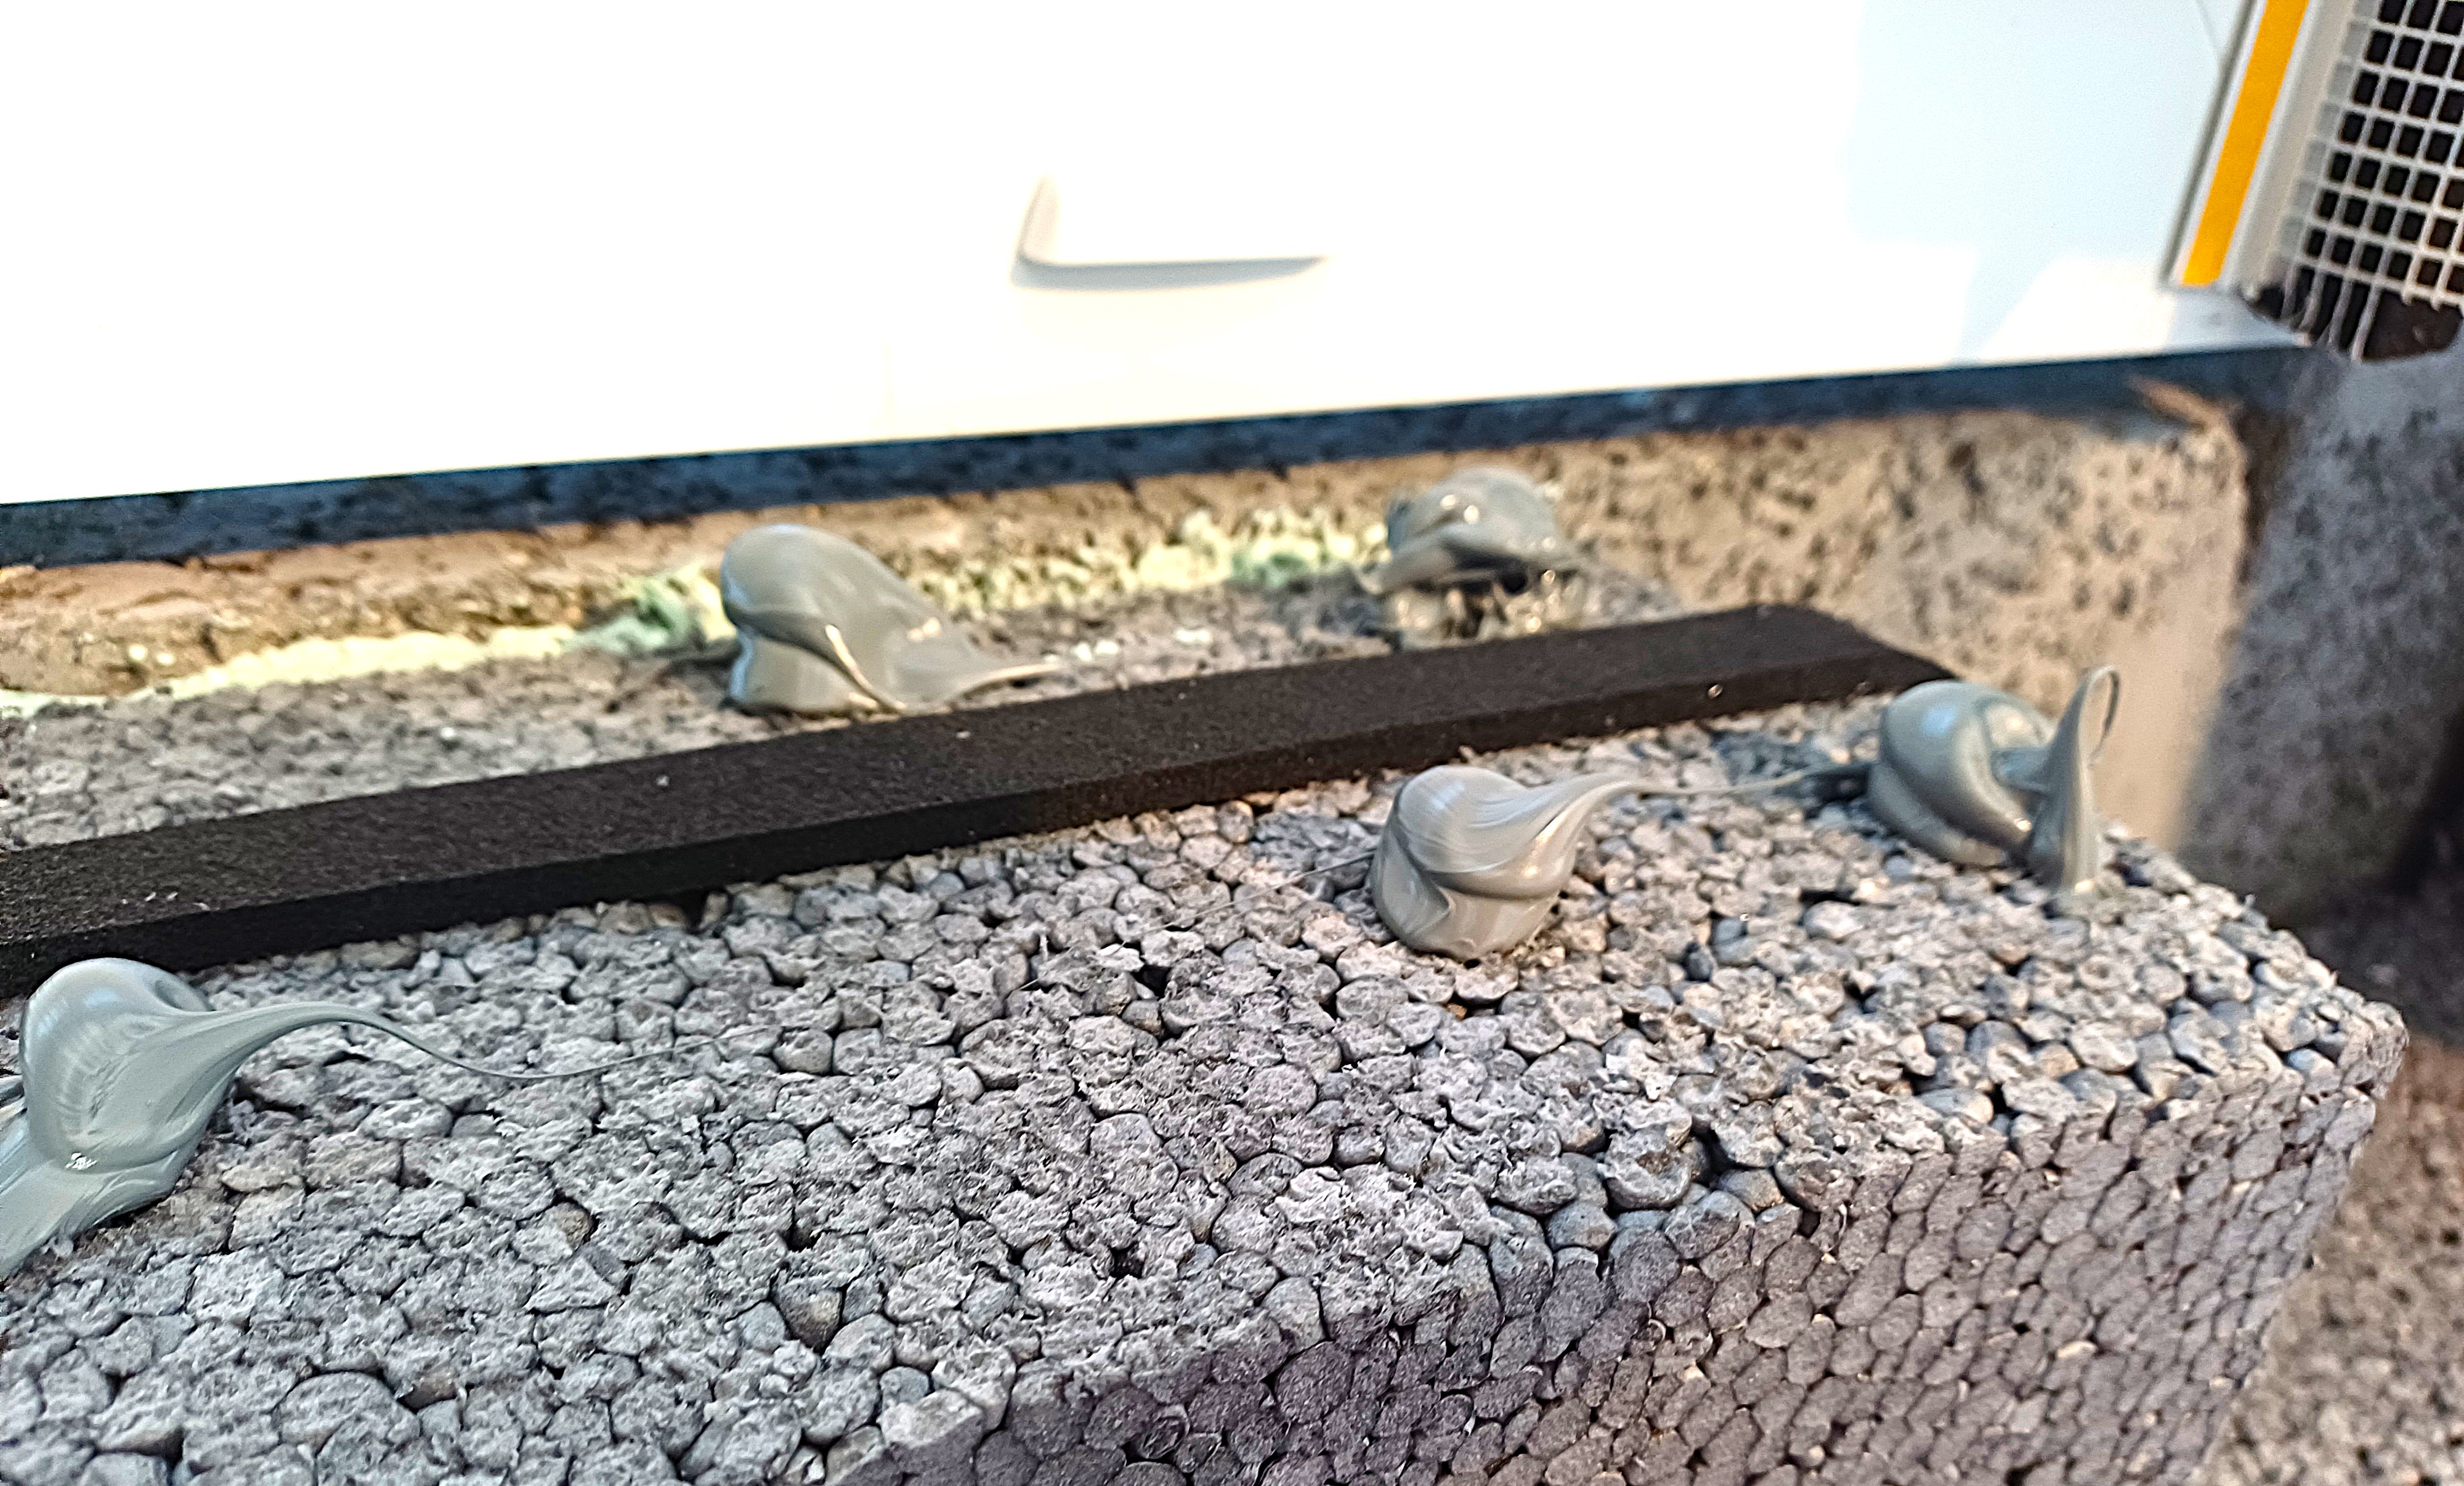
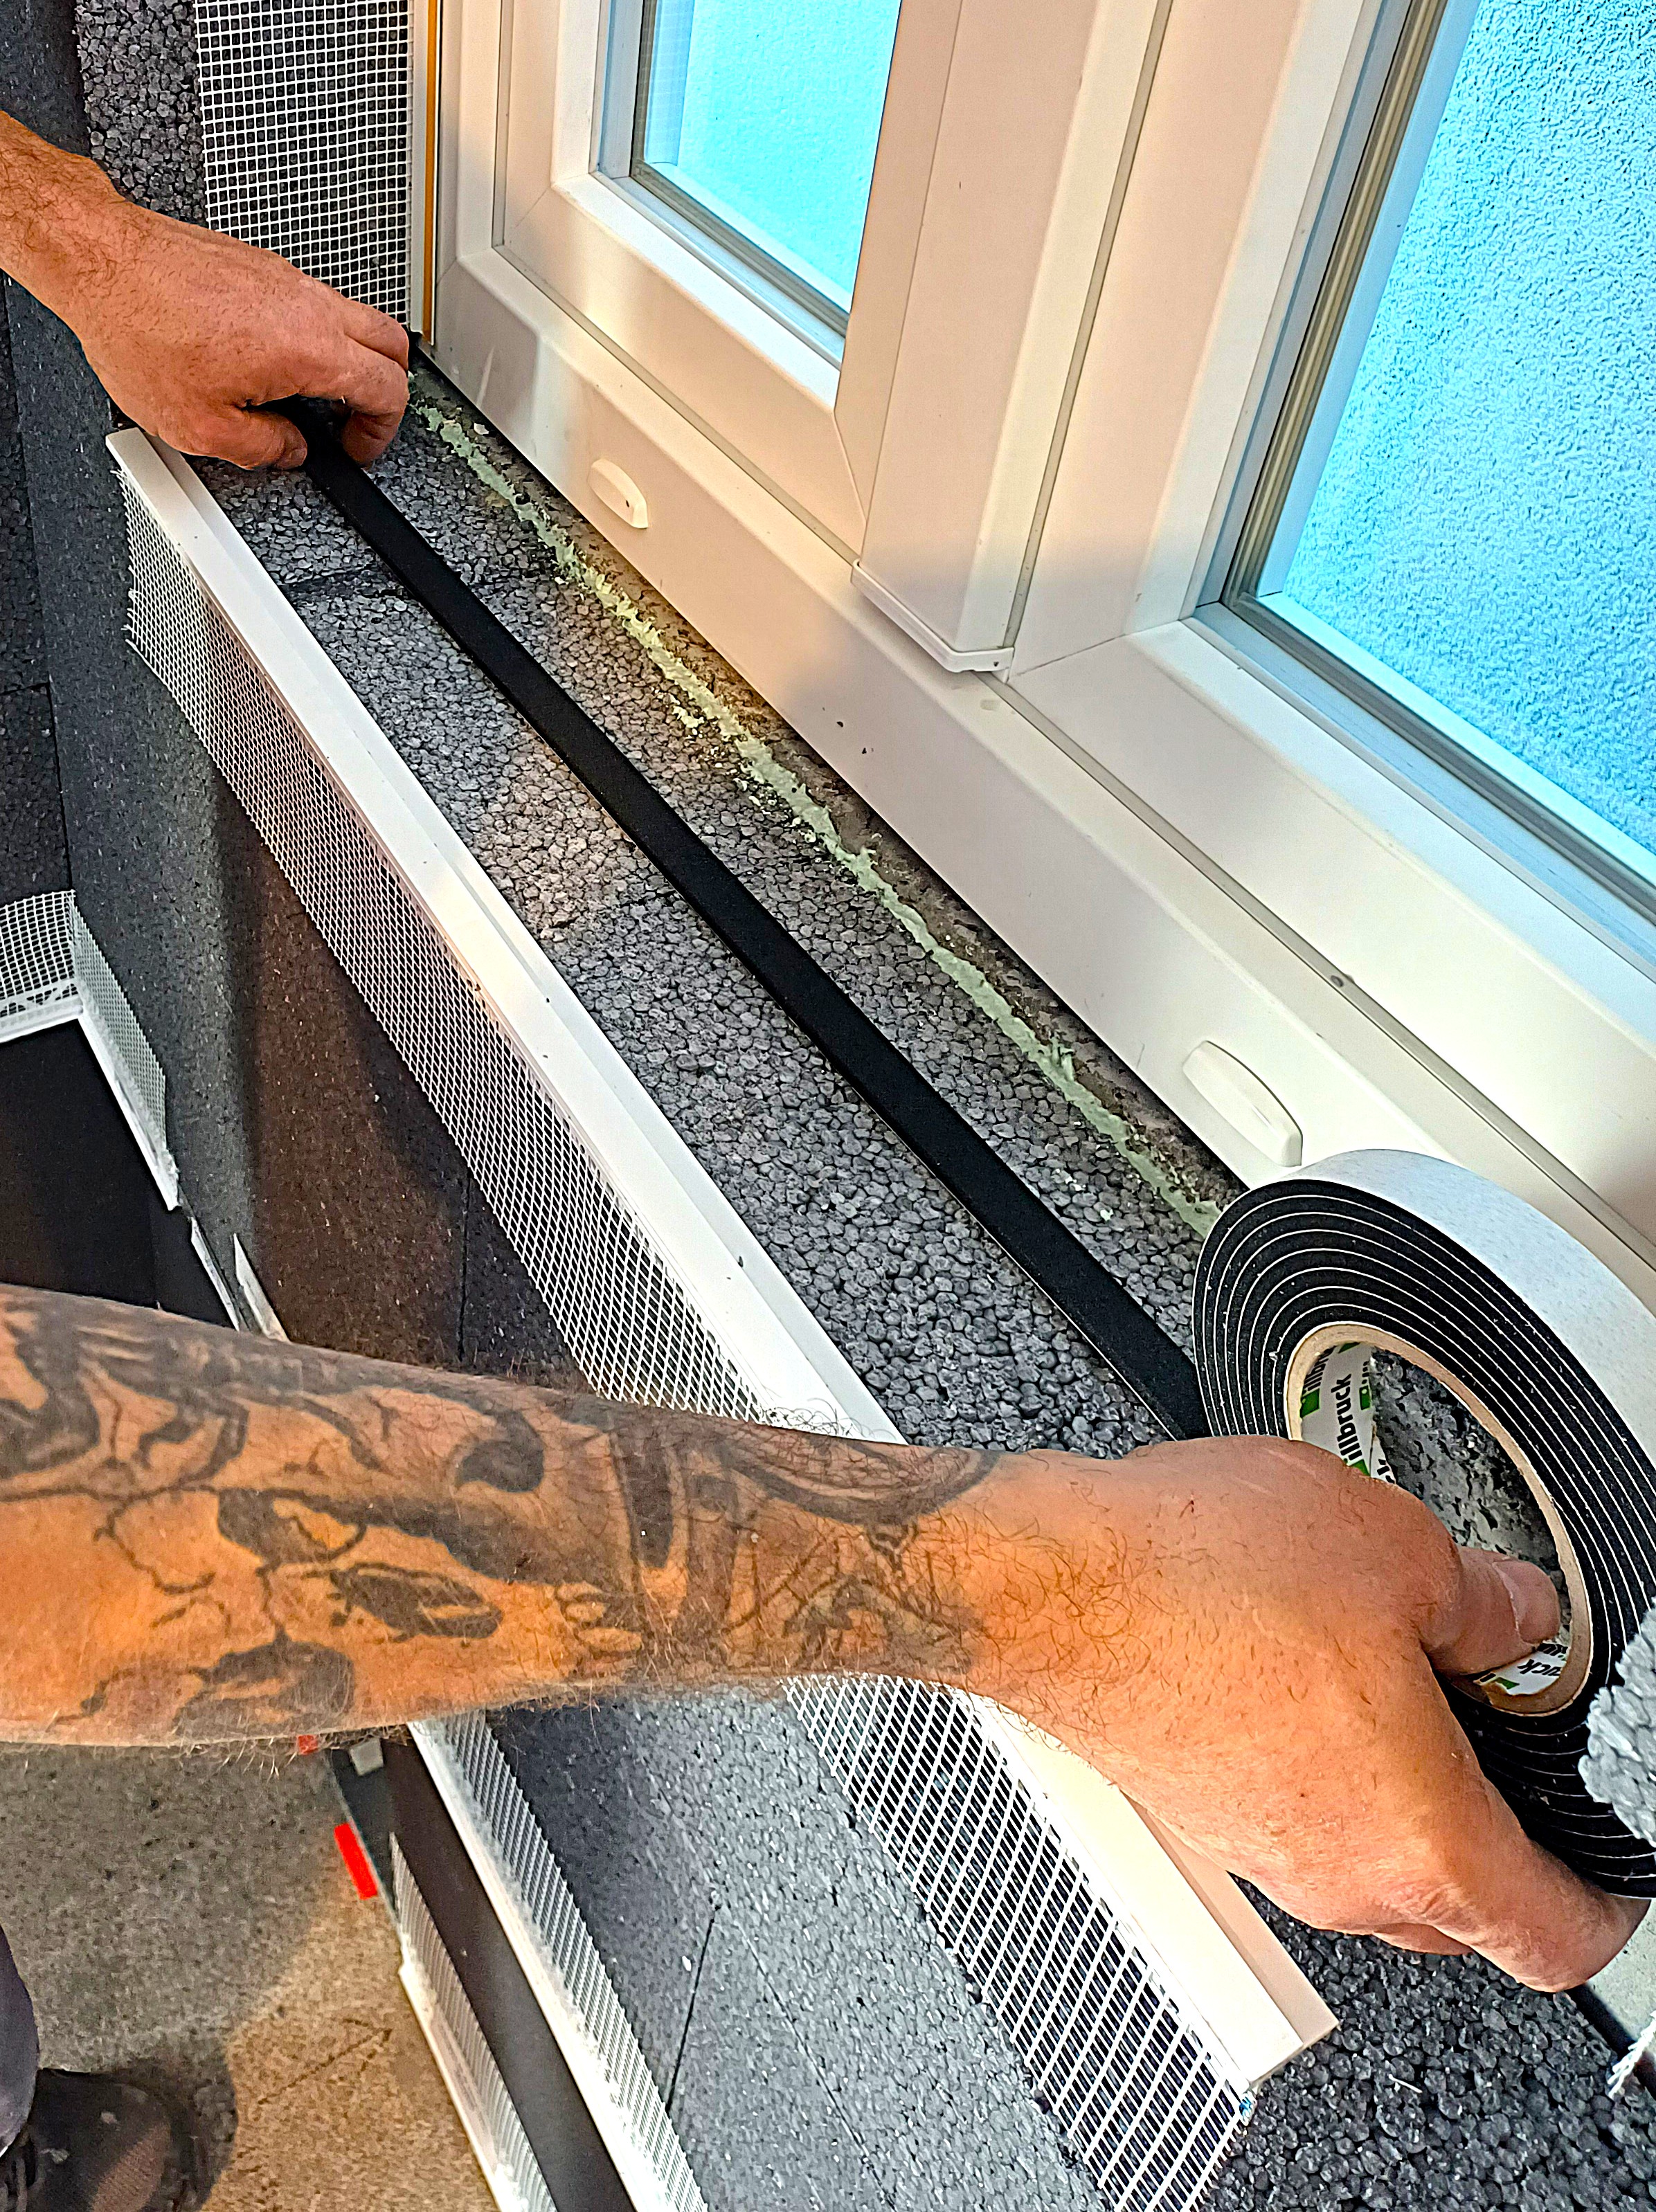
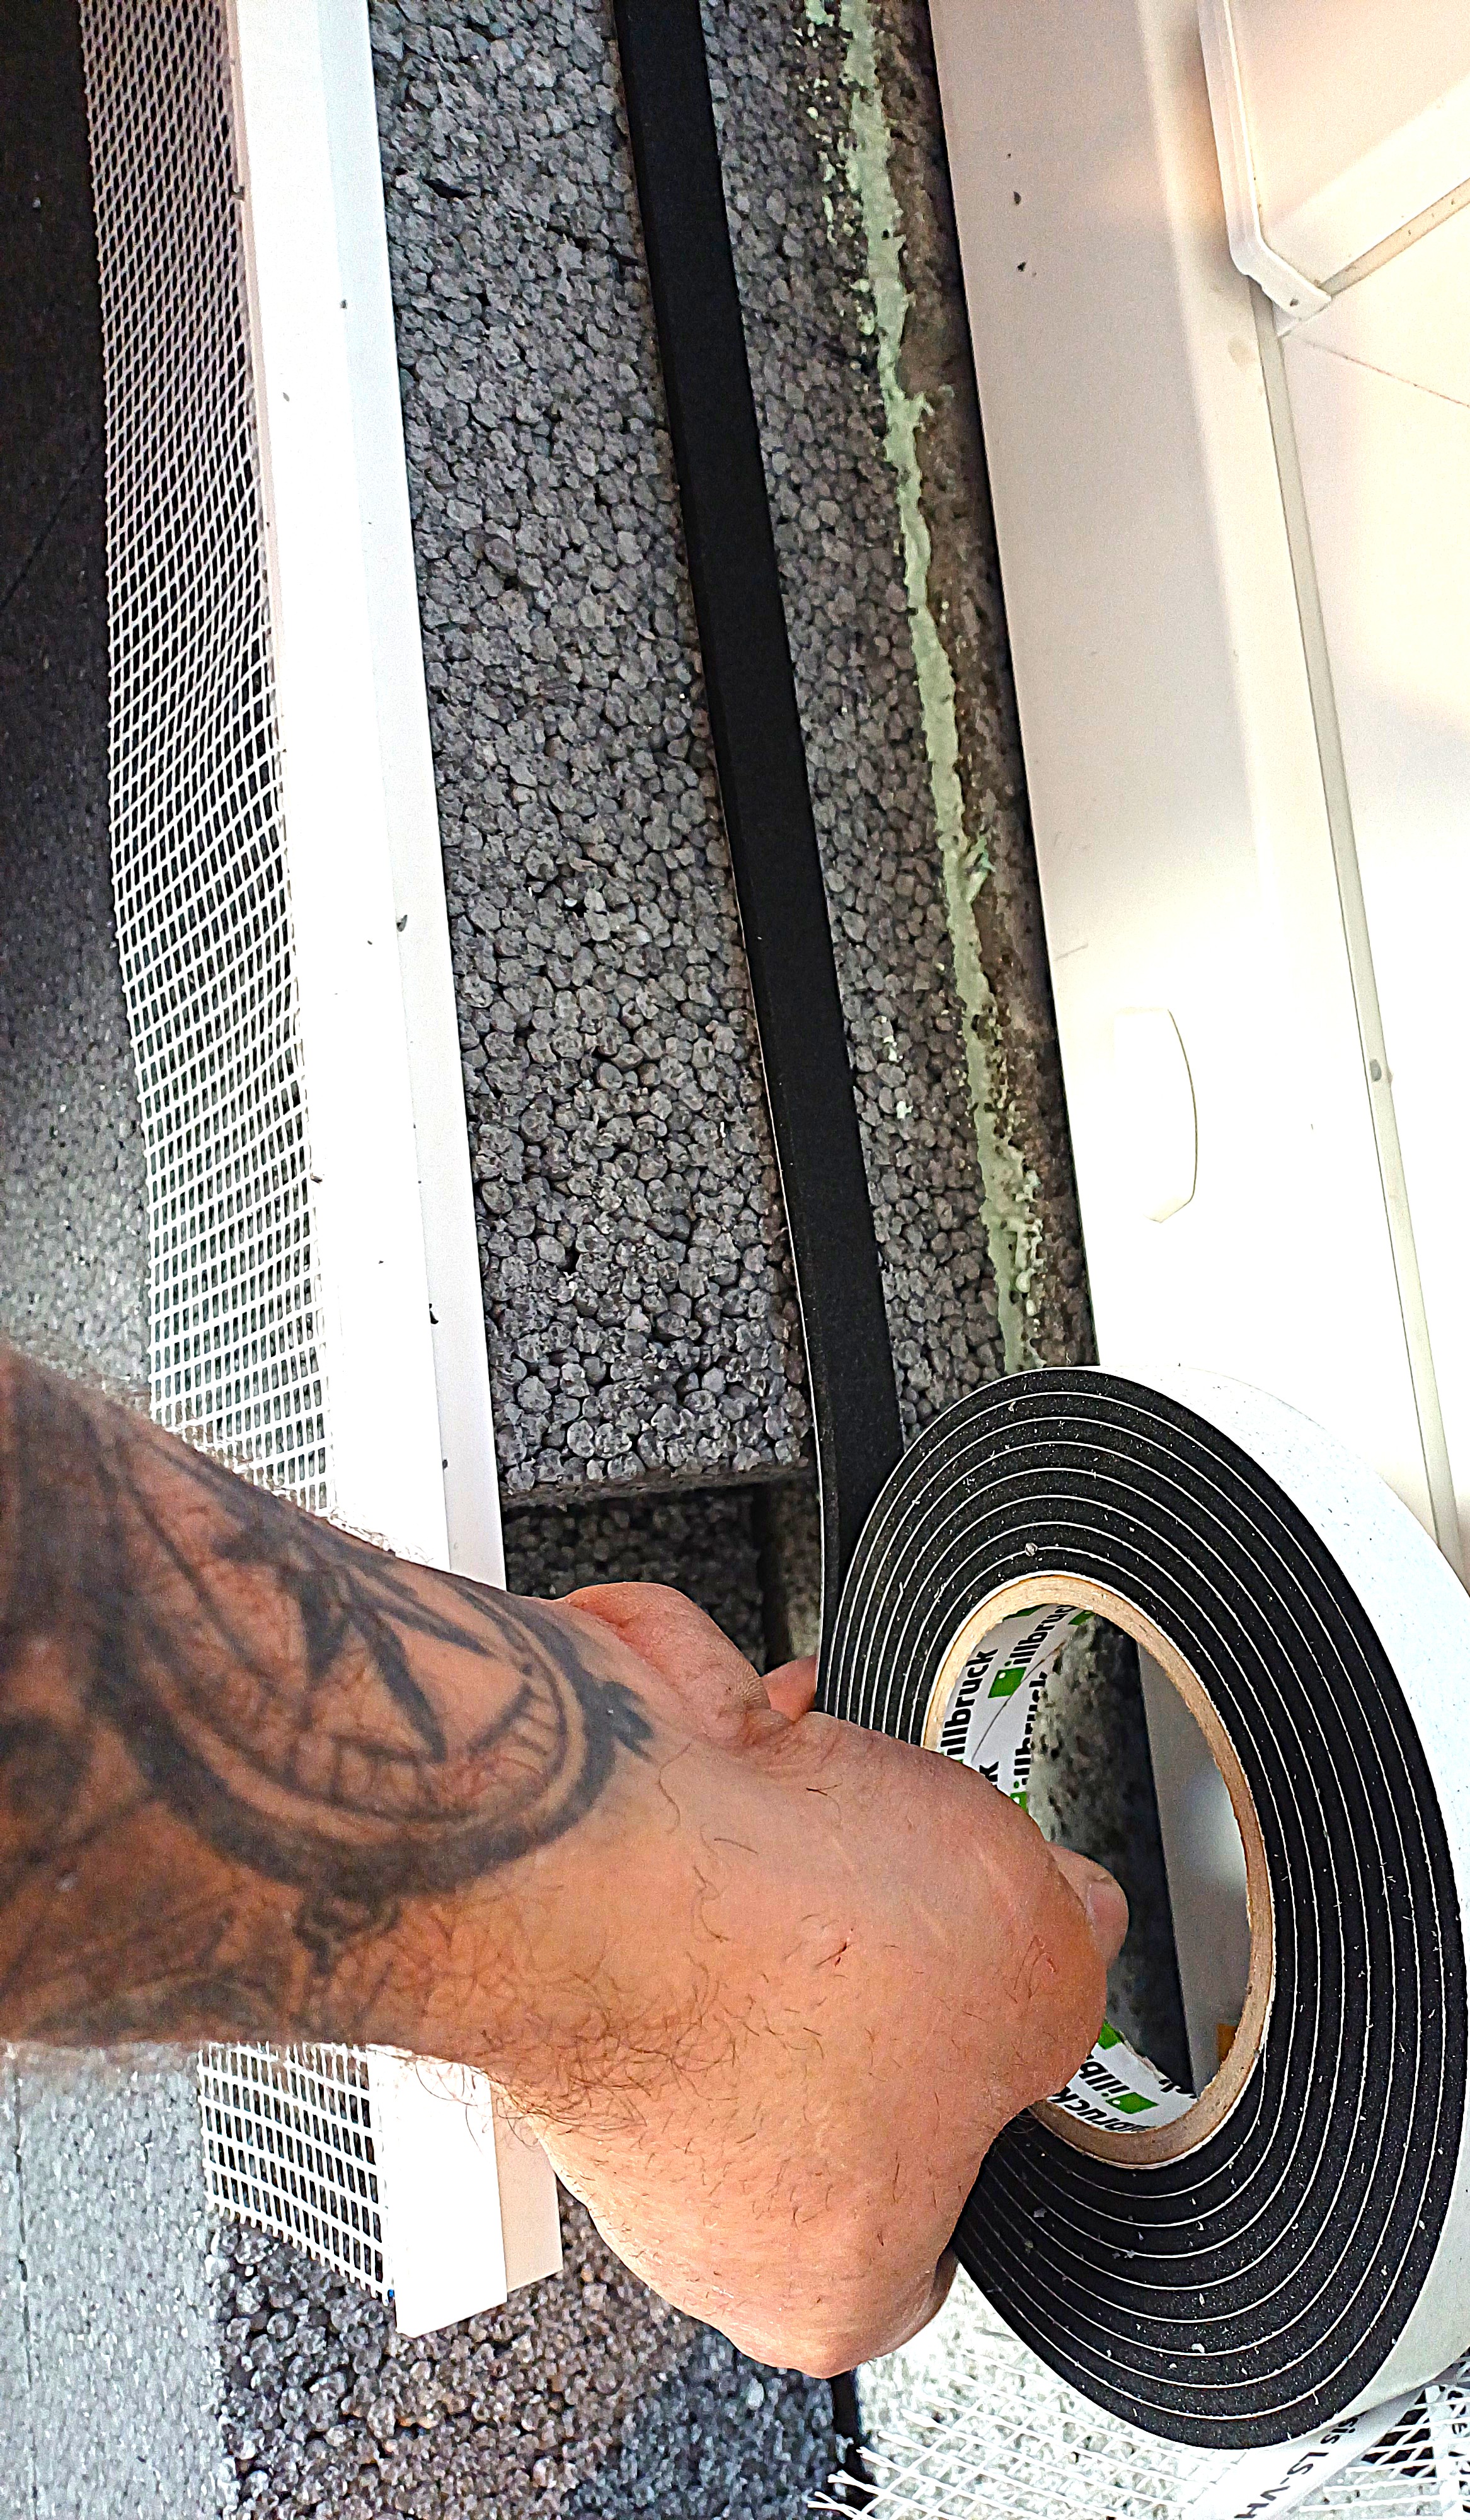
Also place a compression strip along the entire length of the Adam Matériaux EPS insulation and in its central section, which will receive the PZA aluminum threshold, ensuring that the compression strip extends up both sides of the KZ end caps
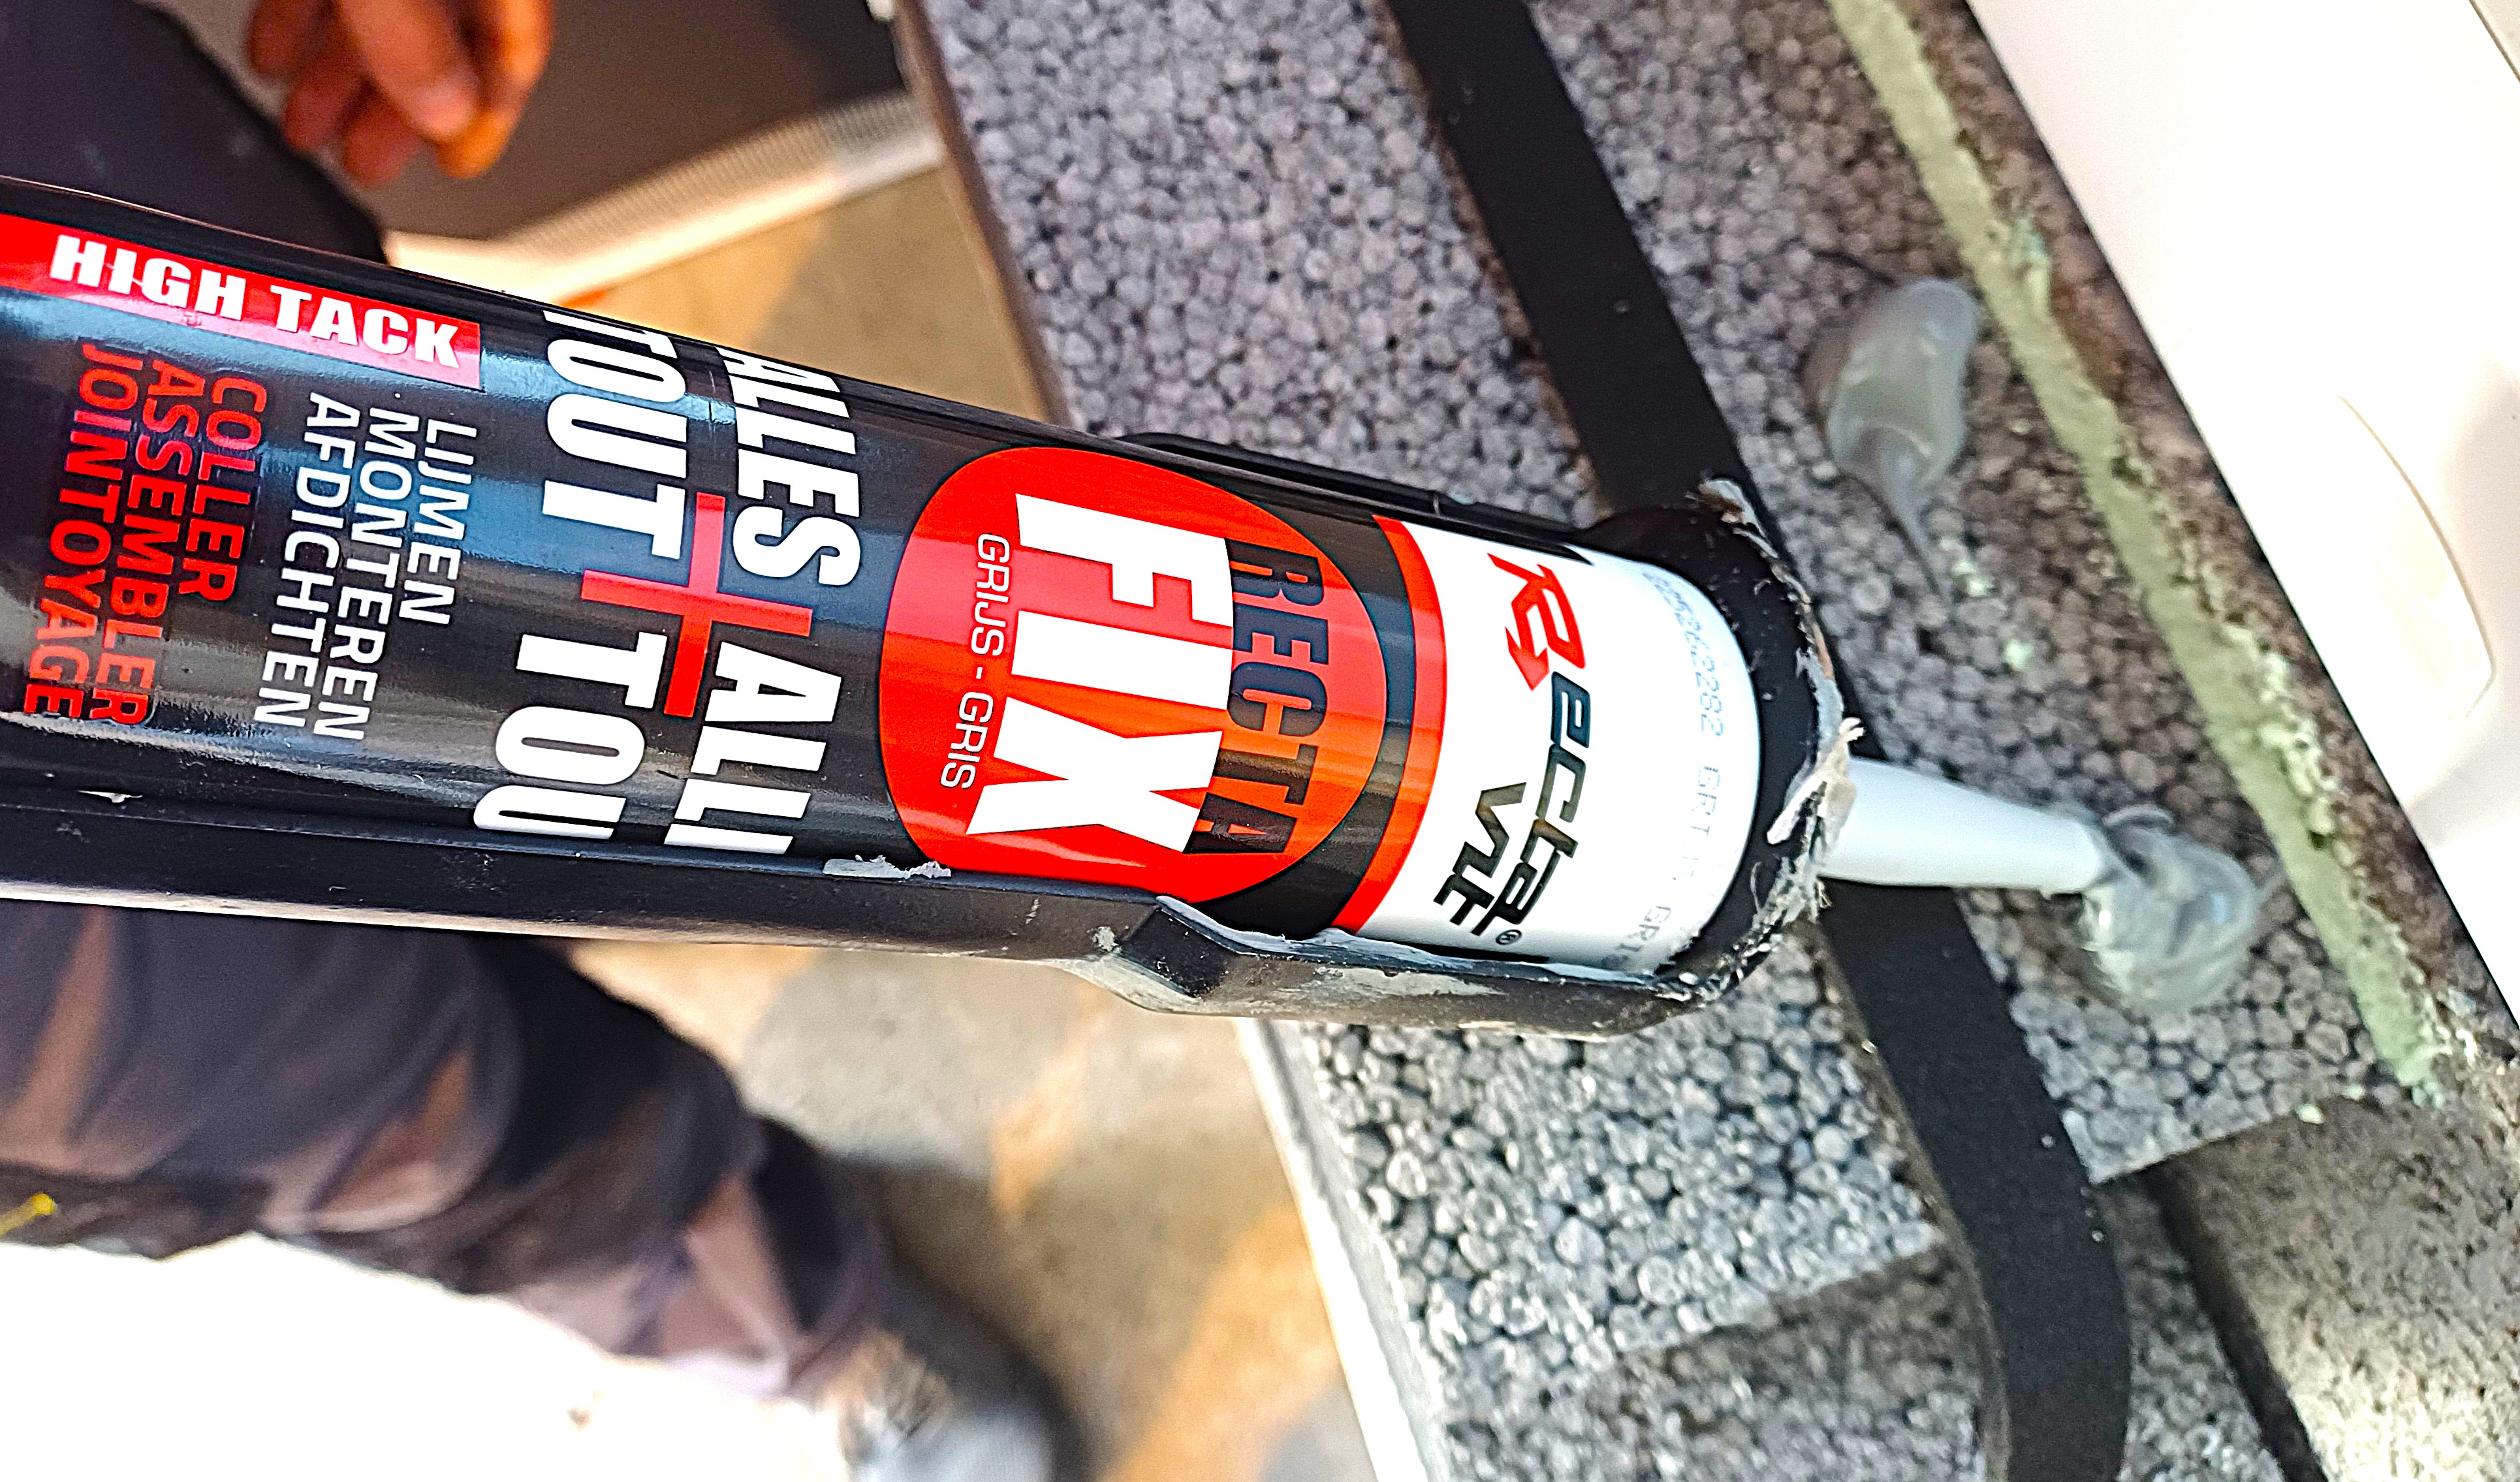
For bonding the PZA aluminum threshold, use a 2-component silicone such as Recta-FIX: Apply several dabs of Recta-FIX 2-component silicone on either side of the compression joint
You can now place the LX-LPE SILL corner bead onto the Adam MatériauxEPS insulation, then slide in the PZA aluminum threshold fitted with its two KZ end caps
Place the Kubala 1333 level to check and adjust the slopes in both directions of the PZA aluminum threshold
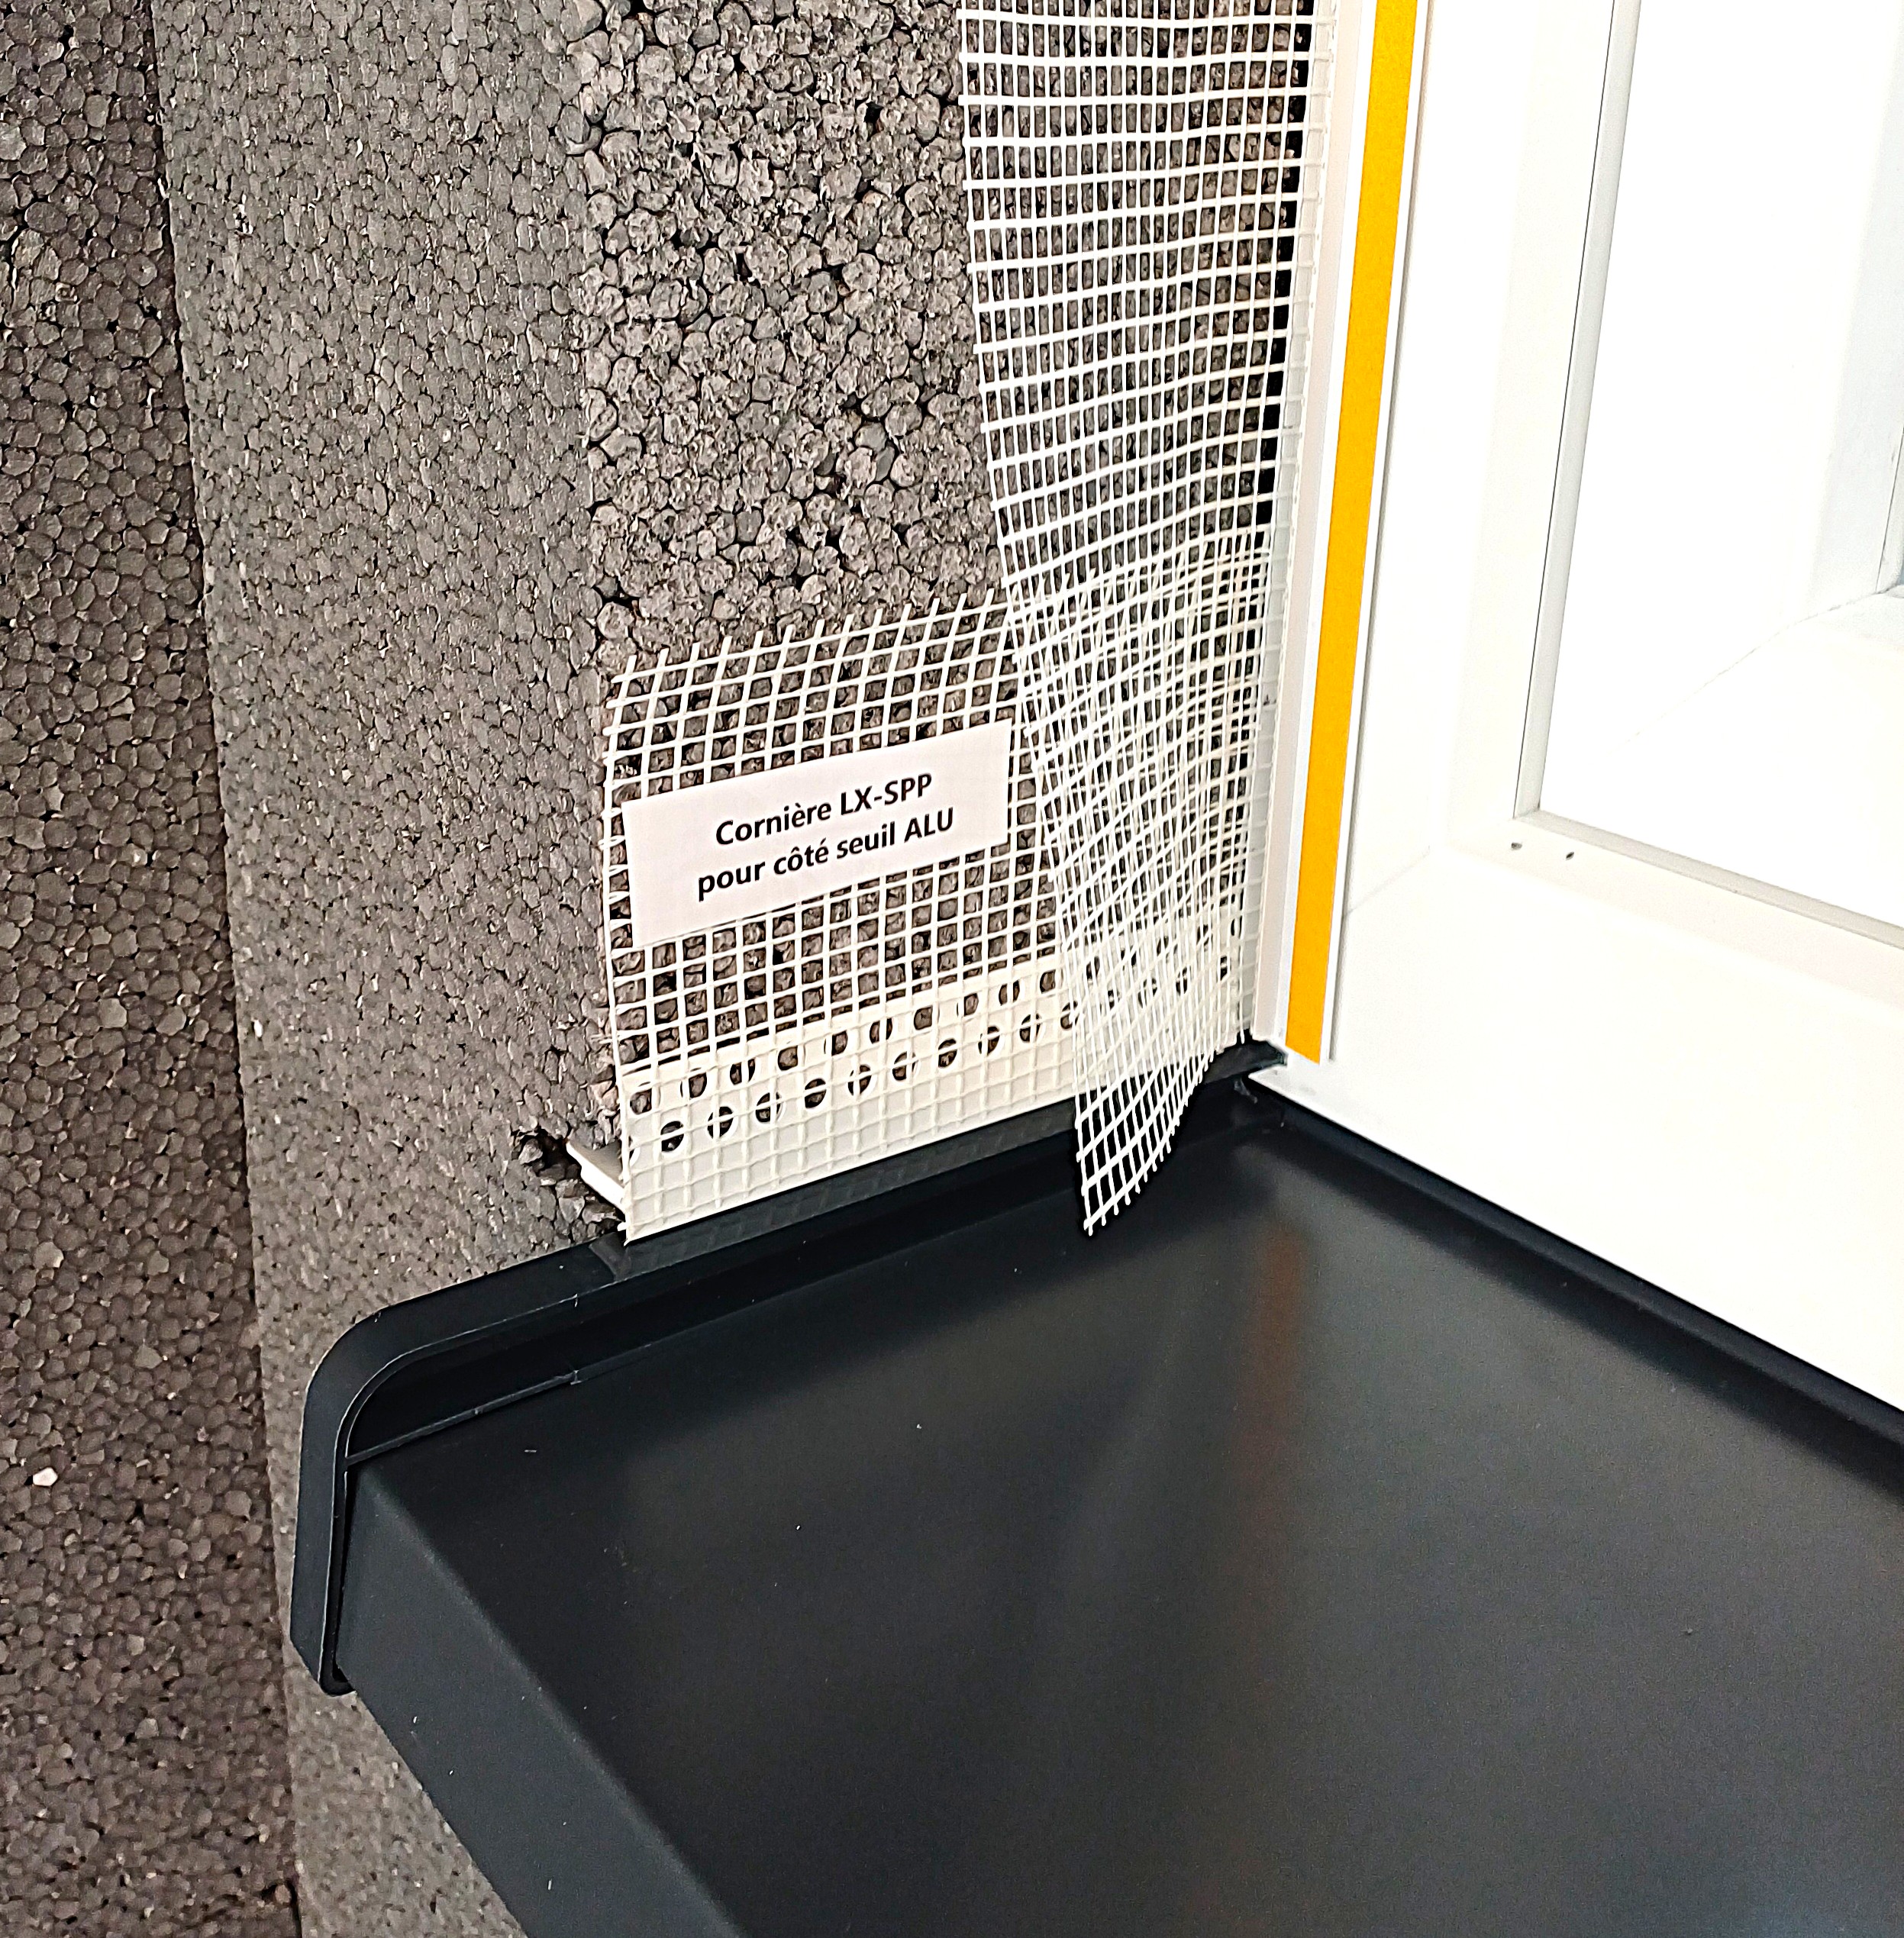
You must now place the LX-SPP angle bracket on top of the 2 KZ end caps:
Measure the distance from the top of the KZ end caps to the stop of the LS-VH06 angle brackets and cut the LX-SPP angle bracket to the correct length
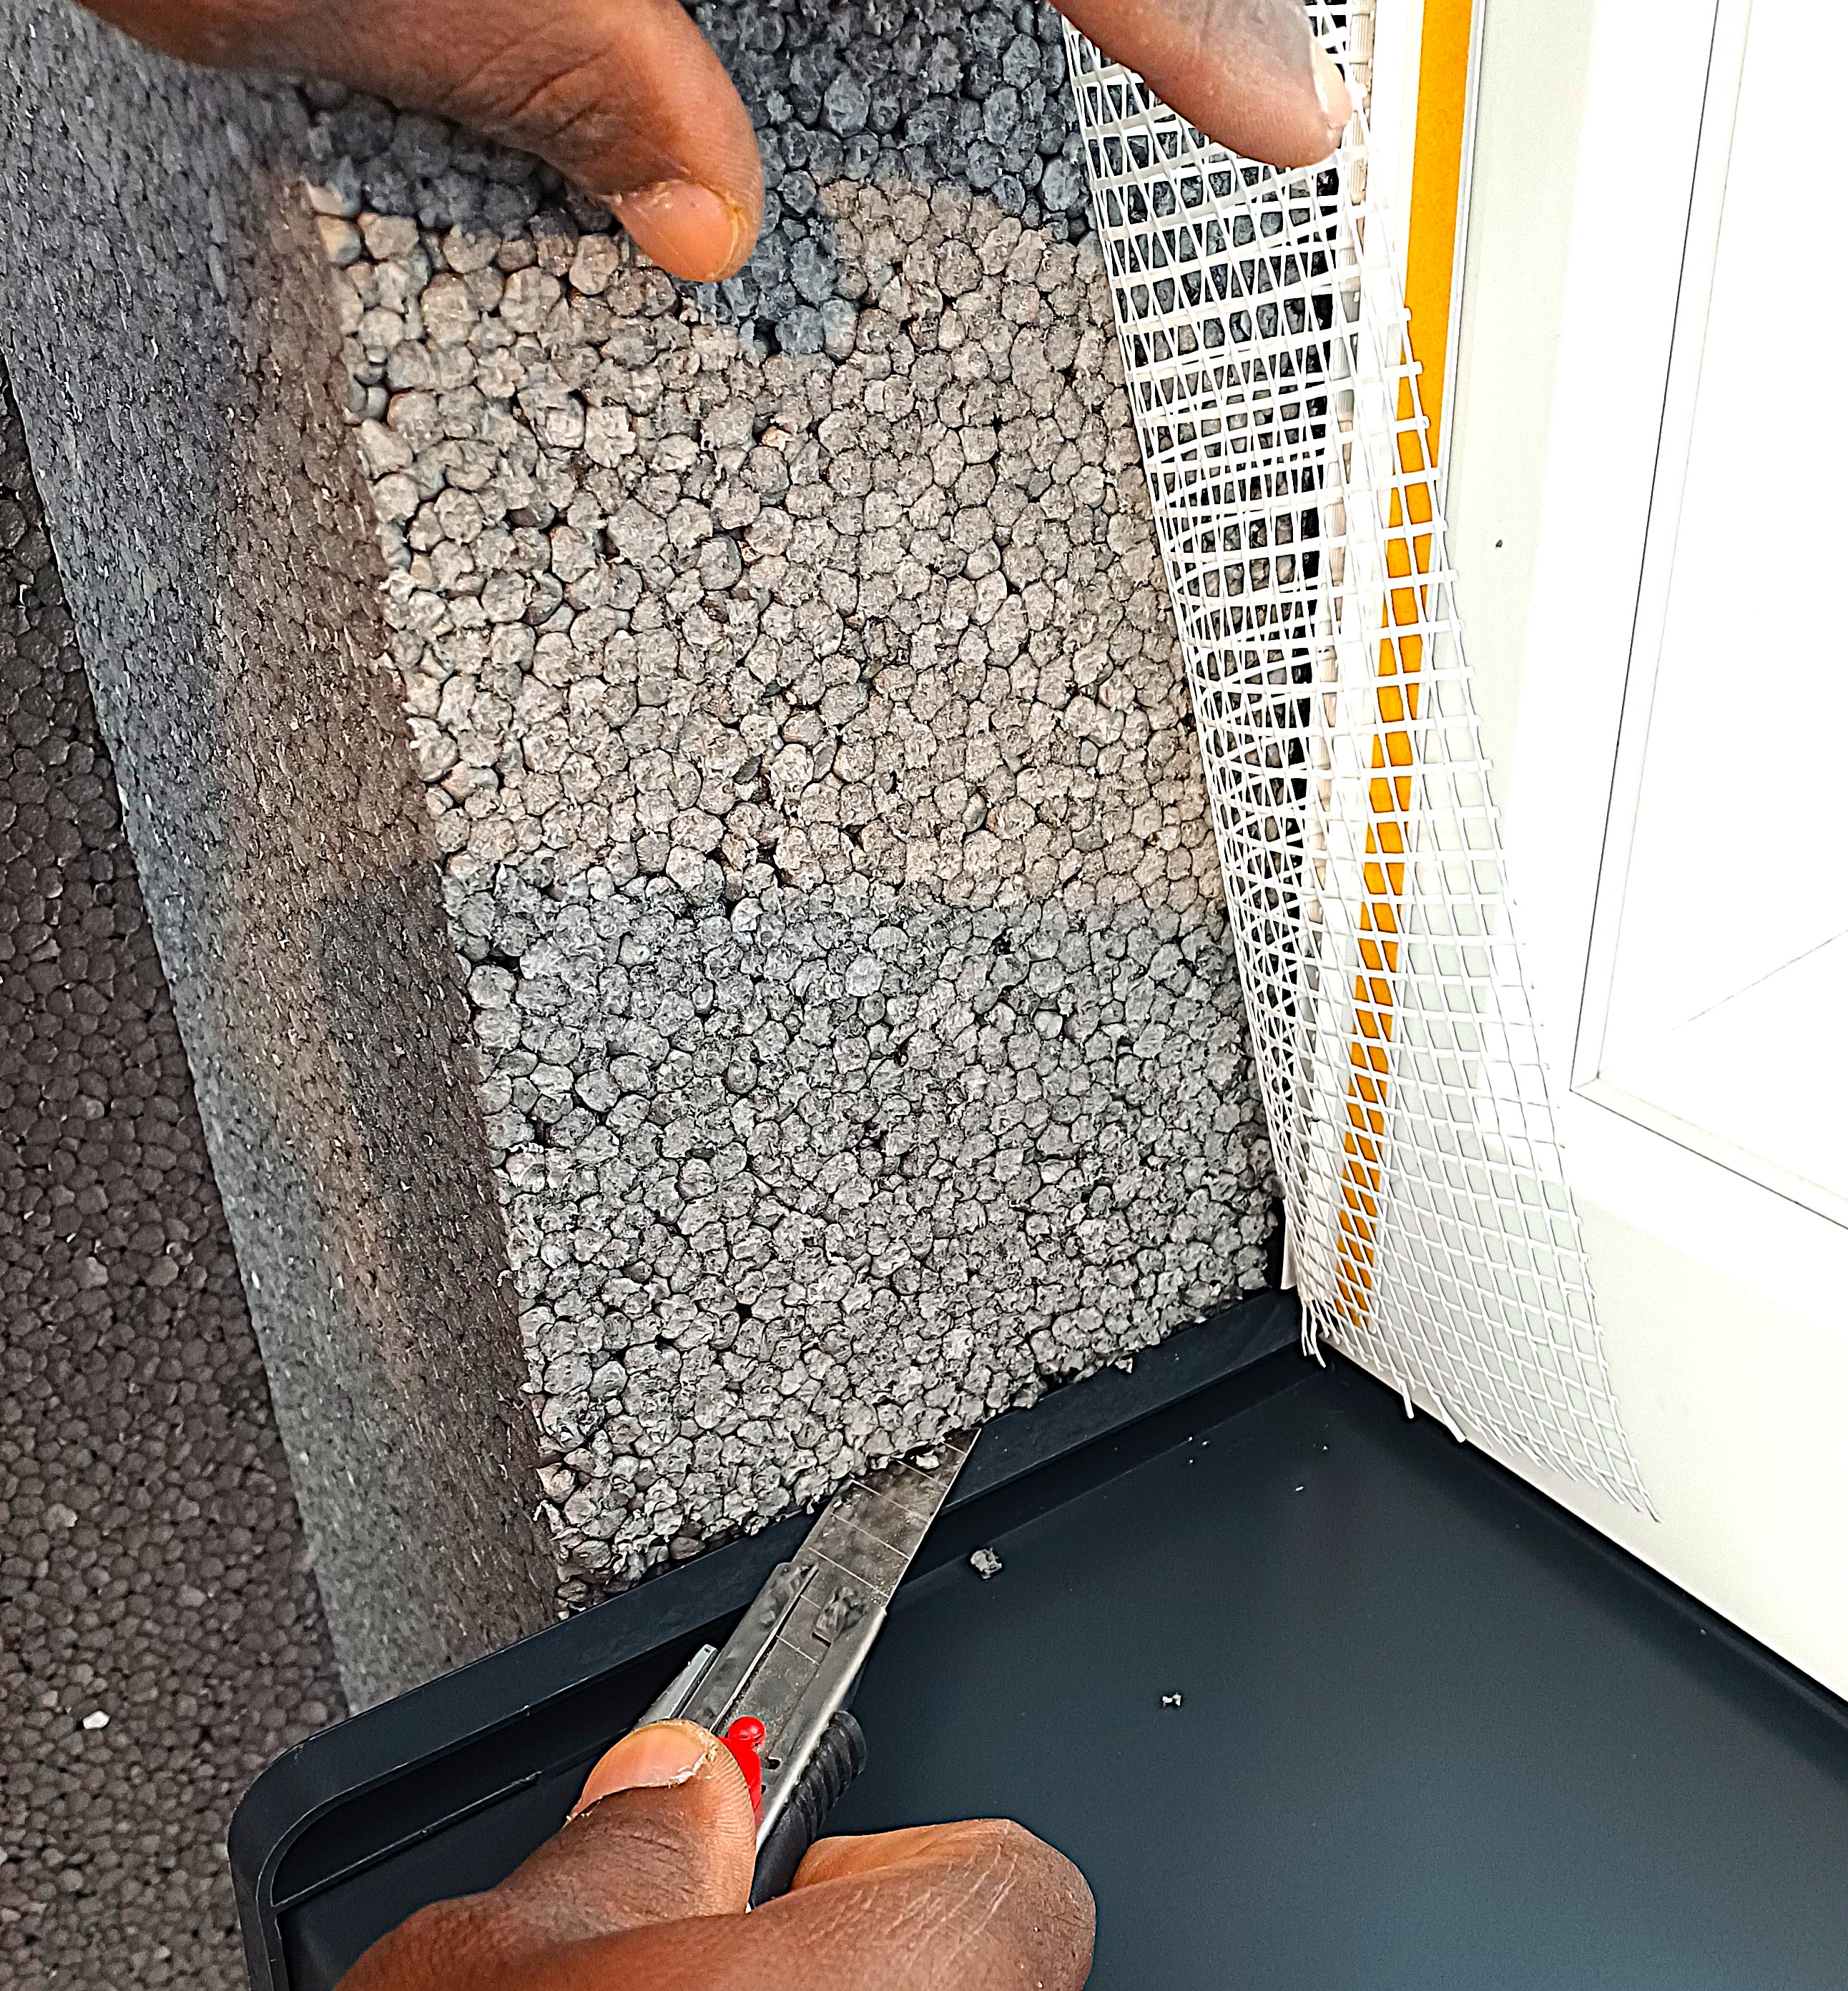
Make an opening in the Adam Matériaux EPS insulation to slide the LX-SPP corner bracket into the Adam Matériaux EPS insulation
Installation of the PZA aluminum threshold with a pair of KZ 7016 end caps
1. Preparation and leveling of the insulation
Before installing the PZA, check that the top of the EPS Adam Matériaux is 20 mm below the bottom of the frame.
Use the Kubala 0344 or 0343 rasp to level the EPS insulation and obtain a flat and regular surface to receive the threshold.
Next, check the flatness and level of the insulation using the Kubala 1333 level.
This step is important in order to obtain a correct base for the sill and to guarantee the slopes necessary for water drainage.
2. Measurement and cutting of the PZA threshold
Once the insulation is properly prepared, measure the distance between the two stops of the LS-VH06 frame corner brackets.
To determine the cutting length for the PZA, add:
- 8 mm left side ;
- 8 mm right side.
Example :
If the measured distance between the two stops of the LS-VH06 is 100 cm :
100cm + 0.8cm + 0.8cm = 101.6cm
The cutting length of the PZA threshold will therefore be 101.6 cm.
Also allow for an overhang of 2 to 4 cm of the PZA aluminium threshold insulation and plaster system Adam Matériaux.
3. Fitting the KZ 7016 tips
After cutting the PZA aluminum threshold , prepare the pair of KZ 7016 end caps .
The end caps will be cut and adjusted so that they fit properly against the rise of the PZA threshold.
The PZA aluminum threshold lift must be correctly engaged in the slot provided in the lower part of the chassis.
Check that both KZ end caps are correctly positioned and perfectly aligned with the ends of the threshold.
4. Preparation of the LX-LPE SILL threshold angle
Measure the distance corresponding to the inside distance between the two KZ tips.
Cut the LX-LPE SILL to this dimension so that it can be positioned between the two KZ end caps.
The LX-LPE SILL, equipped with its reinforcing mesh, plays an important role in the treatment of the connection under the threshold.
It ensures the reinforcement mesh Adam Matériaux which will be placed on the EPS insulation.
5. Preparation of the support below the threshold
Place the PUR foam Adam Matériaux between the facade wall and the Adam Matériaux, at the joint located under the threshold.
Next, install a compriband joint along the entire length of the EPS insulation, in the area intended to receive the PZA aluminum threshold.
The compriband seal must also be provided with a rise on both sides of the KZ ends, in order to ensure continuity of connection and sealing at the ends of the threshold.
6. Bonding of the PZA threshold
For bonding the PZA, use a two-component silicone of the Recta-FIX type, in accordance with the manufacturer's instructions for the product.
Apply several dabs of two-component silicone such as Recta-FIX on either side of the compriband joint, ensuring that the product is evenly distributed below the threshold.
Do not obstruct areas necessary for the possible drainage of water.
7. Installation of the PZA threshold and the LX-LPE SILL angle bracket
Next, position the LX-LPE SILL EPS insulation Adam Matériaux, ensuring proper alignment.
Next, slide the PZA aluminum threshold , equipped with its two KZ 7016 end caps , into its final position.
Check that the rear rise of the sill is correctly engaged in the slot provided under the chassis and that the KZ end caps are correctly positioned against the LS-VH06.
8. Level and slope control
Place the Kubala 1333 level on the PZA threshold in order to control its positioning.
Check and adjust the slopes in both directions of the thresholdto ensure proper drainage of water to the outside.
The threshold must be perfectly stable, correctly aligned and free from back slope before work can continue.
9. Installation of the LX-SPP angle bracket
Once the PZA threshold is correctly positioned, place the LX-SPP angle bracket on top of the two KZ end caps.
Accurately measure the distance between the top of the KZ end caps and the stop of the LS-VH06 chassis corner brackets .
Transfer this measurement to the LX-SPP and cut it to the required length.
10. Integration of LX-SPP into the insulation
Create an opening in the EPS Adam Matériaux to allow the integration of the LX-SPP into the thickness of the insulation.
The cut must be made precisely to allow the angle bracket to take its correct position, without creating a thermal bridge or a lack of flatness in the facade assembly.
Check one last time the alignment, level and stability of the PZA + KZ 7016 + LX-LPE SILL + LX-SPP before proceeding with the implementation of the Adam Matériaux.
Implementation guidelines
The entire assembly must be carried out with the accessories provided for the system and in accordance with the technical specifications of the manufacturers , in particular for the PZA threshold , the KZ 7016 end caps , the LX-LPE SILL and LX-SPP corner brackets , the compriband seal and the adhesive product.
Particular attention should be paid to the slope of the threshold, the sealing of the joints, the treatment of the ends and the continuity of the reinforcement system , in order to guarantee a durable result and in accordance with the Adam Matériaux facade and plastering system .
 to level the EPS insulation Adam Matériaux